Introduzione
Say you dropped your phone and the glass is now cracked but the display is still working. You don't need to change the full display ($199), only the front glass ($6-$10).
Cosa ti serve
-
-
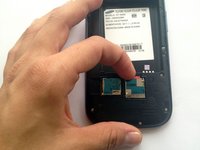
If your phone already has a protective screen applied to it, you are ready to begin.
-
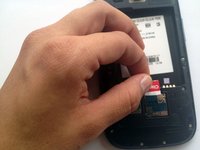
If it doesn't, cut a piece of packaging tape the size of the screen and apply it to the screen. This will help you remove the broken glass later.
-
-
Attrezzo utilizzato in questo passaggio:Heat Gun$24.99
-
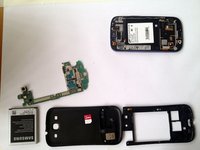
At this point you can already go to the next step, which is using a heat gun. However I felt safer by taking out the motherboard too.
-
If you decide to take out the motherboard follow the Samsung Galaxy S III Motherboard Replacement, it has all the details.
-
-
-
-
Using an infrared thermometer heat the surface to 170-180° F (roughly 70-80° C). This will loosen the glue but not damage the electronics.
-
Hold the gun at about 3 inches from your phone (in this picture it looks like its right on top). With the heat gun set to low, heat up the borders for about 3 to 5 minutes depending on the strength of your heat gun.
-
You must be careful when using the heat gun on this device. If the device is heated up too much then it may melt the digitizer and cause discoloration. If you start to see any discoloration then shut off the gun immediately.
-
If you are working with a hair dryer, it might take up to 1 hour.
-
-
Attrezzo utilizzato in questo passaggio:iFixit Opening Picks (Set of 6)$4.99
-
Using a guitar pick or a plastic opening tool, very carefully start to work separating the edges of the glass.
-
Make sure to go from top to bottom.
-
You will need to use the heat gun a number of times as you go down separating the glass. For glasses with lots of damage you will need to go extra carefully as to not damage the LCD with the shattered glass pieces.
-
-
-
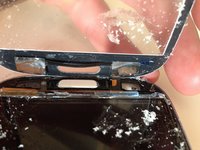
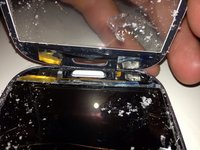
Extra attention is necessary with this step, don't damage the buttons or cable! With a spudger, detach the buttons from the inner side of the glass. This might require a little extra heat. Also, the best strategy is to start in the middle, under the black ribbon that connects the two buttons, and then move sideways to separate each one.
-
*Edit* Thanks to the awesome guy or gal who uploaded the missing pics ^__^
-
-
Attrezzo utilizzato in questo passaggio:Tweezers$4.99
-
Take out the broken glass. I was able to take it all in one piece.
-
If your glass is very shattered you will need to pick up the small pieces with tweezers, one by one or stick tape to the glass before you take it out. You can also use screen protectors.
-


To reassemble your device, follow these instructions in reverse order.
To reassemble your device, follow these instructions in reverse order.
Annulla: non ho completato questa guida.
Altre 271 persone hanno completato questa guida.

103 Commenti
I replace too many Galaxy screens and I'm sure that anyone else that has done this procedure wants to know, is there any way to bond the glass with the LCD to make it look original again?!?
LOCA is the most popular method I see and would love to learn how to use it correctly before ruining any more LCDs, or any way to use the Optical Adhesive film and remove the bubbles correctly without an expensive autoclave from China.
Any help or suggestions are appreciated!!
Yes its in how you apply the glue. A certain pattern to place it is really helpful ill send you a youtube link: http://youtu.be/ca2x94OQa2c There is a better one that makes two Ys opposite each other.
Julio -
Hi there,
I have ventured into replacing Glass and bonding with LOCA. One thing I did learn is that. Don't be cheap with buying LOCA. Find a good supplier that will supply you with LOCA. Also, minor smudges is not your enemies, LOCA actually covers them and becomes clear. The problem is the dust and dirth. If you have a control environment that can do suction of air. You will pretty much have a good job everytime. Also for cleaning LCD use 100% alcohol and 100% Acetone. They go side by side. Acetone removes residues of glue better than alcohol while 100% does a better job in removing streaks or smudges.
Aquiles -
Great guide, your photos are very clear. Well done!
Thank you! =)