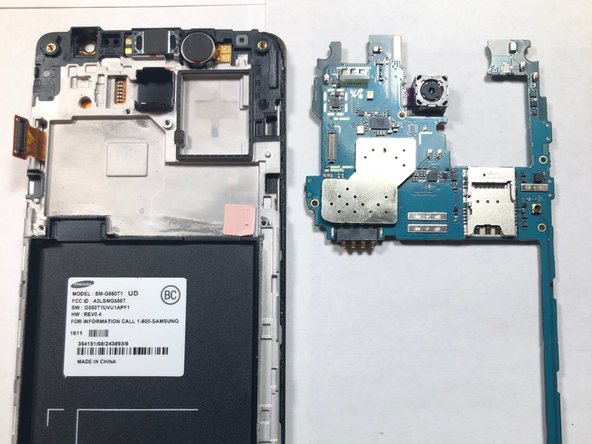
Salta al contenuto principale

Samsung Galaxy On5 Camera Replacement

Cosa ti serve

  1. Samsung Galaxy On5 Camera Replacement, Battery: passo 1, immagine 1 di 1
    • Locate the side notch that allows you to open the back casing.

  2. Samsung Galaxy On5 Camera Replacement: passo 2, immagine 1 di 3 Samsung Galaxy On5 Camera Replacement: passo 2, immagine 2 di 3 Samsung Galaxy On5 Camera Replacement: passo 2, immagine 3 di 3
    • Use a plastic prying tool or your fingernail to pop the back cover off of the phone.

  3. Samsung Galaxy On5 Camera Replacement: passo 3, immagine 1 di 3 Samsung Galaxy On5 Camera Replacement: passo 3, immagine 2 di 3 Samsung Galaxy On5 Camera Replacement: passo 3, immagine 3 di 3
    • Locate the battery notch and remove the battery, using either your finger or a plastic prying tool.

    • Be careful not to puncture the battery. Lithium-ion batteries are highly flammable when exposed to oxygen.

  4. Samsung Galaxy On5 Camera Replacement, Speaker: passo 4, immagine 1 di 2 Samsung Galaxy On5 Camera Replacement, Speaker: passo 4, immagine 2 di 2
    • Before disassembling the phone, take out the SIM card and microSD card.

    • Use a plastic pry tool to slide both of the cards out.

    • Do not use a metal pry tool. Using this could cause damage to the cards and/or card holder.

  5. Samsung Galaxy On5 Camera Replacement: passo 5, immagine 1 di 3 Samsung Galaxy On5 Camera Replacement: passo 5, immagine 2 di 3 Samsung Galaxy On5 Camera Replacement: passo 5, immagine 3 di 3
    • Use the plastic Spudger tool to pry open the LCD ribbon cable cover.

    • This part might be a little hard to open. Take your time and be careful not to push too hard as doing so could result in damage to the ribbon.

  6. Samsung Galaxy On5 Camera Replacement: passo 6, immagine 1 di 3 Samsung Galaxy On5 Camera Replacement: passo 6, immagine 2 di 3 Samsung Galaxy On5 Camera Replacement: passo 6, immagine 3 di 3
    • Using a plastic pry tool, carefully pry the LCD ribbon cable from the logic board.

    • Do not use a metal pry tool. Metal pry tools can cause damage to the logic board and to the ribbon cable.

    • This LCD ribbon cable sends signal from the logic board to the LCD screen.

  7. Samsung Galaxy On5 Camera Replacement: passo 7, immagine 1 di 2 Samsung Galaxy On5 Camera Replacement: passo 7, immagine 2 di 2
    • Take a Phillips #00 head and remove all 9 screws. Once done place them aside where you won't lose them.

    • All 9 screws are the same size.

  8. Samsung Galaxy On5 Camera Replacement: passo 8, immagine 1 di 2 Samsung Galaxy On5 Camera Replacement: passo 8, immagine 2 di 2
    • Use an iFixit plastic pick to pry away the LCD from the back assembly.

    • This process will take some time due to the glue that's holding the LCD and back assembly together. Slowly move around the edge of the screen to loosen the glue up.

    • If you have a heat gun, you can use it to heat up the glue. Heating up the glue makes it easier to separate the LCD and back assembly.

  9. Samsung Galaxy On5 Camera Replacement: passo 9, immagine 1 di 3 Samsung Galaxy On5 Camera Replacement: passo 9, immagine 2 di 3 Samsung Galaxy On5 Camera Replacement: passo 9, immagine 3 di 3
    • Once both the LCD and back assembly come apart, look at the back assembly where the speaker is located.

    • Once located, take the plastic pry tool to remove the speaker from its housing and replace it with a new one.

  10. Samsung Galaxy On5 Camera Replacement, Front-Facing Camera: passo 10, immagine 1 di 2 Samsung Galaxy On5 Camera Replacement, Front-Facing Camera: passo 10, immagine 2 di 2
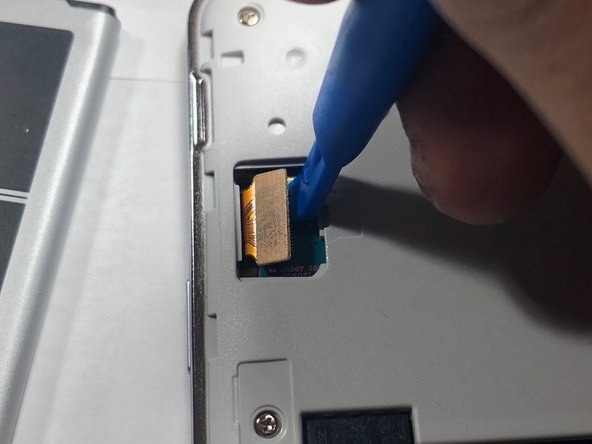
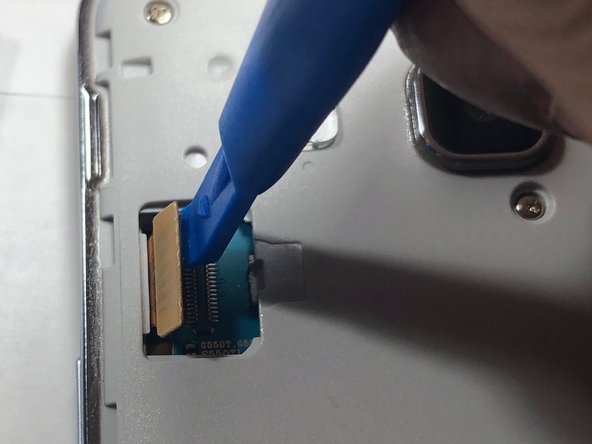
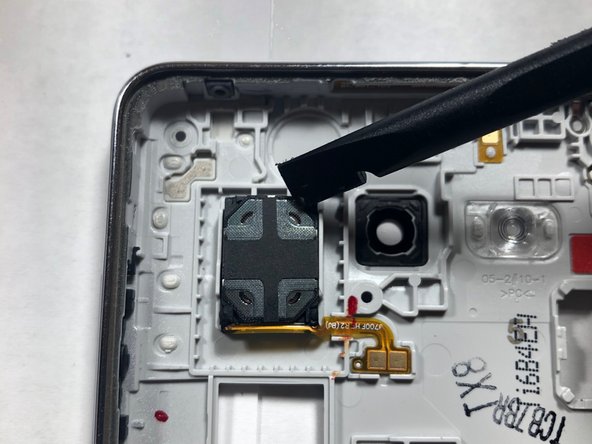
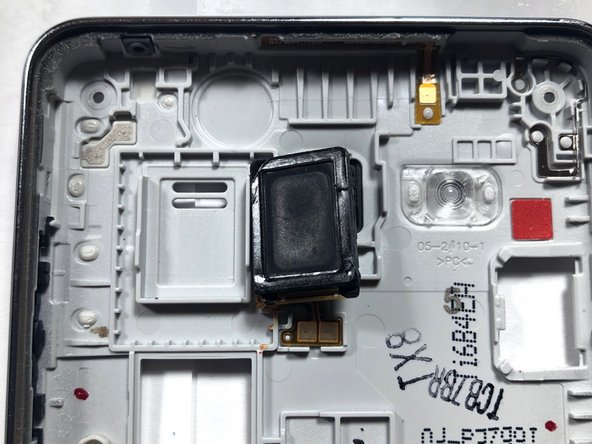
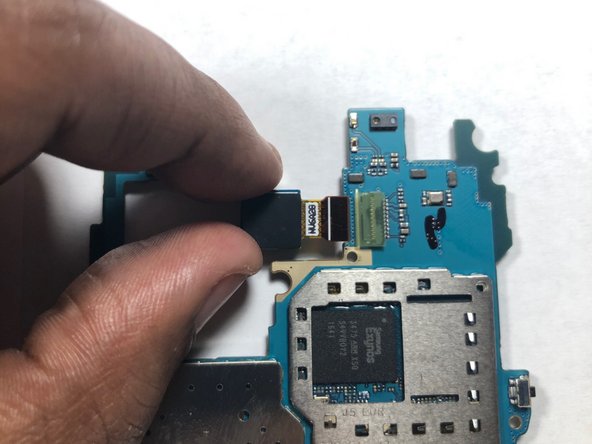
    • Use a plastic pry tool to lift the front-facing camera from its housing.

    • Always use plastic pry tool over metal tools when working on delicate electronic devices.

  11. Samsung Galaxy On5 Camera Replacement: passo 11, immagine 1 di 1
    • Once the camera is out of the housing, disconnect the camera from the logic board.

  12. Samsung Galaxy On5 Camera Replacement: passo 12, immagine 1 di 1
    • You have now sucessfully removed the front-facing camera.

  13. Samsung Galaxy On5 Camera Replacement, Rear-Facing Camera: passo 13, immagine 1 di 1
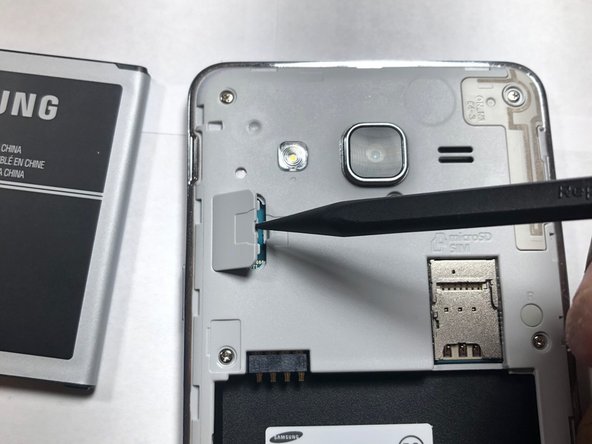
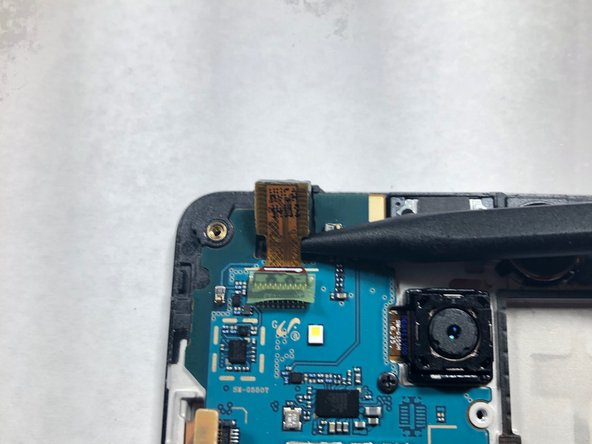
    • Using a Phillips #00 screwdriver, remove the screw securing the rear-facing camera.

    • When using a metal tool always be aware of where you're placing the bit. Damage to the motherboard can be irreparable with normal tools.

  14. Samsung Galaxy On5 Camera Replacement: passo 14, immagine 1 di 3 Samsung Galaxy On5 Camera Replacement: passo 14, immagine 2 di 3 Samsung Galaxy On5 Camera Replacement: passo 14, immagine 3 di 3
    • Use a plastic pry tool to disconnect the headphone ribbon from the motherboard.

    • Remove the motherboard from the LCD housing by lifting up from the ends of the logic board.

  15. Samsung Galaxy On5 Camera Replacement: passo 15, immagine 1 di 3 Samsung Galaxy On5 Camera Replacement: passo 15, immagine 2 di 3 Samsung Galaxy On5 Camera Replacement: passo 15, immagine 3 di 3
    • Flip the logic board so the camera lens is facing down rather than at you.

    • Use your finger to remove the camera from its connection on the logic board.

Conclusione

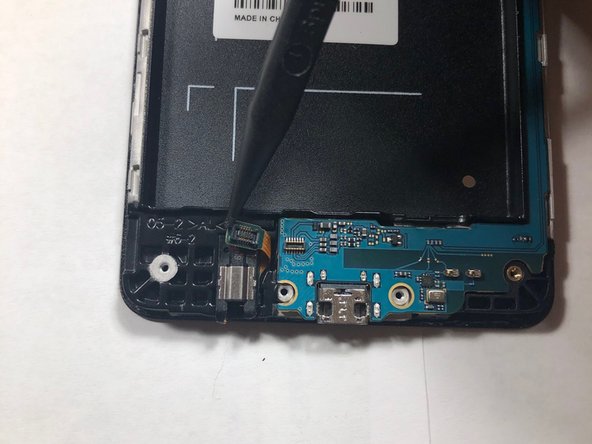
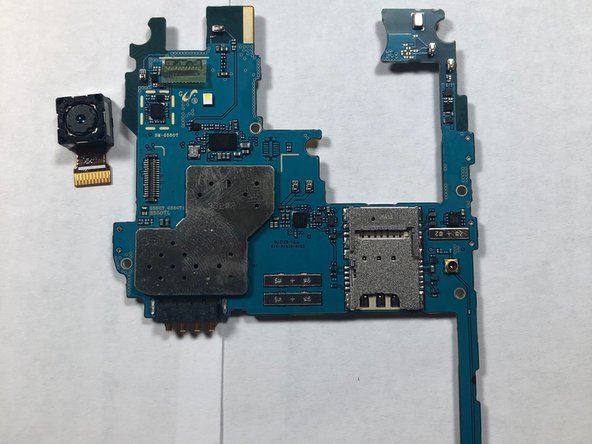
That's it, now you've removed both the front and rear facing cameras on your device! To reassemble your device, follow these instructions in reverse order.

Un'altra persona ha completato questa guida.

Team

Gateway, Team S1-G5, Luster Fall 2018 Membro di Gateway, Team S1-G5, Luster Fall 2018

GCC-LUSTER-F18S1G5

1 Membro

5 Guide realizzate

0 Commenti

Aggiungi Commento

Visualizza Statistiche:

Ultime 24 Ore: 0

Ultimi 7 Giorni: 0

Ultimi 30 Giorni: 4

Tutti i Tempi: 1,021