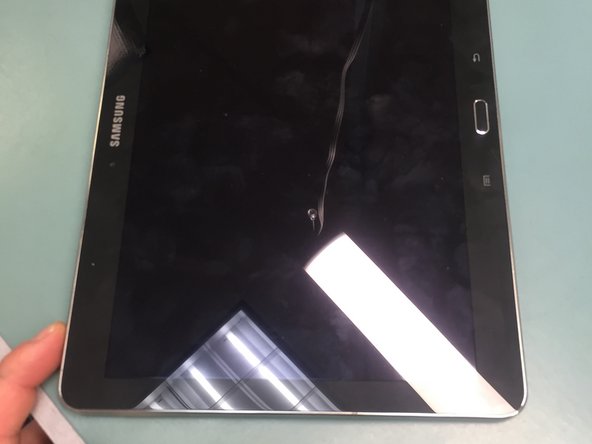
Salta al contenuto principale

Samsung Galaxy Note SM-P600 Battery Replacement

Guida Archiviata
Questa guida รจ mantenuta solo per scopi storici. Usa la versione aggiornata della guida per eseguire la riparazione.

Cosa ti serve

  1. Samsung Galaxy Note SM-P600 Battery Replacement, Begin repair: passo 1, immagine 1 di 1
    • To start, power down your device

  2. Samsung Galaxy Note SM-P600 Battery Replacement, Removing the plastic back: passo 2, immagine 1 di 2 Samsung Galaxy Note SM-P600 Battery Replacement, Removing the plastic back: passo 2, immagine 2 di 2
    • Carefully insert either a plastic pry tool or an iSesamo around the edges to pop the plastic clips free, allowing the seperation of the rear cover. You may need to go around all four edges a few times till you feel it begin to lift. Again, this step must be completed very carefully to avoid damaging the display or the buttons located on the sides.

  3. Samsung Galaxy Note SM-P600 Battery Replacement, Removing ribbon cables covering battery: passo 3, immagine 1 di 3 Samsung Galaxy Note SM-P600 Battery Replacement, Removing ribbon cables covering battery: passo 3, immagine 2 di 3 Samsung Galaxy Note SM-P600 Battery Replacement, Removing ribbon cables covering battery: passo 3, immagine 3 di 3
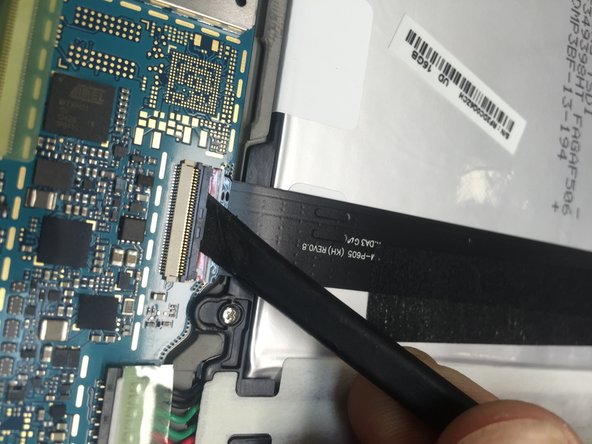
    • Using no plastic spudger, push the zif connector on each ribbon cable to release them. Then use the plastic spudger to slide under the cable with the black adhesive tape to remove it. Use a pair of tweezers to remove the silver tape on the top of the other cable.

  4. Samsung Galaxy Note SM-P600 Battery Replacement, Disconnecting the battery: passo 4, immagine 1 di 3 Samsung Galaxy Note SM-P600 Battery Replacement, Disconnecting the battery: passo 4, immagine 2 di 3 Samsung Galaxy Note SM-P600 Battery Replacement, Disconnecting the battery: passo 4, immagine 3 di 3
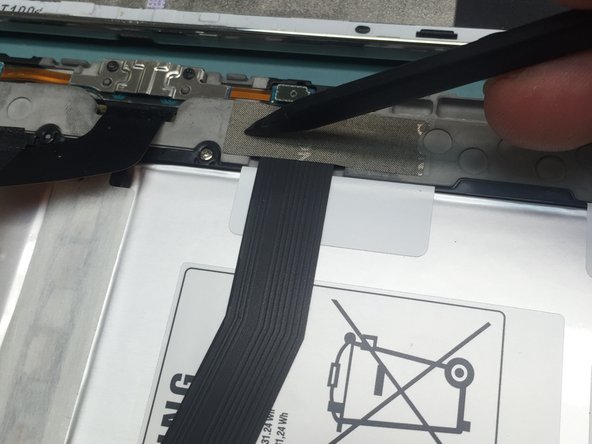
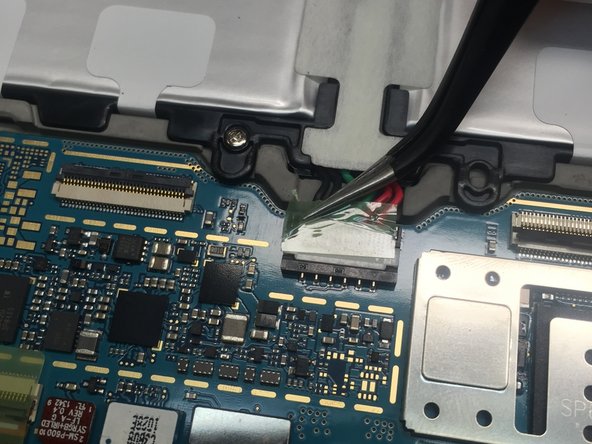
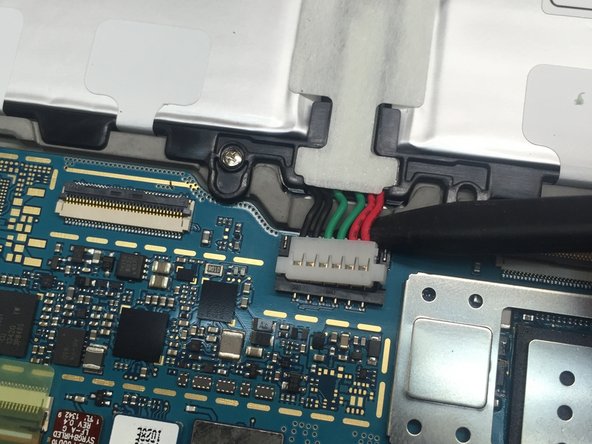
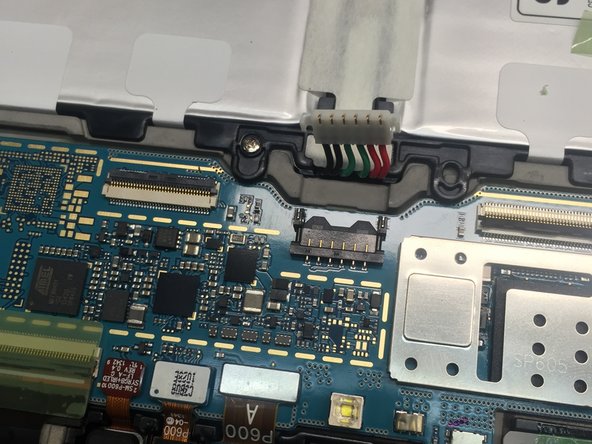
    • Remove the kapton tape located on the connector of the battery. Use the spudger to release the battery connector. Do this carefully as it is a tight connection. Then remove the 6 screws located along the sides, they are the same length and thread so their return spots are not an issue. Lift out the battery and the reverse steps to reinstall.

Conclusione

To reassemble your device, follow these instructions in reverse order.

Altre 9 persone hanno completato questa guida.

dwales

Membro da: 07/05/16

611 Reputazione

1 Guida realizzata

2 Commenti

dewales -- Thank you for an outstanding tutorial. You helped me to revive my beloved Note 10.1 ed. 2014.

Preston - Replica

Thanks! This worked!

Vera - Replica

Aggiungi Commento

Visualizza Statistiche:

Ultime 24 Ore: 0

Ultimi 7 Giorni: 0

Ultimi 30 Giorni: 1

Tutti i Tempi: 5,397