Questa versione può contenere modifiche errate. Passa all'ultima istantanea verificata.
Cosa ti serve
-
-
Inserisci un'unghia o uno strumenti di apertura di plastica all'interno dell'incavo posto alla sinistra della fotocamera posteriore.
-
Fai leva delicatamente e, piegando leggermente, stacca la cover posteriore flessibile.
-
-
Questo passaggio è privo di traduzione. Aiuta a tradurlo
-
Insert a fingernail or plastic opening tool into the recess in the bottom right corner of the battery and lift upward.
-
Remove the battery.
-
-
Questo passaggio è privo di traduzione. Aiuta a tradurlo
-
Remove the SIM card by first pushing the card slightly out of its housing, then pulling it the rest of the way.
-
-
-
Questo passaggio è privo di traduzione. Aiuta a tradurlo
-
Remove the sixteen 4.0 mm Phillips #00 screws securing the midframe to the display assembly.
-
Grasp the cap of the S Pen and remove it from its slot in the midframe.
-
-
Questo passaggio è privo di traduzione. Aiuta a tradurlo
-
Insert a plastic opening tool between the midframe and the display assembly.
-
Work the plastic opening tool around the perimeter of the phone to break the adhesive.
-
-
Questo passaggio è privo di traduzione. Aiuta a tradurlo
-
Use a plastic opening tool to loosen the clasps around the battery housing.
-
-
Questo passaggio è privo di traduzione. Aiuta a tradurlo
-
Push on the battery housing to separate the midframe from the display assembly.
-
-
Questo passaggio è privo di traduzione. Aiuta a tradurlo
-
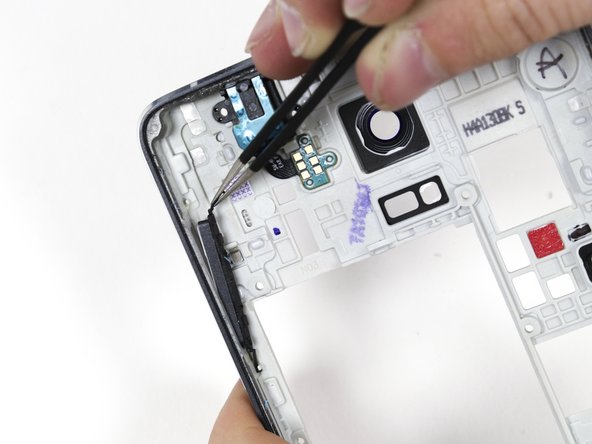
Use a set of tweezers to free the volume buttons from the midframe.
-
Annulla: non ho completato questa guida.
Altre 18 persone hanno completato questa guida.
2 Commenti
I remember wwwdrcelluar.com its gone,. Apple must have shut them down in law suit. How the !&&* do I do now?
I remember Drcellular*com that was the place where I buy my parts from. there are gone Apple must have shut down another 3rd party repair on law suits now how the H E L L do I do now?


