Cosa ti serve
-
Questo passaggio è privo di traduzione. Aiuta a tradurlo
-
Remove the back cover. It comes off easily.
-
-
Questo passaggio è privo di traduzione. Aiuta a tradurlo
-
Remove battery, SIM card.
-
Don't forget the S Pen.
-
-
Questo passaggio è privo di traduzione. Aiuta a tradurlo
-
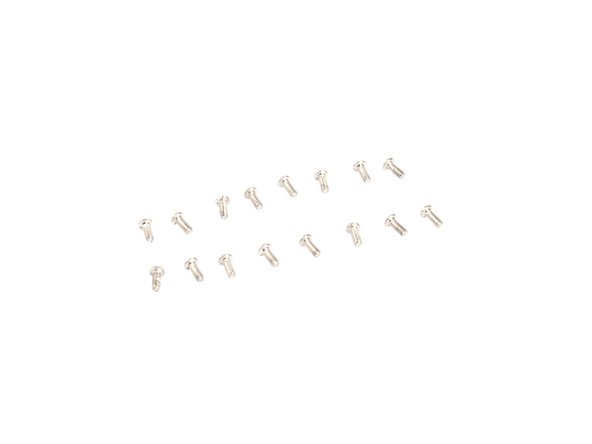
Remove the 16 screws all together on the middle housing. That is a lot of screws.
-
-
Questo passaggio è privo di traduzione. Aiuta a tradurlo
-
Cut the adhesive sticker between the screen and the middle housing. It will be easier if you apply low heat degree less than 85℃. Be careful to avoid breaking touch panel.
-
Carefully flip the housing over and loosen the hidden tabs around the battery slot.
-
Loosen the middle housing and then push the front assembly--this may take a little extra effort.
-
-
Questo passaggio è privo di traduzione. Aiuta a tradurlo
-
Separate front assembly from middle housing successfully.
-
The whole front assembly comes with motherboard, USB board, cameras, LCD screen and some other small components.
-
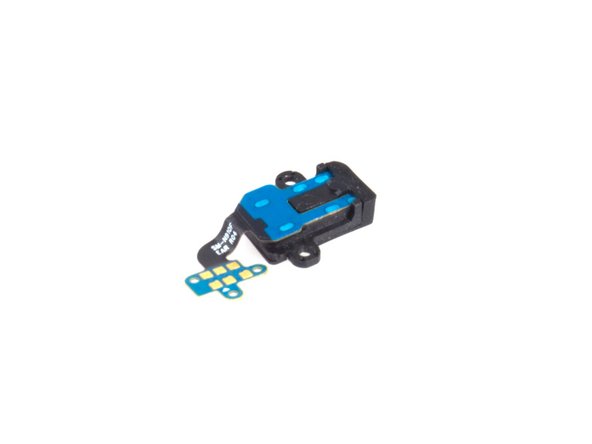
The back housing comes with power & volume button, headphone jack and loudspeaker. And except loudspeaker, other parts are easy to remove.
-
-
Questo passaggio è privo di traduzione. Aiuta a tradurlo
-
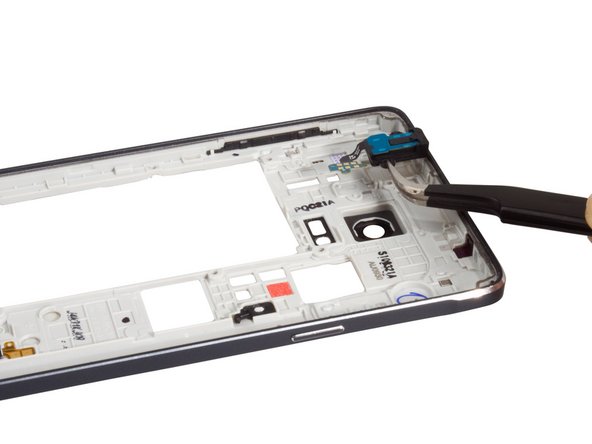
Get the flex free from the adhesive underneath and remove headphone jack naturally.
-
-
Questo passaggio è privo di traduzione. Aiuta a tradurlo
-
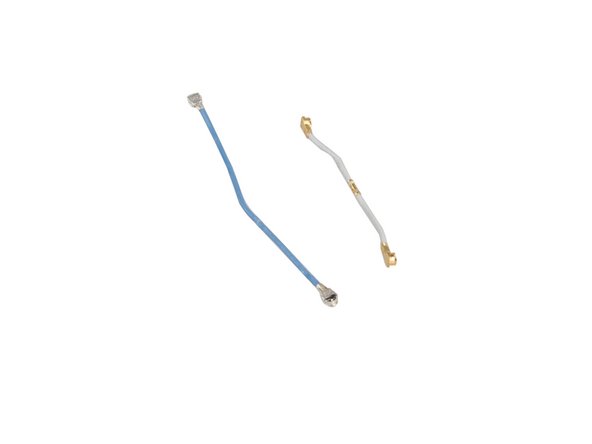
Unlike the Galaxy S5, the Note 4 power and volume buttons are easy to remove.
-
-
-
Questo passaggio è privo di traduzione. Aiuta a tradurlo
-
Cut the adhesive between LCD screen and mid plate carefully. Especially care about the position of the flex very much.
-
The adhesive is in the red scale, it's strong and we had damaged the foil film on the back of the screen when cut the adhesive. Heat with a low degree will make easier.
-
Release the connectors from motherboard. The right one is S Pen sensor film connector and the left one is LCD screen connector.
-
You also can see the soft keys on the bottom side. So be careful when cut the adhesive, don't hurt that part.
-
At last, remove LCD screen assembly carefully.
-
-
Questo passaggio è privo di traduzione. Aiuta a tradurlo
-
Release navigation button flex connector ,get it free from the adhesive on the mid-plate and remove it.
-
-
Questo passaggio è privo di traduzione. Aiuta a tradurlo
-
Remove 2 pcs of signal flexes. And maybe different versions Galaxy Note 4 comes with different numbers of signal flexes. Possibly one or two.
-
-
Questo passaggio è privo di traduzione. Aiuta a tradurlo
-
Twist off two screws securing motherboard and USB board at first.
-
Don't forget to release the earpiece speaker connector.
-
-
Questo passaggio è privo di traduzione. Aiuta a tradurlo
-
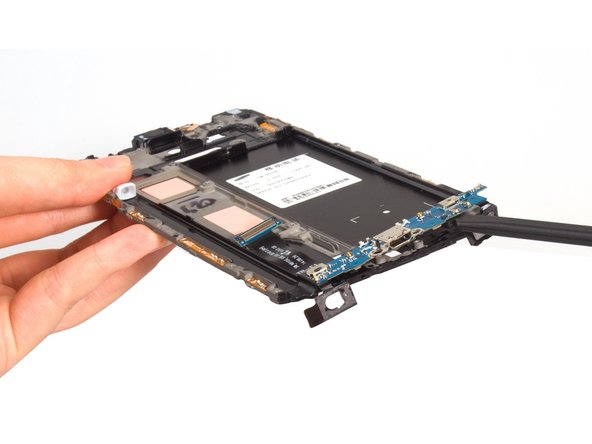
Pry up the motherboard.
-
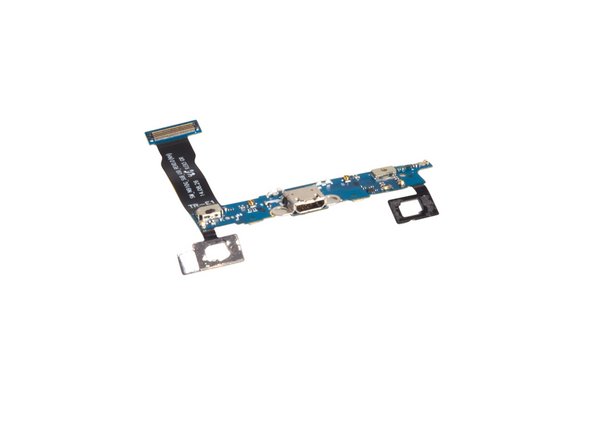
Release USB charging board from motherboard.
-
Finally, remove Galaxy Note 4 motherboard.
-
-
Questo passaggio è privo di traduzione. Aiuta a tradurlo
-
By the way, remove rear camera from motherboard. Release the connector and can take the camera away easily.
-
-
Questo passaggio è privo di traduzione. Aiuta a tradurlo
-
Now, it's the turn of front camera assembly.
-
Release the connector at first, and then get free the two clasps, at last remove the front camera with sensors together.
-
-
Questo passaggio è privo di traduzione. Aiuta a tradurlo
-
Get recent apps button and back button free from the adhesive on the mid plate.
-
Pry up the USB charging board and remove it.
-
-
Questo passaggio è privo di traduzione. Aiuta a tradurlo
-
Vibrator comes with power button flex together.
-


26 Commenti
horrible.
what happened Samsung? Why suddenly screw with repairers?
Samsung has gone from the most repairable telephones to one of the worst.
I'd also like to note @ Step 8. Be VERY careful of the menu respectively the return key flexes located at the bottom of the screen while seperating the LCD from the chassi. They tend to "follow with" the sceren and break.
If they do break you'll have to replace the entire charging contact in order to restore them to full function.
Thnx For The Important Tip
Can you fit interior of note 3 inside chasis of note 4
ever make any progress with getting that note 3 to fit in the note 4 chassis?