Salta al contenuto principale

Samsung Galaxy Fame S6812i Vibration Unit Replacement

Cosa ti serve

  1. Samsung Galaxy Fame S6812i Vibration Unit Replacement, Remove the Backplate: passo 1, immagine 1 di 2 Samsung Galaxy Fame S6812i Vibration Unit Replacement, Remove the Backplate: passo 1, immagine 2 di 2
    • Locate the small indent in the top of the device and use your nails or a spudger to separate the backplate from the mid-frame.

  2. Samsung Galaxy Fame S6812i Vibration Unit Replacement, Remove the Battery: passo 2, immagine 1 di 2 Samsung Galaxy Fame S6812i Vibration Unit Replacement, Remove the Battery: passo 2, immagine 2 di 2
    • Locate the indent on the bottom left corner of the battery compartment. Use your fingers or the plastic opening tool to lift the battery from the device.

  3. Samsung Galaxy Fame S6812i Vibration Unit Replacement, Remove the Mid-Frame: passo 3, immagine 1 di 3 Samsung Galaxy Fame S6812i Vibration Unit Replacement, Remove the Mid-Frame: passo 3, immagine 2 di 3 Samsung Galaxy Fame S6812i Vibration Unit Replacement, Remove the Mid-Frame: passo 3, immagine 3 di 3
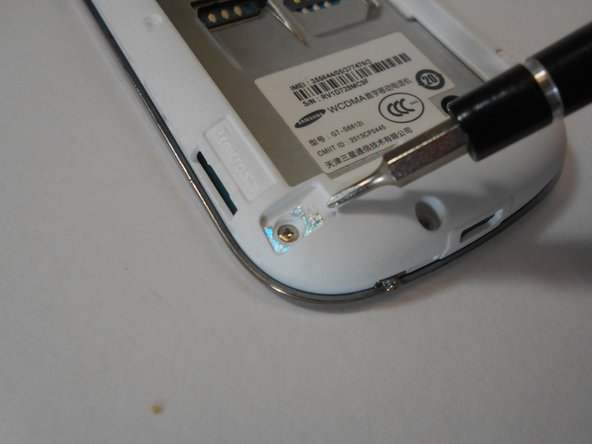
    • Remove the five 3mm screws along the top and bottom edges of the device with the Philips #00 screwdriver.

    • One of these will be hidden under a piece of reflective foil. Breaking this will void the warranty.

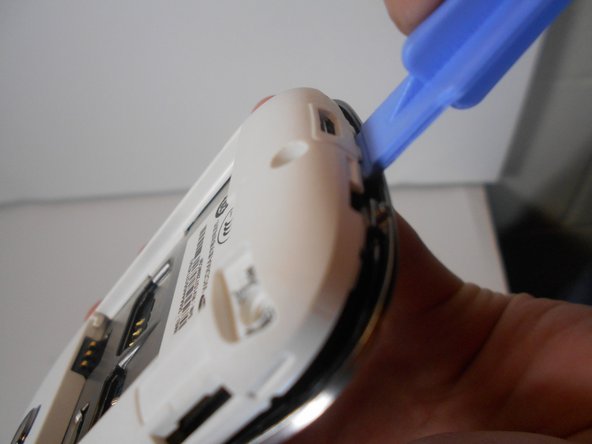
    • Use the plastic removal tool to work pry the mid-frame from the device.

    • This may take some effort, so try working around the edges slowly as to not break anything.

  4. Samsung Galaxy Fame S6812i Vibration Unit Replacement, Remove Damaged Vibration Unit: passo 4, immagine 1 di 2 Samsung Galaxy Fame S6812i Vibration Unit Replacement, Remove Damaged Vibration Unit: passo 4, immagine 2 di 2
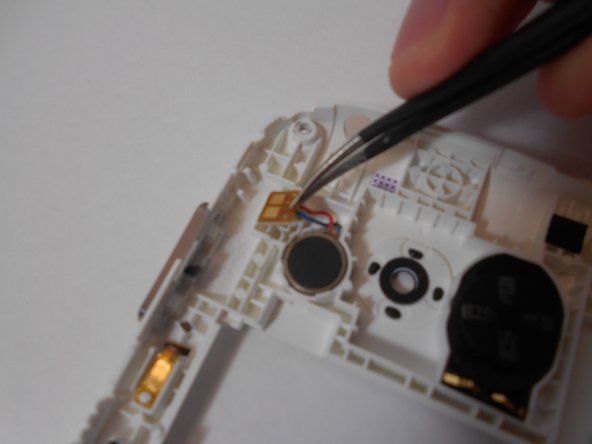
    • The vibration unit can be found on the internal side of the mid-frame, in the upper left corner.

    • Using the tweezers, remove the small plastic slip to the left of the unit. The optimal place to grab this is on the small flap on the slip's right.

    • Place the head of the tweezers in the small crevice on the bottom left of the device's housing and push up from under it. This will pop out the vibration unit.

    • These parts are held in via a weak adhesive; some amount of force may be required.

Conclusione

To reassemble your device, follow these instructions in reverse order.

Un'altra persona ha completato questa guida.

Taylor

Membro da: 01/30/15

1.165 Reputazione

5 Guide realizzate

Team

USF Tampa, Team 16-6, Watkins Winter 2015 Membro di USF Tampa, Team 16-6, Watkins Winter 2015

USFT-WATKINS-W15S16G6

2 Membri

5 Guide realizzate

0 Commenti

Aggiungi Commento

Visualizza Statistiche:

Ultime 24 Ore: 0

Ultimi 7 Giorni: 0

Ultimi 30 Giorni: 1

Tutti i Tempi: 302