Salta al contenuto principale

Samsung Galaxy A71 Charging Board Replacement

Cosa ti serve

Panoramica Video

Samsung A71 Charging Port Replacement

  1. Samsung Galaxy A71 Charging Board Replacement, Charging port: passo 1, immagine 1 di 3 Samsung Galaxy A71 Charging Board Replacement, Charging port: passo 1, immagine 2 di 3 Samsung Galaxy A71 Charging Board Replacement, Charging port: passo 1, immagine 3 di 3
    • A look at the new charging board.

  2. Samsung Galaxy A71 Charging Board Replacement, Back cover / Battery cover removal: passo 2, immagine 1 di 3 Samsung Galaxy A71 Charging Board Replacement, Back cover / Battery cover removal: passo 2, immagine 2 di 3 Samsung Galaxy A71 Charging Board Replacement, Back cover / Battery cover removal: passo 2, immagine 3 di 3
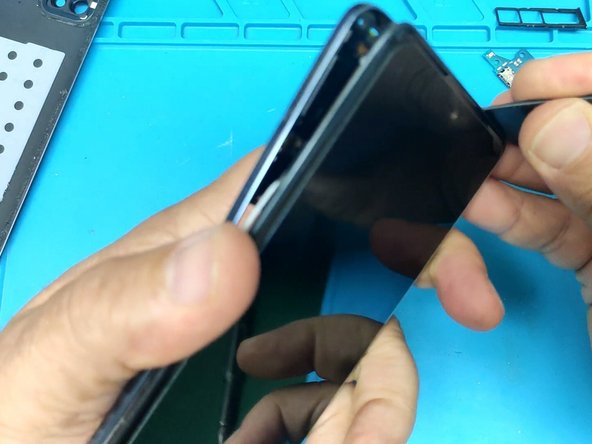
    • Now we are going to separate the back cover. First, warm up the device to soften the adhesive, then use a plastic spudger to open up the rest of the device.

    • Take care when removing the back case as too not damage anything.

  3. Samsung Galaxy A71 Charging Board Replacement, Phillips screws and SIM Tray: passo 3, immagine 1 di 2 Samsung Galaxy A71 Charging Board Replacement, Phillips screws and SIM Tray: passo 3, immagine 2 di 2
    • Remove all Phillips screws and the SIM Tray.

    I've had issues with my SIM tray on this phone and found I need to insert the ejection tool at slight angle to find the trigger point.

    Callum - Replica

  4. Samsung Galaxy A71 Charging Board Replacement, Middle frame removal: passo 4, immagine 1 di 3 Samsung Galaxy A71 Charging Board Replacement, Middle frame removal: passo 4, immagine 2 di 3 Samsung Galaxy A71 Charging Board Replacement, Middle frame removal: passo 4, immagine 3 di 3
    • Use your spudger once again to separate the middle frame. Be careful to take your time here as well so you don't damage anything.

    Tip to separate middle frame: Start at the sim tray area - the plastic clips are weakest there and it's easier to get a plastic tool in.

    Callum - Replica

  5. Samsung Galaxy A71 Charging Board Replacement, Battery, Main flex cable, etc.: passo 5, immagine 1 di 3 Samsung Galaxy A71 Charging Board Replacement, Battery, Main flex cable, etc.: passo 5, immagine 2 di 3 Samsung Galaxy A71 Charging Board Replacement, Battery, Main flex cable, etc.: passo 5, immagine 3 di 3
    • Disconnect the battery. Make sure not to puncture it.

    • One by one disconnect:

    • Display flex cable.

    • Coaxial antenna connector.

    • Fingerprint Sensor.

    • Main flex cable.

    • Remove the two Phillips screws securing the Fingerprint sensor.

  6. Samsung Galaxy A71 Charging Board Replacement, Installing the new charging board.: passo 6, immagine 1 di 2 Samsung Galaxy A71 Charging Board Replacement, Installing the new charging board.: passo 6, immagine 2 di 2
    • Carefully pry out the old charging board, and put in the new one.

    There is a little glue on the bottom of the old charging board. It may take a little extra pressure to pop it out of place. My new board came with glue installed and a removable plastic strip.

    Callum - Replica

Conclusione

To reassemble your device, follow these instructions in reverse order.

Altre 10 persone hanno completato questa guida.

ZFix

Membro da: 12/09/13

191.278 Reputazione

330 Guide realizzate

Team

Master Techs Membro di Master Techs

Community

322 Membri

2.528 Guide realizzate

5 Commenti

Great guide! I recommend removing the Fingerprint Sensor as a whole. It will make it easier to remove the board, as the charging board has some adhesive, so you will need to pull a bit harder.

When screwing the sensor back, make sure to not tighten each screw all the way at first, but instead alternate between tightening one screw and the other. This will make sure that the sensor is properly aligned! This fixed the issue I was facing with reading some fingerprints after I had my screen replaced by a third party repair shop a couple of months ago. Two birds with one stone!

Festest - Replica

This guide will help you to replace the charging board - definitely not too difficult. I replaced my board after my A71 stopped charging when I inserted the USB C cable. First it wouldn't fast charge and then wouldn't charge at all.

Callum - Replica

Thanks man, got it done in roughly half an hour! My phone would charge but not transfer data and this seems to have fixed it.

Majik - Replica

The guide was very excellent, however after putting the components all in place and booting back into the OS, the finger print reader refused to work anymore (both the original and a replacement one) and as far as i could tell there was no damage to where the reader connects. However, a more important issue is that with the replacement board my phone refused to recognize having the sim card inserted. If there is any software nonsense I have to go through it would be appreciated to have a pointer but at the end I had to fix the USB C port on the original board and reinstall it.

Samuel - Replica

My sims no service after they made my old charger port. Is there any help please?

StaphaySalone - Replica

Aggiungi Commento

Visualizza Statistiche:

Ultime 24 Ore: 9

Ultimi 7 Giorni: 100

Ultimi 30 Giorni: 520

Tutti i Tempi: 15,465