Salta al contenuto principale

Samsung Galaxy A50 Display Assembly with Frame Replacement

Cosa ti serve

Panoramica Video

  1. Samsung Galaxy A50 Display Assembly with Frame Replacement, LCD Display Assembly replacement: passo 1, immagine 1 di 3 Samsung Galaxy A50 Display Assembly with Frame Replacement, LCD Display Assembly replacement: passo 1, immagine 2 di 3 Samsung Galaxy A50 Display Assembly with Frame Replacement, LCD Display Assembly replacement: passo 1, immagine 3 di 3
    • Display Touch Screen Digitizer Assembly with Frame for Samsung Galaxy A50

  2. Samsung Galaxy A50 Display Assembly with Frame Replacement, Battery cover removal: passo 2, immagine 1 di 3 Samsung Galaxy A50 Display Assembly with Frame Replacement, Battery cover removal: passo 2, immagine 2 di 3 Samsung Galaxy A50 Display Assembly with Frame Replacement, Battery cover removal: passo 2, immagine 3 di 3
    • Heat up the back cover to loosen the adhesive.

    • To separate the back cover use a Suction Cup and plastic tools.

  3. Samsung Galaxy A50 Display Assembly with Frame Replacement, Middle frame removal: passo 3, immagine 1 di 3 Samsung Galaxy A50 Display Assembly with Frame Replacement, Middle frame removal: passo 3, immagine 2 di 3 Samsung Galaxy A50 Display Assembly with Frame Replacement, Middle frame removal: passo 3, immagine 3 di 3
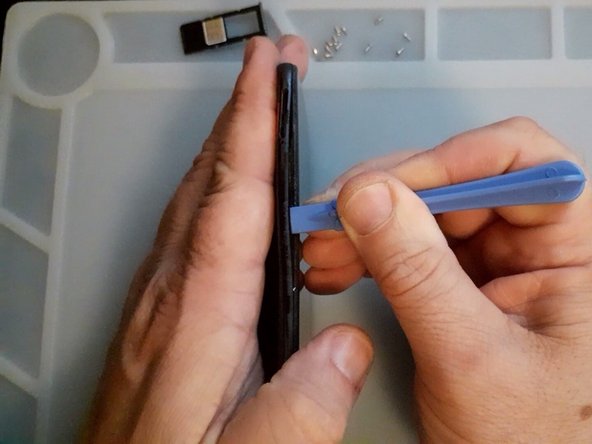
    • Remove the SIM tray.

    • Remove the Philips Screws.

    • Again use plastic tools to separate the middle frame.

  4. Samsung Galaxy A50 Display Assembly with Frame Replacement, Test the new spare part: passo 4, immagine 1 di 3 Samsung Galaxy A50 Display Assembly with Frame Replacement, Test the new spare part: passo 4, immagine 2 di 3 Samsung Galaxy A50 Display Assembly with Frame Replacement, Test the new spare part: passo 4, immagine 3 di 3
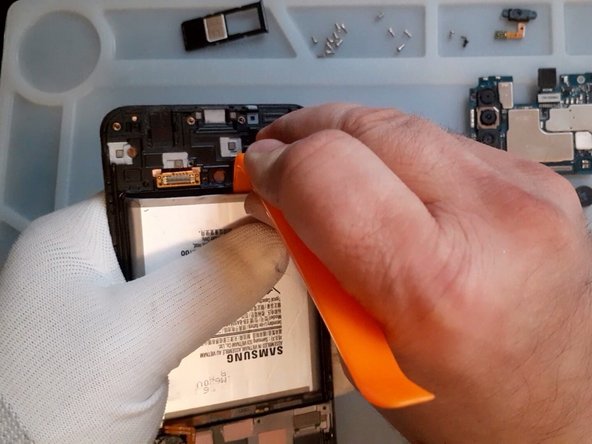
    • First disconnect the Battery.

    • Test the new spare part before the installation.

  5. Samsung Galaxy A50 Display Assembly with Frame Replacement, Logic board removal: passo 5, immagine 1 di 3 Samsung Galaxy A50 Display Assembly with Frame Replacement, Logic board removal: passo 5, immagine 2 di 3 Samsung Galaxy A50 Display Assembly with Frame Replacement, Logic board removal: passo 5, immagine 3 di 3
    • Disconnect and remove the Main Flex Cable.

    • Remove the black Philips screw, it's shorter then the middle frame screws.

    • Disconnect the coaxial antenna cable.

    • Now you can remove the logic board.

  6. Samsung Galaxy A50 Display Assembly with Frame Replacement, Sub board removal: passo 6, immagine 1 di 3 Samsung Galaxy A50 Display Assembly with Frame Replacement, Sub board removal: passo 6, immagine 2 di 3 Samsung Galaxy A50 Display Assembly with Frame Replacement, Sub board removal: passo 6, immagine 3 di 3
    • First remove the Fingerprint sensor.

    • The screws for the Fingerprint are shorter.

    • It's better to use hot air before to disassemble the sub-board.

    • Reminder - only plastic tools :)

  7. Samsung Galaxy A50 Display Assembly with Frame Replacement, Battery removal: passo 7, immagine 1 di 3 Samsung Galaxy A50 Display Assembly with Frame Replacement, Battery removal: passo 7, immagine 2 di 3 Samsung Galaxy A50 Display Assembly with Frame Replacement, Battery removal: passo 7, immagine 3 di 3
    • Again, hot air, plastic tools and very slowly remove the battery.

  8. Samsung Galaxy A50 Display Assembly with Frame Replacement: passo 8, immagine 1 di 1
    • All's Well That Ends Well

Conclusione

To reassemble your device, follow these instructions in reverse order.

Altre 4 persone hanno completato questa guida.

ZFix

Membro da: 12/09/13

191.278 Reputazione

330 Guide realizzate

Team

Master Techs Membro di Master Techs

Community

322 Membri

2.531 Guide realizzate

Un commento

The frame I bought doesn't have the place for earspeaker surrounded by little "walls", so it's very loose and doesn't have contact with the board. Anyone experienced this?

knezi - Replica

Aggiungi Commento

Visualizza Statistiche:

Ultime 24 Ore: 9

Ultimi 7 Giorni: 64

Ultimi 30 Giorni: 306

Tutti i Tempi: 13,434