Salta al contenuto principale

Samsung Galaxy A5 (2017) Motherboard Cover including NFC Antenna and Loudspeaker Replacement

Solo Prerequisita
Questa guida è destinata a essere usata solo come prerequisito per altre guide. Da sola è incompleta.

Cosa ti serve

  1. Samsung Galaxy A5 (2017) Motherboard Cover including NFC Antenna and Loudspeaker Replacement, Back Cover Removal: passo 1, immagine 1 di 1
    • Power off your phone before beginning disassembly.

    • Use an iOpener to loosen the adhesive beneath the back cover. Apply the iOpener for at least two minutes. You might want to repeat this step several times during the back cover removal.

    • The adhesive of the Samsung Galaxy A5 (2017) is very strong. A hair dryer, heat gun, or hot plate may also be used if you aren't able to open the device with the iOpener. Be careful not to overheat the phone—the AMOLED display and internal battery are both susceptible to heat damage.

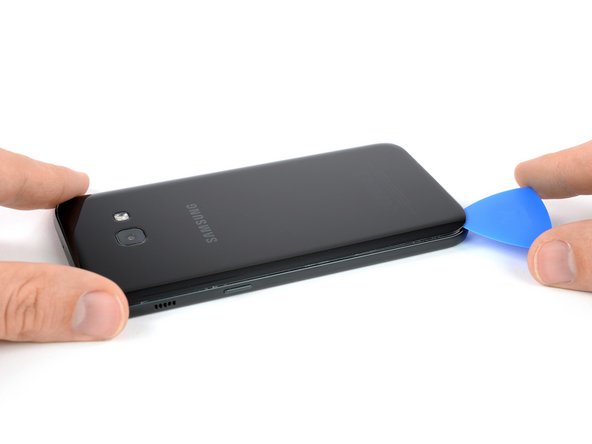
  2. Samsung Galaxy A5 (2017) Motherboard Cover including NFC Antenna and Loudspeaker Replacement: passo 2, immagine 1 di 3 Samsung Galaxy A5 (2017) Motherboard Cover including NFC Antenna and Loudspeaker Replacement: passo 2, immagine 2 di 3 Samsung Galaxy A5 (2017) Motherboard Cover including NFC Antenna and Loudspeaker Replacement: passo 2, immagine 3 di 3
    • Insert an opening pick at the bottom end of your phone.

    • If you can't manage to insert the opening pick between the back cover and the frame, you can use a suction handle to create a small gap.

    • Start to slide the tip of the opening pick to the bottom left corner and cut the adhesive with it.

    • Leave the opening pick in the bottom left corner to prevent the adhesive from resealing. Insert a new opening pick and start to cut the adhesive on the left side of the phone.

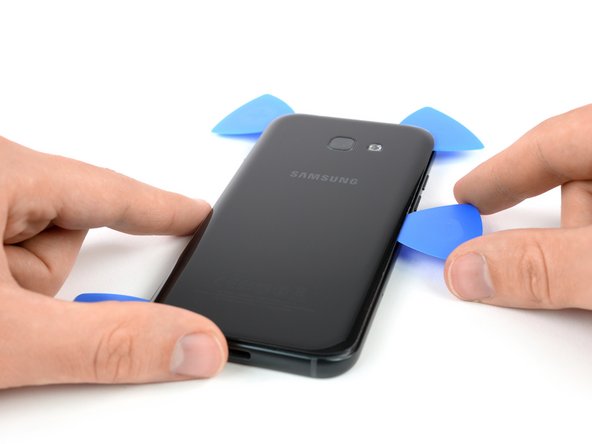
  3. Samsung Galaxy A5 (2017) Motherboard Cover including NFC Antenna and Loudspeaker Replacement: passo 3, immagine 1 di 3 Samsung Galaxy A5 (2017) Motherboard Cover including NFC Antenna and Loudspeaker Replacement: passo 3, immagine 2 di 3 Samsung Galaxy A5 (2017) Motherboard Cover including NFC Antenna and Loudspeaker Replacement: passo 3, immagine 3 di 3
    • Use an opening pick to cut the adhesive on all sides of the phone. Leave one opening pick in every corner to prevent the adhesive from resealing.

    • Reuse an iOpener if the adhesive becomes hard to cut. During the removal process the back cover is under tension all the time and is likely to break if the adhesive isn't loose enough.

    • Insert an opening pick on the right side of the phone after you cut the adhesive on all sides. Flip it sideways until you can get a good grip on the back cover.

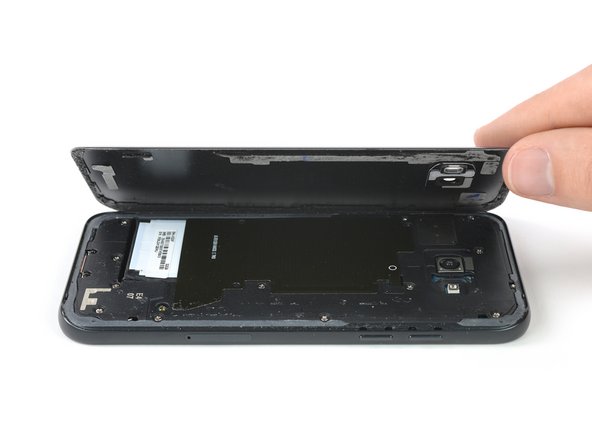
  4. Samsung Galaxy A5 (2017) Motherboard Cover including NFC Antenna and Loudspeaker Replacement: passo 4, immagine 1 di 1
    • Remove the back cover from the phone.

    • Before applying new adhesive remove any remaining adhesive from the back cover and the frame and clean the areas with isopropyl alcohol and a lint-free cloth.

  5. Samsung Galaxy A5 (2017) Motherboard Cover including NFC Antenna and Loudspeaker Replacement, Motherboard Cover including NFC Antenna and Loudspeaker Removal: passo 5, immagine 1 di 1
    • Remove the eight Phillips #00 screws that hold the motherboard cover in its place.

  6. Samsung Galaxy A5 (2017) Motherboard Cover including NFC Antenna and Loudspeaker Replacement: passo 6, immagine 1 di 3 Samsung Galaxy A5 (2017) Motherboard Cover including NFC Antenna and Loudspeaker Replacement: passo 6, immagine 2 di 3 Samsung Galaxy A5 (2017) Motherboard Cover including NFC Antenna and Loudspeaker Replacement: passo 6, immagine 3 di 3
    • Use a pair of tweezers to lift the mother board cover on both upper corners of the phone out of its clamps.

    • Remove the motherboard cover including the NFC antenna and the loudspeaker.

Conclusione

To reassemble your device, follow these instructions in reverse order. When reassembling apply new adhesive where it's necessary.

Team

iFixit Membro di iFixit

Staff

135 Membri

16.767 Guide realizzate

0 Commenti

Aggiungi Commento

Visualizza Statistiche:

Ultime 24 Ore: 0

Ultimi 7 Giorni: 0

Ultimi 30 Giorni: 0

Tutti i Tempi: 85