Questa guida ha delle modifiche più recenti. Passa all'ultima versione non verificata.
Introduzione
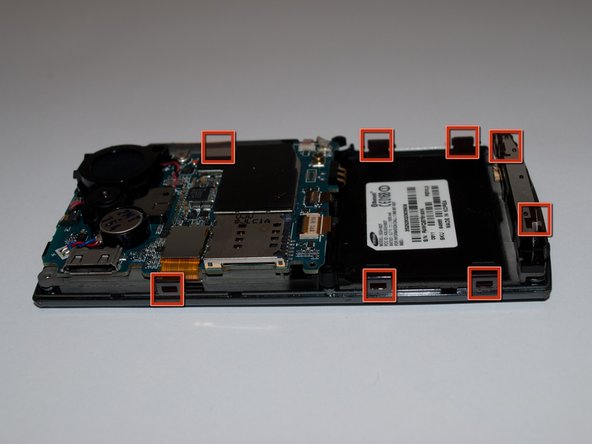
This guide shows you how to access the LCD display inside your phone.
Cosa ti serve
-
-
Press button on back of phone below camera.
-
While button is depressed, remove the back panel of the phone by it sliding off (not shown in picture).
-
-
-
Remove the rubber screw cover in the top left corner by prying it up with an iPod opener tool.
-
-


To reassemble your device, follow these instructions in reverse order.
To reassemble your device, follow these instructions in reverse order.
Annulla: non ho completato questa guida.
Un'altra persona ha completato questa guida.
Team

Cal Poly, Team 15-15, Regan Spring 2011 Membro di Cal Poly, Team 15-15, Regan Spring 2011
CPSU-REGAN-S11S15G15
5 Membri
5 Guide realizzate