Salta al contenuto principale

Samsung Epic 4G Touch Motherboard Replacement

Cosa ti serve

  1. Samsung Epic 4G Touch Motherboard Replacement, Rear Case: passo 1, immagine 1 di 2 Samsung Epic 4G Touch Motherboard Replacement, Rear Case: passo 1, immagine 2 di 2
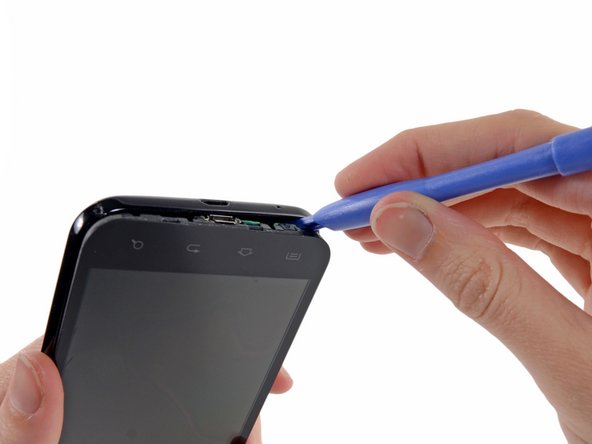
    • Insert a plastic opening tool, or your fingernail, into the opening near the left side of the headphone jack.

    • Pry the opening tool downward to pop the rear case from its clips securing it to the the midframe.

  2. Samsung Epic 4G Touch Motherboard Replacement: passo 2, immagine 1 di 2 Samsung Epic 4G Touch Motherboard Replacement: passo 2, immagine 2 di 2
    • Lift and remove the rear case.

  3. Samsung Epic 4G Touch Motherboard Replacement, microSD Card: passo 3, immagine 1 di 2 Samsung Epic 4G Touch Motherboard Replacement, microSD Card: passo 3, immagine 2 di 2
    • Use the flat end of a spudger, or your fingernail, to press the microSD card slightly deeper into its slot until you hear a click.

    • After the click, release the card and it will pop out of its slot.

    • During reassembly, push the microSD card into the slot until it clicks in place.

  4. Samsung Epic 4G Touch Motherboard Replacement: passo 4, immagine 1 di 1
    • Pull the microSD card away from its slot.

  5. Samsung Epic 4G Touch Motherboard Replacement, Battery: passo 5, immagine 1 di 2 Samsung Epic 4G Touch Motherboard Replacement, Battery: passo 5, immagine 2 di 2
    • Wedge a plastic opening tool into the crevice between the battery and midframe located near the bottom left corner.

    • Push the plastic opening tool downward to pry the battery up from its housing.

  6. Samsung Epic 4G Touch Motherboard Replacement: passo 6, immagine 1 di 2 Samsung Epic 4G Touch Motherboard Replacement: passo 6, immagine 2 di 2
    • Lift and remove the battery from the midframe.

  7. Samsung Epic 4G Touch Motherboard Replacement, Plastic Midframe: passo 7, immagine 1 di 1
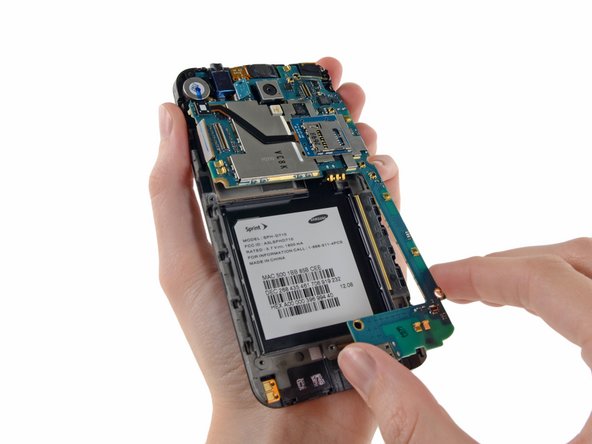
    • Remove the six 4.0 mm Phillips #00 screws securing the midframe to the front panel assembly.

  8. Samsung Epic 4G Touch Motherboard Replacement: passo 8, immagine 1 di 2 Samsung Epic 4G Touch Motherboard Replacement: passo 8, immagine 2 di 2
    • Unless you pry at the right insertion points, you might have a difficult time removing the midframe. This shot of the display assembly, with display glass facing down, is meant to help you locate them.

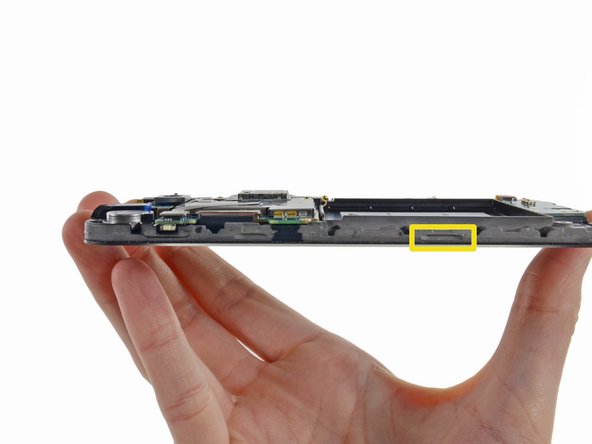
    • The first insertion point is a divot to the left of the micro-USB port.

    • The second insertion point is a divot to the right of the micro-USB port near the corner of the phone.

    • The final insertion point is located about two inches to the right of the volume control toggle, toward the corner of the phone. An additional insertion point is located slightly to the right of the volume button if you need it.

  9. Samsung Epic 4G Touch Motherboard Replacement: passo 9, immagine 1 di 2 Samsung Epic 4G Touch Motherboard Replacement: passo 9, immagine 2 di 2
    • Insert a plastic opening tool slightly to the left of the micro-USB port, and pry between the midframe and the display to open a gap.

  10. Samsung Epic 4G Touch Motherboard Replacement: passo 10, immagine 1 di 2 Samsung Epic 4G Touch Motherboard Replacement: passo 10, immagine 2 di 2
    • Wedge a plastic opening tool slightly to the right of the micro-USB port, and pry between the midframe and the display to widen the gap.

  11. Samsung Epic 4G Touch Motherboard Replacement: passo 11, immagine 1 di 2 Samsung Epic 4G Touch Motherboard Replacement: passo 11, immagine 2 di 2
    • Pry again about two inches to the right of the volume control toggles between the midframe and the front panel assembly.

  12. Samsung Epic 4G Touch Motherboard Replacement: passo 12, immagine 1 di 2 Samsung Epic 4G Touch Motherboard Replacement: passo 12, immagine 2 di 2
    • Pull the micro-USB end of the front panel assembly out and away from the midframe and lift up to free it entirely.

  13. Samsung Epic 4G Touch Motherboard Replacement, Motherboard Connectors: passo 13, immagine 1 di 1
    • Headphone jack/vibrator assembly cable connector

    • Front-facing camera cable connector

    • Digitizer cable connector

    • Display cable connector

  14. Samsung Epic 4G Touch Motherboard Replacement, Headphone Jack/Vibrator Connector: passo 14, immagine 1 di 2 Samsung Epic 4G Touch Motherboard Replacement, Headphone Jack/Vibrator Connector: passo 14, immagine 2 di 2
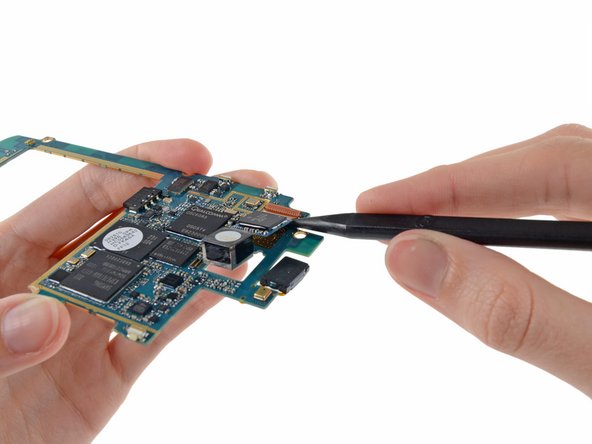
    • Use the flat end of a spudger to disconnect the headphone jack/vibrator assembly cable.

  15. Samsung Epic 4G Touch Motherboard Replacement, Motherboard Assembly: passo 15, immagine 1 di 2 Samsung Epic 4G Touch Motherboard Replacement, Motherboard Assembly: passo 15, immagine 2 di 2
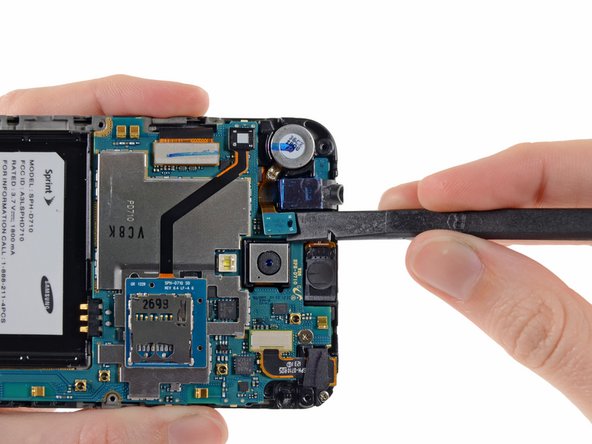
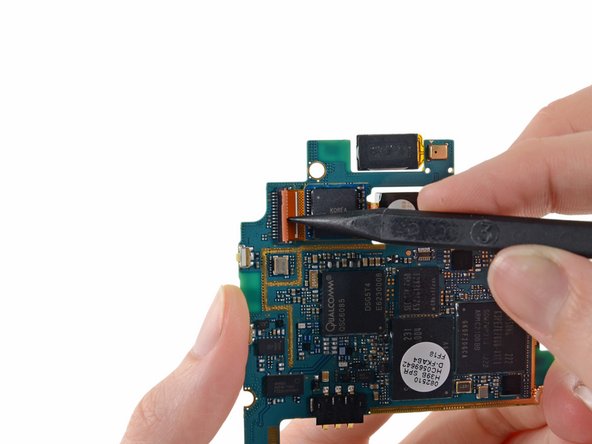
    • Use the flat end of a spudger to disconnect the front-facing camera cable connector.

  16. Samsung Epic 4G Touch Motherboard Replacement: passo 16, immagine 1 di 1
    • Carefully disconnect the digitizer display cable.

  17. Samsung Epic 4G Touch Motherboard Replacement: passo 17, immagine 1 di 1
    • Use a spudger to disconnect the display cable connector.

  18. Samsung Epic 4G Touch Motherboard Replacement: passo 18, immagine 1 di 1
    • Remove the two 3 mm Phillips #00 screws.

  19. Samsung Epic 4G Touch Motherboard Replacement: passo 19, immagine 1 di 3 Samsung Epic 4G Touch Motherboard Replacement: passo 19, immagine 2 di 3 Samsung Epic 4G Touch Motherboard Replacement: passo 19, immagine 3 di 3
    • Lift the micro-USB end of the motherboard away from the display assembly and pull it down.

    • Be mindful that you don't snag the motherboard on any cables as you remove it.

  20. Samsung Epic 4G Touch Motherboard Replacement, Rear Facing Camera: passo 20, immagine 1 di 2 Samsung Epic 4G Touch Motherboard Replacement, Rear Facing Camera: passo 20, immagine 2 di 2
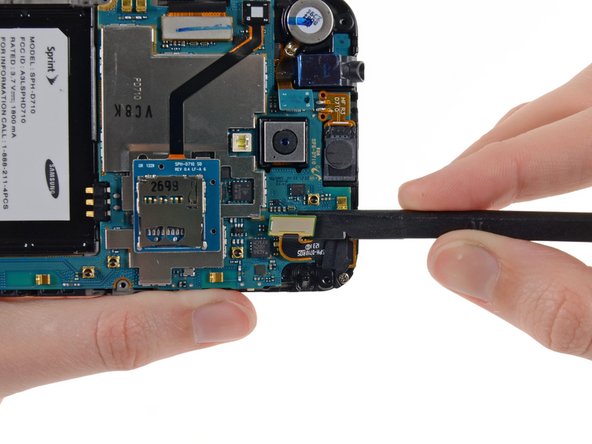
    • Use the pointed end of a spudger to flip the tab on the rear-facing camera ZIF connector.

  21. Samsung Epic 4G Touch Motherboard Replacement: passo 21, immagine 1 di 2 Samsung Epic 4G Touch Motherboard Replacement: passo 21, immagine 2 di 2
    • Slide a spudger under the rear-facing camera cable to free it from the adhesive.

  22. Samsung Epic 4G Touch Motherboard Replacement: passo 22, immagine 1 di 1
    • Remove the rear-facing camera from the motherboard.

  23. Samsung Epic 4G Touch Motherboard Replacement, Microphone Cover: passo 23, immagine 1 di 2 Samsung Epic 4G Touch Motherboard Replacement, Microphone Cover: passo 23, immagine 2 di 2
    • The microphone cover fits in a notch and over a small peg in the display assembly, ensure it is well seated before sealing your device.

    • Make sure the microphone cover stays in its slot on the display assembly.

    • When you removed the motherboard, the microphone cover may have remained stuck on the microphone. Put it back in its notch in the display assembly to avoid losing it.

Conclusione

To reassemble your device, follow these instructions in reverse order.

Altre 13 persone hanno completato questa guida.

Sam Goldheart

Membro da: 10/18/12

465.252 Reputazione

538 Guide realizzate

Team

iFixit Membro di iFixit

Staff

136 Membri

16.573 Guide realizzate

Un commento

Sadly, this guide is for the Sprint version of the S II.

The international version has a completely different layout and mainboard. :/

Someone - Replica

Aggiungi Commento

Visualizza Statistiche:

Ultime 24 Ore: 0

Ultimi 7 Giorni: 0

Ultimi 30 Giorni: 13

Tutti i Tempi: 28,307