Salta al contenuto principale

Samsung DVD-P230 Tray Motor Replacement

Cosa ti serve

  1. Samsung DVD-P230 Tray Motor Replacement, Outer Cover & Faceplate: passo 1, immagine 1 di 3 Samsung DVD-P230 Tray Motor Replacement, Outer Cover & Faceplate: passo 1, immagine 2 di 3 Samsung DVD-P230 Tray Motor Replacement, Outer Cover & Faceplate: passo 1, immagine 3 di 3
    • Open the tray by pressing the eject button

    • Remove the DVD tray faceplate by pushing the faceplate up off of the tray.

  2. Samsung DVD-P230 Tray Motor Replacement: passo 2, immagine 1 di 1
    • Press the eject button to insert the tray

    • After the tray is closed unplug DVD player

  3. Samsung DVD-P230 Tray Motor Replacement: passo 3, immagine 1 di 1
    • Unscrew the 3 screws in the back.

  4. Samsung DVD-P230 Tray Motor Replacement: passo 4, immagine 1 di 2 Samsung DVD-P230 Tray Motor Replacement: passo 4, immagine 2 di 2
    • Pull the outer case upward and then towards you.

  5. Samsung DVD-P230 Tray Motor Replacement: passo 5, immagine 1 di 3 Samsung DVD-P230 Tray Motor Replacement: passo 5, immagine 2 di 3 Samsung DVD-P230 Tray Motor Replacement: passo 5, immagine 3 di 3
    • There are six symmetrically placed tabs holding in the front faceplate. Unhook these six tabs to loosen the faceplate.

  6. Samsung DVD-P230 Tray Motor Replacement: passo 6, immagine 1 di 2 Samsung DVD-P230 Tray Motor Replacement: passo 6, immagine 2 di 2
    • Pull off front faceplate. This may take a couple of tries to get all six tabs unhooked simultaneously.

  7. Samsung DVD-P230 Tray Motor Replacement, Power Cord: passo 7, immagine 1 di 3 Samsung DVD-P230 Tray Motor Replacement, Power Cord: passo 7, immagine 2 di 3 Samsung DVD-P230 Tray Motor Replacement, Power Cord: passo 7, immagine 3 di 3
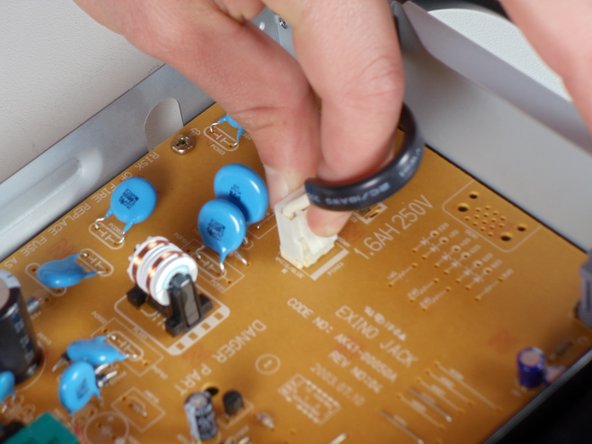
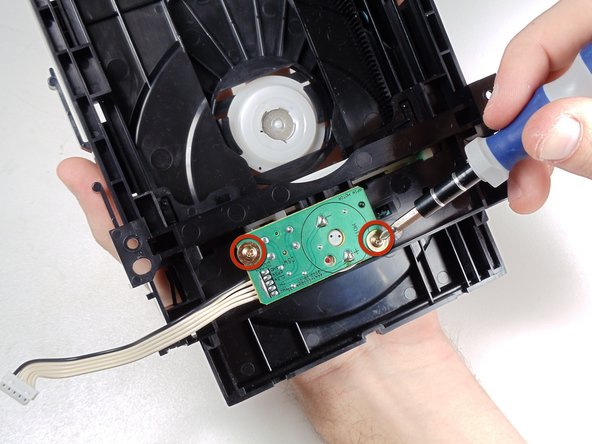
    • Locate the white clip that attaches the cord to the motherboard

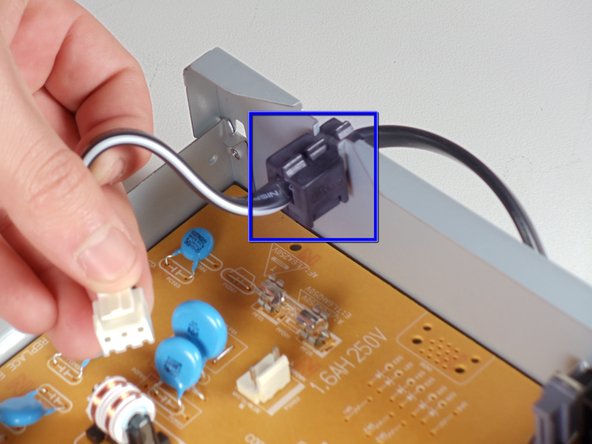
    • Grasp clip and squeeze to release

    • Lift up and remove power cord

    • Slide cord mount from outer case

  8. Samsung DVD-P230 Tray Motor Replacement, Tray: passo 8, immagine 1 di 3 Samsung DVD-P230 Tray Motor Replacement, Tray: passo 8, immagine 2 di 3 Samsung DVD-P230 Tray Motor Replacement, Tray: passo 8, immagine 3 di 3
    • Remove the three screws holding in the DVD tray

  9. Samsung DVD-P230 Tray Motor Replacement: passo 9, immagine 1 di 2 Samsung DVD-P230 Tray Motor Replacement: passo 9, immagine 2 di 2
    • Remove the power cord and first two ribbons by pulling them directly out of their sockets.

  10. Samsung DVD-P230 Tray Motor Replacement: passo 10, immagine 1 di 2 Samsung DVD-P230 Tray Motor Replacement: passo 10, immagine 2 di 2
    • Gently lift the DVD tray off of the motherboard.

  11. Samsung DVD-P230 Tray Motor Replacement, Tray Motor: passo 11, immagine 1 di 2 Samsung DVD-P230 Tray Motor Replacement, Tray Motor: passo 11, immagine 2 di 2
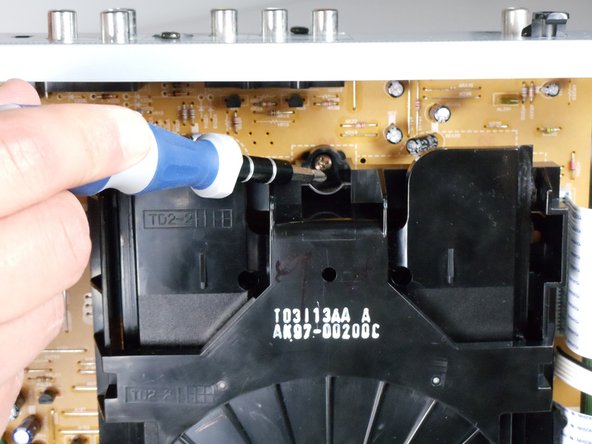
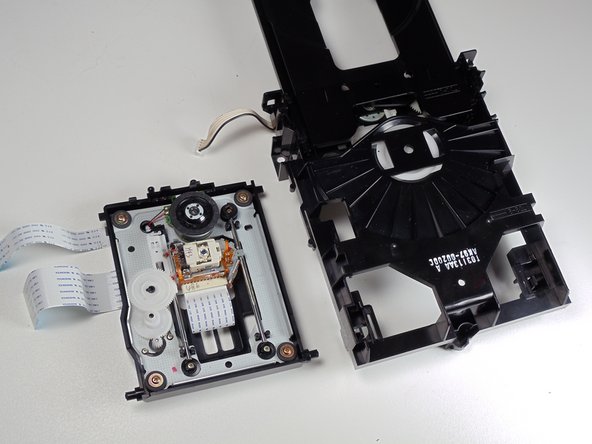
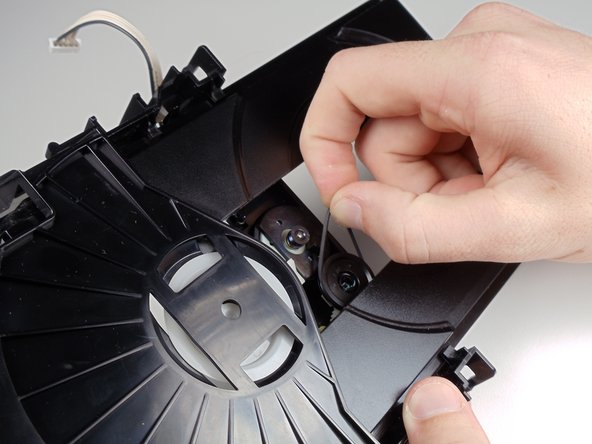
    • Spin the small gear shown to the right to begin opening the tray. There should be relatively little resistance in the gear.

  12. Samsung DVD-P230 Tray Motor Replacement: passo 12, immagine 1 di 3 Samsung DVD-P230 Tray Motor Replacement: passo 12, immagine 2 di 3 Samsung DVD-P230 Tray Motor Replacement: passo 12, immagine 3 di 3
    • Use your fingers to pull the shown tabs towards the sides of the tray, releasing the internal tray that contains the laser.

  13. Samsung DVD-P230 Tray Motor Replacement: passo 13, immagine 1 di 2 Samsung DVD-P230 Tray Motor Replacement: passo 13, immagine 2 di 2
    • In order to remove the tray motor you must detach the small rubber band that runs between the two shown wheels.

    • If the rubber band is improperly fitted onto one of the wheels or broken this is probably the cause of the tray not opening or closing.

  14. Samsung DVD-P230 Tray Motor Replacement: passo 14, immagine 1 di 2 Samsung DVD-P230 Tray Motor Replacement: passo 14, immagine 2 di 2
    • Flip over the tray.

    • Unscrew the two screws that attach the motor to the tray.

    • Once completed the motor can be easily removed and replaced.

Conclusione

To reassemble your device, follow these instructions in reverse order.

Team

Cal Poly, Team 3-30, Regan Winter 2011 Membro di Cal Poly, Team 3-30, Regan Winter 2011

CPSU-REGAN-W11S3G30

4 Membri

8 Guide realizzate

0 Commenti

Aggiungi Commento

Visualizza Statistiche:

Ultime 24 Ore: 0

Ultimi 7 Giorni: 0

Ultimi 30 Giorni: 2

Tutti i Tempi: 5,023