Salta al contenuto principale

Samsung DV300F Front LCD Screen Replacement

Cosa ti serve

  1. Samsung DV300F Front LCD Screen Replacement, Front and Rear Casing: passo 1, immagine 1 di 3 Samsung DV300F Front LCD Screen Replacement, Front and Rear Casing: passo 1, immagine 2 di 3 Samsung DV300F Front LCD Screen Replacement, Front and Rear Casing: passo 1, immagine 3 di 3
    • Remove the two black 4.2 mm screws on the right side of the camera using a Phillips #0 screwdriver.

    • Remove the two black 4.2 mm screws on the left side of the camera using a Phillips #0 screwdriver.

    • Remove the two black 4.2 mm screws on the bottom of the camera using a Phillips #0 screwdriver.

  2. Samsung DV300F Front LCD Screen Replacement: passo 2, immagine 1 di 2 Samsung DV300F Front LCD Screen Replacement: passo 2, immagine 2 di 2
    • Remove the back case of the camera carefully.

  3. Samsung DV300F Front LCD Screen Replacement: passo 3, immagine 1 di 3 Samsung DV300F Front LCD Screen Replacement: passo 3, immagine 2 di 3 Samsung DV300F Front LCD Screen Replacement: passo 3, immagine 3 di 3
    • Remove the front case of the camera.

    • Remove the front LCD screen from the front case next to the lens.

  4. Samsung DV300F Front LCD Screen Replacement, Back Button Control: passo 4, immagine 1 di 2 Samsung DV300F Front LCD Screen Replacement, Back Button Control: passo 4, immagine 2 di 2
    • Remove the blue button control from its position next to the LCD screen.

    • Pull the ribbon cable to disconnect the blue button control from the camera.

  5. Samsung DV300F Front LCD Screen Replacement, Back LCD Screen: passo 5, immagine 1 di 1
    • Remove the back LCD screen from its place carefully.

  6. Samsung DV300F Front LCD Screen Replacement: passo 6, immagine 1 di 2 Samsung DV300F Front LCD Screen Replacement: passo 6, immagine 2 di 2
    • Flip the black tab where the back LCD screen connects to the circuit board.

    • Pull the tape connection to disconnect the back LCD screen from the circuit board.

  7. Samsung DV300F Front LCD Screen Replacement, Front LCD Screen: passo 7, immagine 1 di 2 Samsung DV300F Front LCD Screen Replacement, Front LCD Screen: passo 7, immagine 2 di 2
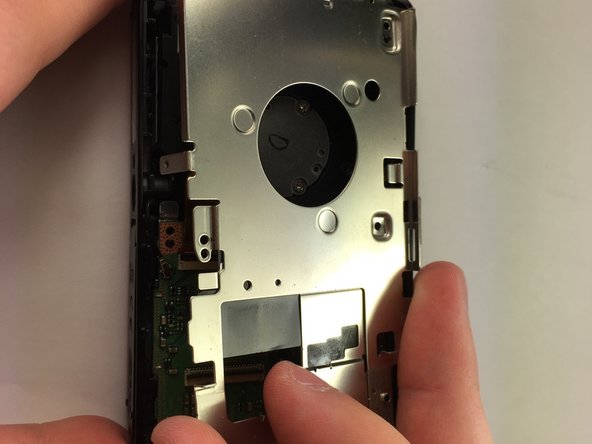
    • Unscrew the 3 silver 4.5 mm screws from the circuit board using a Phillips #0 screwdriver.

    • Remove the circuit board cover.

  8. Samsung DV300F Front LCD Screen Replacement: passo 8, immagine 1 di 3 Samsung DV300F Front LCD Screen Replacement: passo 8, immagine 2 di 3 Samsung DV300F Front LCD Screen Replacement: passo 8, immagine 3 di 3
    • Flip the black tab where the front LCD screen connects to the circuit board.

    • Pull the tape connection to disconnect the front LCD screen from the circuit board.

    • You can do this easily with your fingers.

    • Remove the front LCD screen from the front of the camera.

Conclusione

To reassemble your device, follow these instructions in reverse order.

Un'altra persona ha completato questa guida.

Team

Baylor, Team 5-10, Williams Spring 2015 Membro di Baylor, Team 5-10, Williams Spring 2015

BU-WILLIAMS-S15S5G10

3 Membri

10 Guide realizzate

0 Commenti

Aggiungi Commento

Visualizza Statistiche:

Ultime 24 Ore: 0

Ultimi 7 Giorni: 1

Ultimi 30 Giorni: 11

Tutti i Tempi: 735