Salta al contenuto principale

Samsung Chromebook 2 XE503c12 Trackpad Replacement

Cosa ti serve

  1. Samsung Chromebook 2 XE503c12 Trackpad Replacement, Trackpad: passo 1, immagine 1 di 2 Samsung Chromebook 2 XE503c12 Trackpad Replacement, Trackpad: passo 1, immagine 2 di 2
    • Turn the power off before beginning this step.

    • Most Chromebooks contain rubber circle pads on each of the four corners to cover the screws. In order to remove the rubber pads, simply use any opening tool.

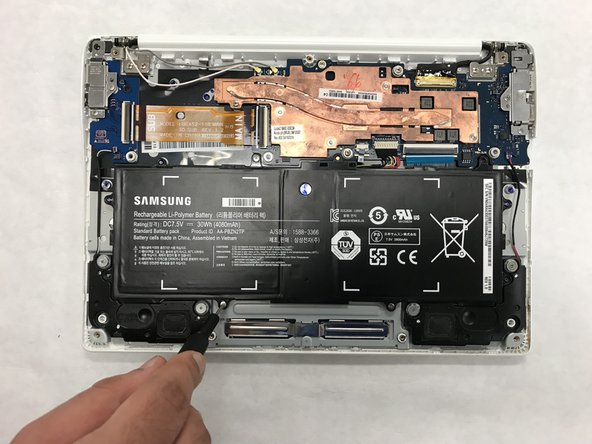
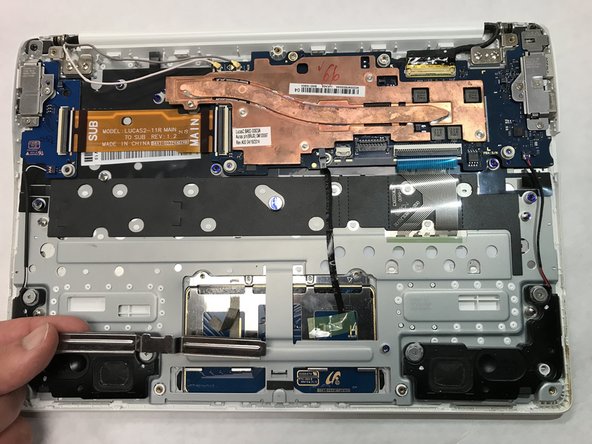
    • Lay the Chromebook down so that the bottom cover is facing upward.

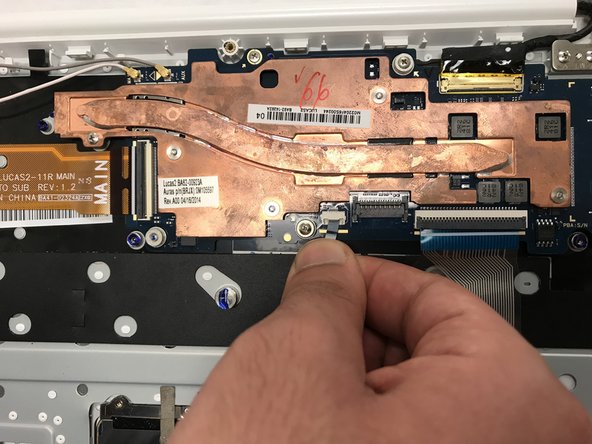
    • Using a Phillips #00 screwdriver, remove all nine 5.5 mm screws from the back cover.

  2. Samsung Chromebook 2 XE503c12 Trackpad Replacement: passo 2, immagine 1 di 2 Samsung Chromebook 2 XE503c12 Trackpad Replacement: passo 2, immagine 2 di 2
    • Place the opening tool in the divot between the spine of the Chromebook and the back cover.

    • Slowly glide and push down the end of the opening tool along all sides of the Chromebook to detach the brackets. You will hear the brackets detach.

  3. Samsung Chromebook 2 XE503c12 Trackpad Replacement: passo 3, immagine 1 di 2 Samsung Chromebook 2 XE503c12 Trackpad Replacement: passo 3, immagine 2 di 2
    • Slowly pry off the back cover of the Chromebook.

    • Be gentle while prying to avoid breaking the back cover.

  4. Samsung Chromebook 2 XE503c12 Trackpad Replacement: passo 4, immagine 1 di 2 Samsung Chromebook 2 XE503c12 Trackpad Replacement: passo 4, immagine 2 di 2
    • Remove the four 3 mm screws using a Phillips #000 screwdriver.

  5. Samsung Chromebook 2 XE503c12 Trackpad Replacement: passo 5, immagine 1 di 2 Samsung Chromebook 2 XE503c12 Trackpad Replacement: passo 5, immagine 2 di 2
    • Carefully lift the top of the battery then pull it away from you to remove it.

    • Some batteries may be attached via a battery connector. Disconnect the battery connector by simply pulling straight up at its base.

  6. Samsung Chromebook 2 XE503c12 Trackpad Replacement: passo 6, immagine 1 di 2 Samsung Chromebook 2 XE503c12 Trackpad Replacement: passo 6, immagine 2 di 2
    • Using a Phillips #00 screwdriver, remove all of the two screws keeping the trackpad in place.

  7. Samsung Chromebook 2 XE503c12 Trackpad Replacement: passo 7, immagine 1 di 3 Samsung Chromebook 2 XE503c12 Trackpad Replacement: passo 7, immagine 2 di 3 Samsung Chromebook 2 XE503c12 Trackpad Replacement: passo 7, immagine 3 di 3
    • Gently remove the connector between the trackpad and the motherboard by pulling upward on it at the port.

  8. Samsung Chromebook 2 XE503c12 Trackpad Replacement: passo 8, immagine 1 di 2 Samsung Chromebook 2 XE503c12 Trackpad Replacement: passo 8, immagine 2 di 2
    • Using an opening tool, gently peel back the adhesive strip holding the trackpad in place.

  9. Samsung Chromebook 2 XE503c12 Trackpad Replacement: passo 9, immagine 1 di 3 Samsung Chromebook 2 XE503c12 Trackpad Replacement: passo 9, immagine 2 di 3 Samsung Chromebook 2 XE503c12 Trackpad Replacement: passo 9, immagine 3 di 3
    • Using the opening tool, disconnect the metal trackpad support brackets.

    • Don't be afraid to use a moderate amount of force when prying the support brackets loose.

  10. Samsung Chromebook 2 XE503c12 Trackpad Replacement: passo 10, immagine 1 di 2 Samsung Chromebook 2 XE503c12 Trackpad Replacement: passo 10, immagine 2 di 2
    • With the laptop slightly open, push the trackpad upwards at the rear, and pull it out from the bottom.

Conclusione

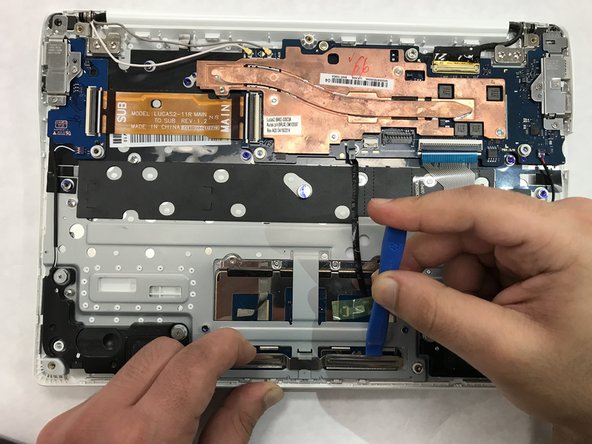
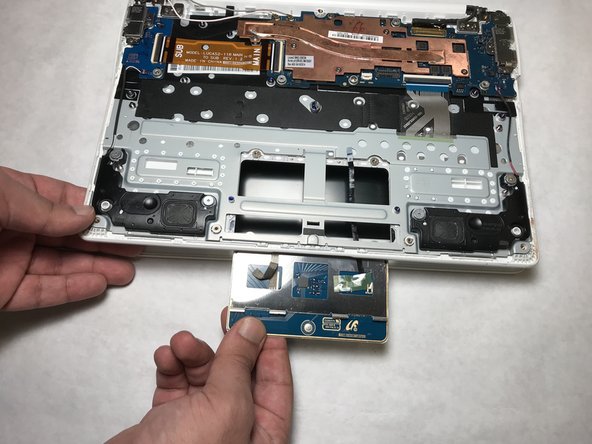
To reassemble your device, follow these instructions in reverse order.

Un'altra persona ha completato questa guida.

Shane Solomon

Membro da: 05/22/19

181 Reputazione

1 Guida realizzata

Team

IUPUI, Team S1-G1, Wilson Summer 2019 Membro di IUPUI, Team S1-G1, Wilson Summer 2019

IUPUI-WILSON-SU19S1G1

4 Membri

4 Guide realizzate

0 Commenti

Aggiungi Commento

Visualizza Statistiche:

Ultime 24 Ore: 0

Ultimi 7 Giorni: 2

Ultimi 30 Giorni: 5

Tutti i Tempi: 174