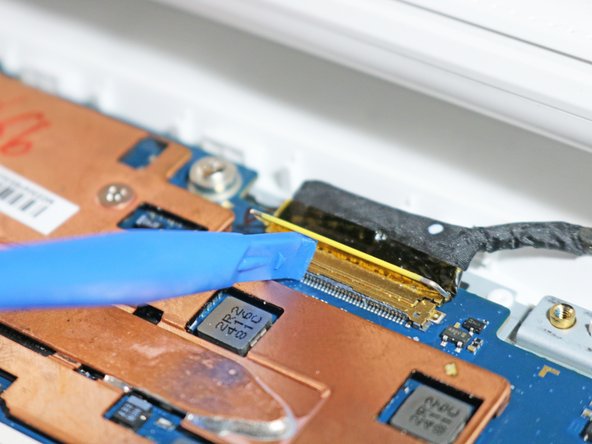
Salta al contenuto principale

Samsung Chromebook 2 XE503c12 Screen Replacement

Cosa ti serve

  1. Samsung Chromebook 2 XE503c12 Screen Replacement, Battery: passo 1, immagine 1 di 2 Samsung Chromebook 2 XE503c12 Screen Replacement, Battery: passo 1, immagine 2 di 2
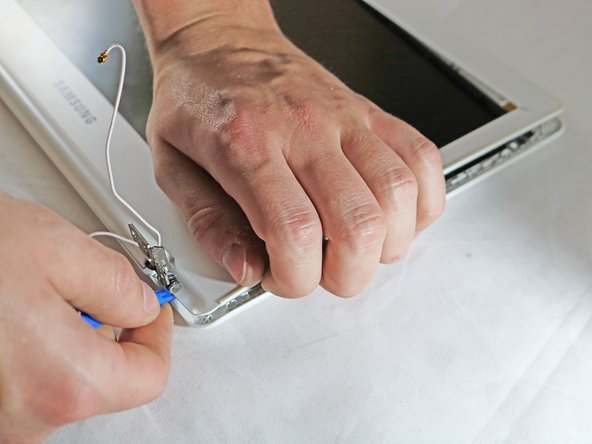
    • Flip device over so that the underside is facing up.

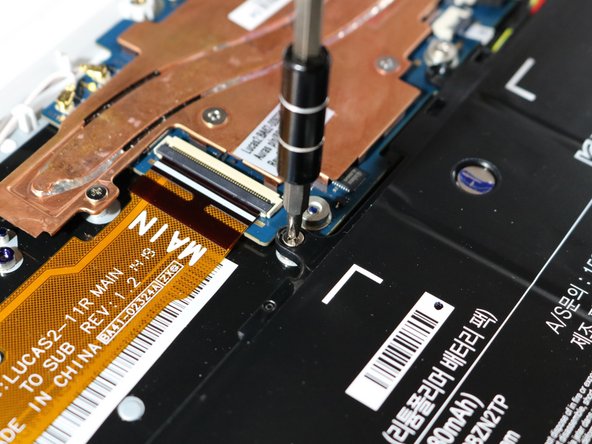
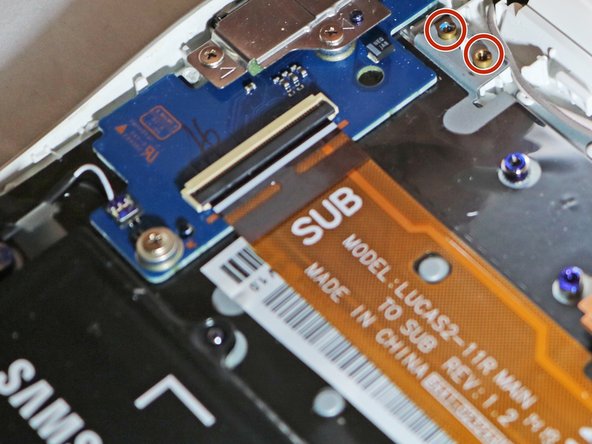
    • Remove nine, 7mm PH#0 screws from the bottom.

  2. Samsung Chromebook 2 XE503c12 Screen Replacement: passo 2, immagine 1 di 2 Samsung Chromebook 2 XE503c12 Screen Replacement: passo 2, immagine 2 di 2
    • Using the plastic opening tool, pry open the bottom of the Chromebook case, working all around the computer.

    • Lift the panel out of the way to reveal the battery.

  3. Samsung Chromebook 2 XE503c12 Screen Replacement: passo 3, immagine 1 di 2 Samsung Chromebook 2 XE503c12 Screen Replacement: passo 3, immagine 2 di 2
    • Remove four, 5mm Phillips #0 screws connecting the battery to the laptop

  4. Samsung Chromebook 2 XE503c12 Screen Replacement: passo 4, immagine 1 di 1
    • Lift the battery, and pull it up and towards you, away from the connector.

    • Be sure to lift gently to avoid damage to connector

  5. Samsung Chromebook 2 XE503c12 Screen Replacement: passo 5, immagine 1 di 1
    • Using a plastic opening tool, pry the connector up from the contact.

    • Remove the battery from the device.

  6. Samsung Chromebook 2 XE503c12 Screen Replacement, Screen: passo 6, immagine 1 di 2 Samsung Chromebook 2 XE503c12 Screen Replacement, Screen: passo 6, immagine 2 di 2
    • Remove the four 5mm Phillips #0 screws on the hinges.

  7. Samsung Chromebook 2 XE503c12 Screen Replacement: passo 7, immagine 1 di 3 Samsung Chromebook 2 XE503c12 Screen Replacement: passo 7, immagine 2 di 3 Samsung Chromebook 2 XE503c12 Screen Replacement: passo 7, immagine 3 di 3
    • Unplug two auxiliary wires leading to the top lid.

    • Using the plastic prying tool, lift the hinge on the connector up and pull the connector away.

  8. Samsung Chromebook 2 XE503c12 Screen Replacement: passo 8, immagine 1 di 1
    • Lift the hinges up and separate the top lid from the bottom casing.

  9. Samsung Chromebook 2 XE503c12 Screen Replacement: passo 9, immagine 1 di 3 Samsung Chromebook 2 XE503c12 Screen Replacement: passo 9, immagine 2 di 3 Samsung Chromebook 2 XE503c12 Screen Replacement: passo 9, immagine 3 di 3
    • Using the plastic prying tool, carefully pry the casing apart from the screen.

    • When prying case apart, there is a risk of screen and parts of the casing shattering and cutting you.

  10. Samsung Chromebook 2 XE503c12 Screen Replacement: passo 10, immagine 1 di 1
    • Remove the four 5mm Phillips #0 screws holding the screen in place.

  11. Samsung Chromebook 2 XE503c12 Screen Replacement: passo 11, immagine 1 di 1
    • Lift and remove the screen from the device.

Conclusione

To reassemble your device, follow these instructions in reverse order.

Un'altra persona ha completato questa guida.

0 Commenti

Aggiungi Commento

Visualizza Statistiche:

Ultime 24 Ore: 0

Ultimi 7 Giorni: 1

Ultimi 30 Giorni: 2

Tutti i Tempi: 411