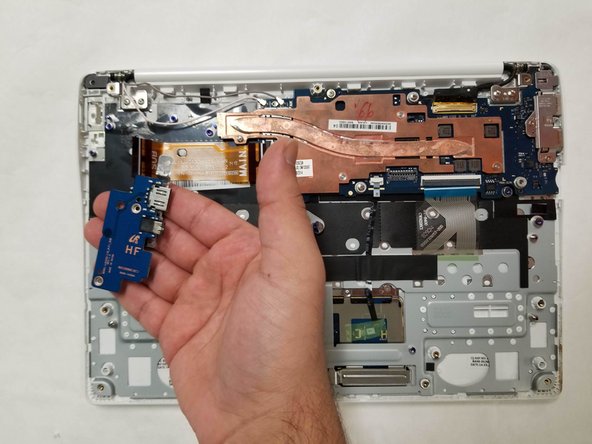
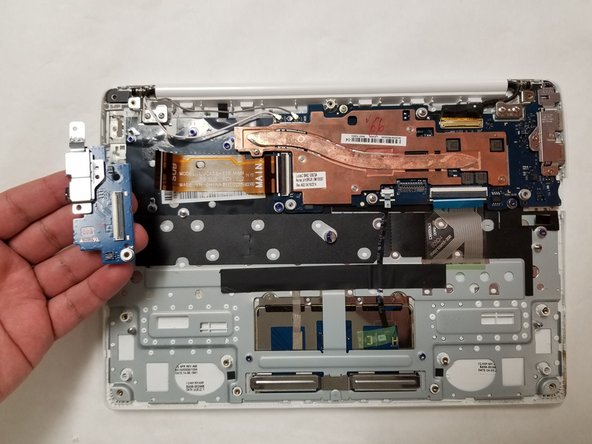
Salta al contenuto principale

Samsung Chromebook 2 XE503c12 Daughterboard Replacement

  1. Samsung Chromebook 2 XE503c12 Daughterboard Replacement, Daughterboard: passo 1, immagine 1 di 1
    • Turn the power off before beginning this step

    • It is common for Chromebooks to have rubber circle pads covering the four screws on each of the four corners. You can use any opening tool to remove the rubber circle pads.

    • Lay the Chromebook down in a way that the bottom cover faces upward.

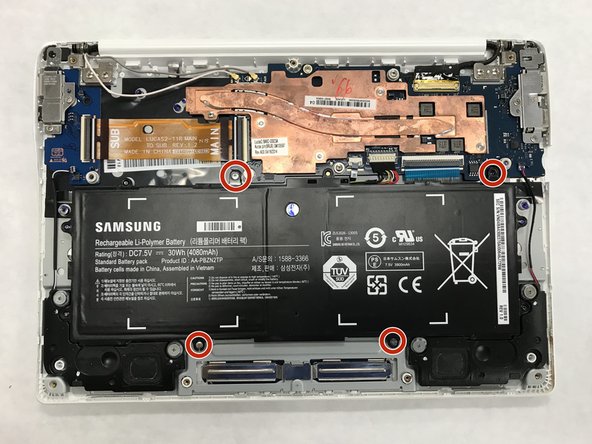
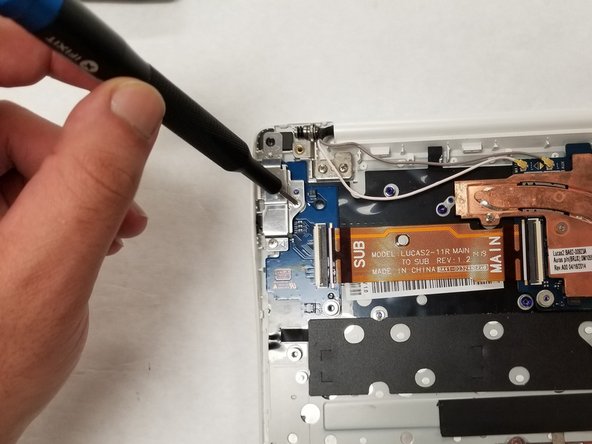
    • Remove all nine screws from the back cover using a Phillips #00 screw.

  2. Samsung Chromebook 2 XE503c12 Daughterboard Replacement: passo 2, immagine 1 di 3 Samsung Chromebook 2 XE503c12 Daughterboard Replacement: passo 2, immagine 2 di 3 Samsung Chromebook 2 XE503c12 Daughterboard Replacement: passo 2, immagine 3 di 3
    • Place the opening tool in the divot between the spine of the Chromebook and the back cover.

    • Slowly glide and push down the end of the opening tool along all sides of the Chromebook to detach the brackets. You will hear the brackets detach.

    • Be gentle while prying to avoid breaking the back cover.

  3. Samsung Chromebook 2 XE503c12 Daughterboard Replacement: passo 3, immagine 1 di 3 Samsung Chromebook 2 XE503c12 Daughterboard Replacement: passo 3, immagine 2 di 3 Samsung Chromebook 2 XE503c12 Daughterboard Replacement: passo 3, immagine 3 di 3
    • Remove the four 3 mm screws using a Phillips #000 screwdriver.

    • Carefully lift the top of the battery then pull it away from you to remove it.

    • Some batteries may be attached via a battery connector. Disconnect the battery connector by simply pulling straight up at its base.

  4. Samsung Chromebook 2 XE503c12 Daughterboard Replacement: passo 4, immagine 1 di 3 Samsung Chromebook 2 XE503c12 Daughterboard Replacement: passo 4, immagine 2 di 3 Samsung Chromebook 2 XE503c12 Daughterboard Replacement: passo 4, immagine 3 di 3
    • Use a blunt precision tweezer to remove the speaker cord from the daughterboard.

  5. Samsung Chromebook 2 XE503c12 Daughterboard Replacement: passo 5, immagine 1 di 3 Samsung Chromebook 2 XE503c12 Daughterboard Replacement: passo 5, immagine 2 di 3 Samsung Chromebook 2 XE503c12 Daughterboard Replacement: passo 5, immagine 3 di 3
    • Using a Phillips #00 screwdriver, remove all of the two screws from the daughterboard.

  6. Samsung Chromebook 2 XE503c12 Daughterboard Replacement: passo 6, immagine 1 di 3 Samsung Chromebook 2 XE503c12 Daughterboard Replacement: passo 6, immagine 2 di 3 Samsung Chromebook 2 XE503c12 Daughterboard Replacement: passo 6, immagine 3 di 3
    • You must first lift the locking bar of the ZIF connector before removing the ribbon cable.

    • Gently, remove the orange tape by pulling it outward.

    • Using an opening tool, gently pull the daughterboard upward.

  7. Samsung Chromebook 2 XE503c12 Daughterboard Replacement: passo 7, immagine 1 di 3 Samsung Chromebook 2 XE503c12 Daughterboard Replacement: passo 7, immagine 2 di 3 Samsung Chromebook 2 XE503c12 Daughterboard Replacement: passo 7, immagine 3 di 3
    • Gently pull the daughterboard away from the Chromebook.

    • Be gentle because the daughterboard might be a little glued.

Conclusione

To reassemble your device, follow these instructions in reverse order.

Nate Duvall

Membro da: 05/22/19

154 Reputazione

1 Guida realizzata

Team

IUPUI, Team S1-G1, Wilson Summer 2019 Membro di IUPUI, Team S1-G1, Wilson Summer 2019

IUPUI-WILSON-SU19S1G1

4 Membri

4 Guide realizzate

0 Commenti

Aggiungi Commento

Visualizza Statistiche:

Ultime 24 Ore: 1

Ultimi 7 Giorni: 3

Ultimi 30 Giorni: 7

Tutti i Tempi: 194