Salta al contenuto principale
Unisciti alla Community delle riparazioni - Crea un account

Samsung CLP-300 Imaging Unit Replacement

  1. Samsung CLP-300 Imaging Unit Replacement, Imaging Unit: passo 1, immagine 1 di 1
    • Turn the printer off and wait a few minutes for it to cool.

    Chiedi a FixBot
  2. Samsung CLP-300 Imaging Unit Replacement: passo 2, immagine 1 di 2 Samsung CLP-300 Imaging Unit Replacement: passo 2, immagine 2 di 2
    • Open the front cover

    Chiedi a FixBot
  3. Samsung CLP-300 Imaging Unit Replacement: passo 3, immagine 1 di 1
    • Remove waste toner container from the printer.

    Chiedi a FixBot
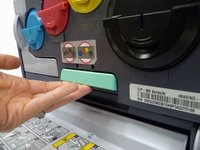
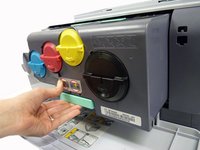
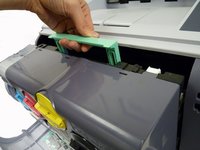
  4. Samsung CLP-300 Imaging Unit Replacement: passo 4, immagine 1 di 3 Samsung CLP-300 Imaging Unit Replacement: passo 4, immagine 2 di 3 Samsung CLP-300 Imaging Unit Replacement: passo 4, immagine 3 di 3
    • Pull the imaging unit out of the printer using bottom handle.

    • Use green handle on top of imaging unit to steady unit as you pull it out.

    • Holding the top and bottom handles on the new imaging unit, slide the unit in the printer until you hear a “click.”

    • Remove new imaging unit from its packaging making sure to remove protective paper and devices from unit

    • Do not expose new imaging unit to light for more than a few minutes. Covering unit with a piece of paper is sufficient protection while you complete repair.

    • If you hear a crackling sound once the printer turns on the imaging unit is not installed correctly. Take out and reinsert the unit.

    Chiedi a FixBot
Conclusione

To reassemble your device, follow these instructions in reverse order.

Altre 2 persone hanno completato questa guida.

0Commenti sulla guida

Aggiungi Commento

Visualizza Statistiche:

Ultime 24 Ore: 2

Ultimi 7 Giorni: 12

Ultimi 30 Giorni: 65

Tutti i Tempi: 13,945