Questa versione può contenere modifiche errate. Passa all'ultima istantanea verificata.
Cosa ti serve
-
-
Per rimuovere il rivestimento posteriore, premi con decisione verso il basso e spingi verso la parte inferiore del telefono.
-
-
Questo passaggio è privo di traduzione. Aiuta a tradurlo
-
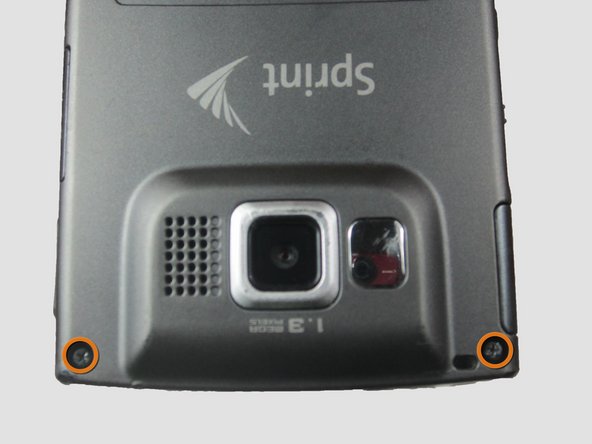
Using the Phillips #00 screwdriver, remove the four indicated screws (4.5 mm).
-
-
Questo passaggio è privo di traduzione. Aiuta a tradurlo
-
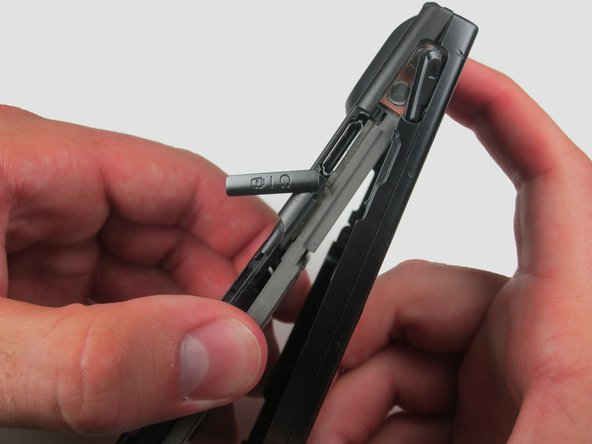
Press the pointed edge of the spudger into the side of the two rubber plugs in order to lift and remove them from the top of the phone.
-
Then, using the Phillips #00 screwdriver, remove the two indicated Phillip screws (6.5 mm).
-
-
-
Questo passaggio è privo di traduzione. Aiuta a tradurlo
-
To remove the SIM card, start by pressing the top of the card and push down and away towards the bottom of the phone. Then, as indicated, pull the SIM card out.
-
-
Questo passaggio è privo di traduzione. Aiuta a tradurlo
-
Begin to slowly lift the back casing of the phone. You should hear a snap when the casing is released.
-
-
Questo passaggio è privo di traduzione. Aiuta a tradurlo
-
Your casing should be separated and the three loose buttons put to the side.
-
-
Questo passaggio è privo di traduzione. Aiuta a tradurlo
-
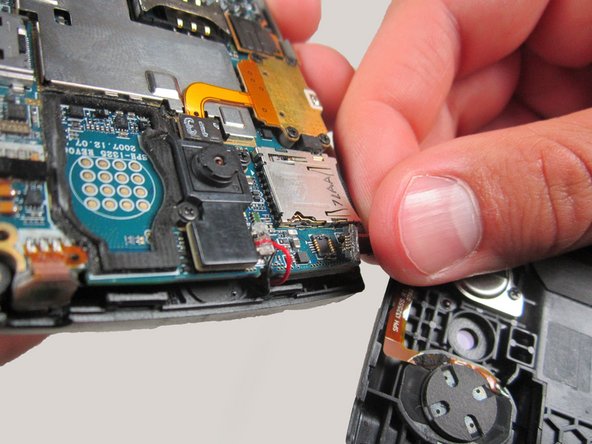
Slowly remove the back casing by gently pulling the ribbon connection.
-
-
Questo passaggio è privo di traduzione. Aiuta a tradurlo
-
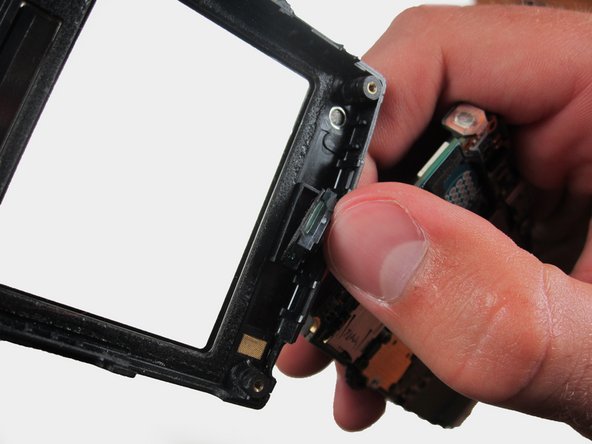
Gently pull on the wires to remove the front casing.
-
-
Questo passaggio è privo di traduzione. Aiuta a tradurlo
-
Your front casing and front speaker are now released.
-
-
Questo passaggio è privo di traduzione. Aiuta a tradurlo
-
Remove the two indicated screws (3.9 mm) with a Phillips #00 screwdriver.
-


Annulla: non ho completato questa guida.
Un'altra persona ha completato questa guida.
Team

Cal Poly, Team 6-24, Amido Spring 2012 Membro di Cal Poly, Team 6-24, Amido Spring 2012
CPSU-AMIDO-S12S6G24
3 Membri
15 Guide realizzate