Introduzione
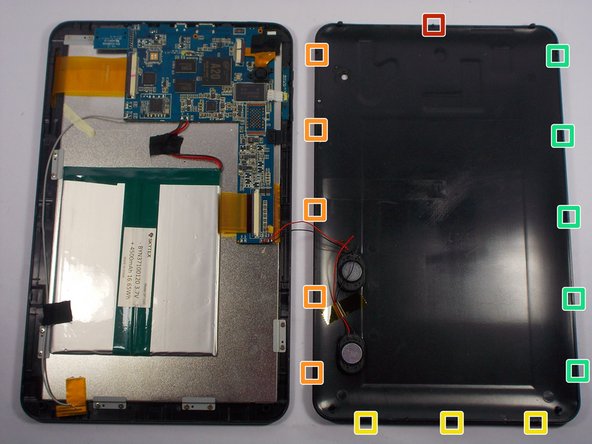
By the end of the guide the back panel will be separated from your device.
Cosa ti serve
-
-
Prior to any repairs make sure that you are familiar with the device as well as the location of its buttons and ports.
-
-
-
Insert the plastic opening tool between the bottom seam of the back panel and the micro SD port. The tool's edge should point toward the rear panel to prevent any scratching or damage.
-
Follow up with the plastic opening tool, releasing the clips as you go all the way around the device.
-
-


To reassemble your device, follow these instructions in reverse order.
To reassemble your device, follow these instructions in reverse order.
Annulla: non ho completato questa guida.
Un'altra persona ha completato questa guida.
Team

UMass Dartmouth, Team 1-6, Miles Spring 2015 Membro di UMass Dartmouth, Team 1-6, Miles Spring 2015
UMASSD-MILES-S15S1G6
4 Membri
8 Guide realizzate