Salta al contenuto principale

SHARP EL-W53XG WriteView Battery Replacement

Cosa ti serve

  1. SHARP EL-W53XG WriteView  Battery Replacement, Battery: passo 1, immagine 1 di 2 SHARP EL-W53XG WriteView  Battery Replacement, Battery: passo 1, immagine 2 di 2
    • Turn off the calculator by pressing both the [2NDF ] and [ON] buttons at the same time.

  2. SHARP EL-W53XG WriteView  Battery Replacement: passo 2, immagine 1 di 1
    • Flip the calculator so that the battery cover is facing you, and it will be easy to remove.

  3. SHARP EL-W53XG WriteView  Battery Replacement: passo 3, immagine 1 di 2 SHARP EL-W53XG WriteView  Battery Replacement: passo 3, immagine 2 di 2
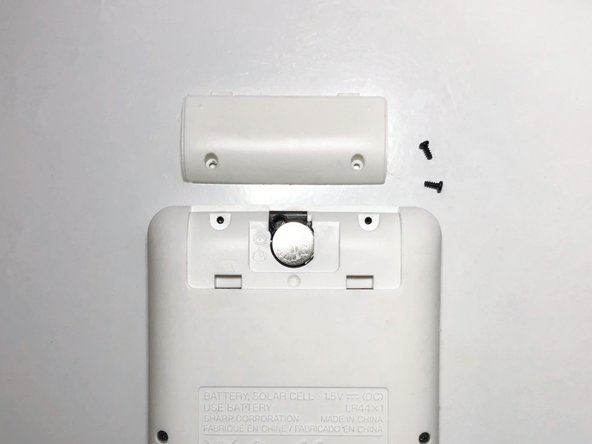
    • Remove the two screws securing the battery cover with the Tri-point #000 screwdriver.

    • Remove the battery cover.

    • Make sure not to remove the other screws on the calculator, just the two screws on the battery cover.

  4. SHARP EL-W53XG WriteView  Battery Replacement: passo 4, immagine 1 di 2 SHARP EL-W53XG WriteView  Battery Replacement: passo 4, immagine 2 di 2
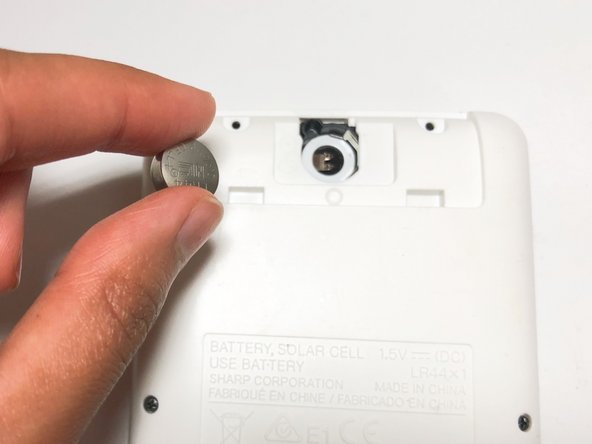
    • Remove the worn-out LR44 battery inside using a spudger.

  5. SHARP EL-W53XG WriteView  Battery Replacement: passo 5, immagine 1 di 1
    • Gently insert the new LR44 battery in the empty battery slot.

  6. SHARP EL-W53XG WriteView  Battery Replacement: passo 6, immagine 1 di 1
    • Place and screw the battery cover on using the Tri-point #000 screwdriver.

    • Tightly screw the battery cover to prevent losing screws.

Conclusione

To reassemble your device, follow these instructions in reverse order.

Faduma Hagi

Membro da: 09/14/21

133 Reputazione

1 Guida realizzata

Team

0 Commenti

Aggiungi Commento

Visualizza Statistiche:

Ultime 24 Ore: 1

Ultimi 7 Giorni: 11

Ultimi 30 Giorni: 43

Tutti i Tempi: 1,449