Questa versione può contenere modifiche errate. Passa all'ultima istantanea verificata.
Cosa ti serve
-
Questo passaggio è privo di traduzione. Aiuta a tradurlo
-
Scratch off the right-hand side of the sticker at the center of the bottom case using the spudger until the screw is visible.
-
Remove this screw with the Phillips #000 screwdriver.
-
-
Questo passaggio è privo di traduzione. Aiuta a tradurlo
-
Remove the two visible screws on the bottom with the Phillips #000 screwdriver.
-
-
Questo passaggio è privo di traduzione. Aiuta a tradurlo
-
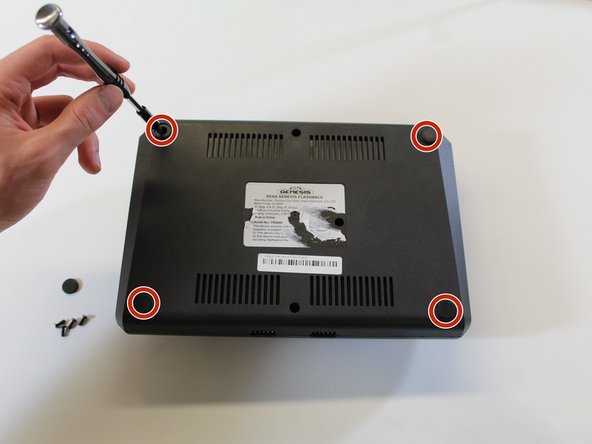
Use your fingers to peel off the four corner rubber feet on the bottom.
-
Use the Phillips #000 screwdriver to remove the four screws beneath the rubber feet.
-
-
-
Questo passaggio è privo di traduzione. Aiuta a tradurlo
-
Flip the case to its upright position.
-
Place one hand on the bottom plate of the case and one on the top plate. Gently pull apart the two plates by tilting the top plate about the front of the device. Treat the front of the device as a hinge.
-
Remove the back cover from the device.
-
-
Questo passaggio è privo di traduzione. Aiuta a tradurlo
-
Unscrew the LED board on the inside of the top plate with the Phillips #000 screwdriver.
-
-
Questo passaggio è privo di traduzione. Aiuta a tradurlo
-
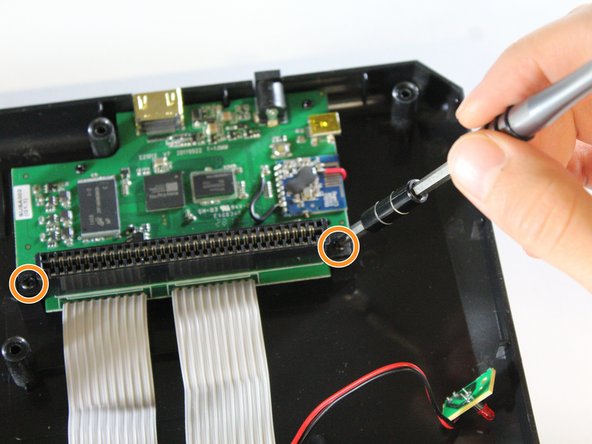
Use the Phillips #000 screwdriver to remove the five screws circled in the provided picture.
-
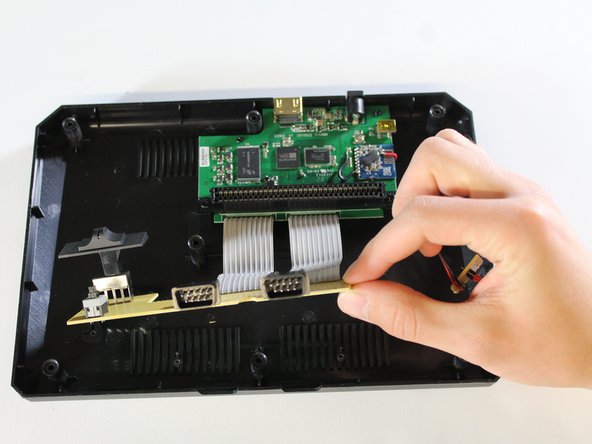
The tan board can now detach from the rest of the case, as pictured, but you can feel free to leave it in place for now.
-
-
Questo passaggio è privo di traduzione. Aiuta a tradurlo
-
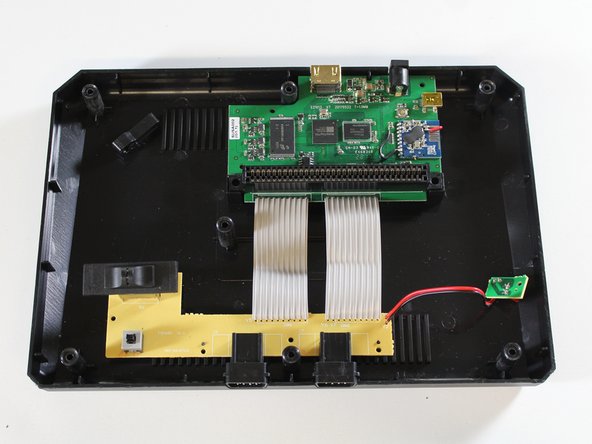
Remove the smaller screws located on the green motherboard with the Phillips #000 screwdriver.
-
Remove the two larger screws holding down the game cartridge slot with the Phillips #1 screwdriver.
-
-
Questo passaggio è privo di traduzione. Aiuta a tradurlo
-
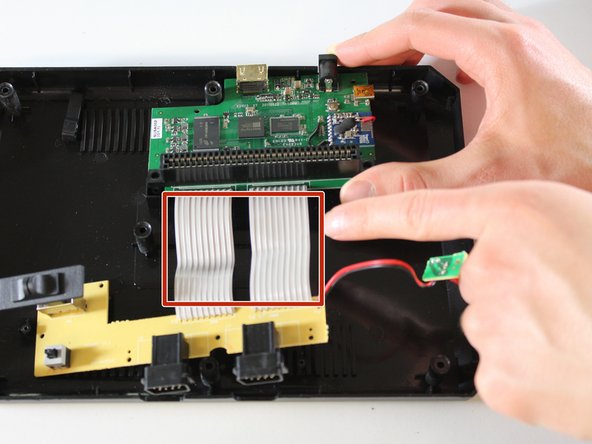
Gently remove the motherboard and the connected tan power switch board from the bottom plate.
-


Annulla: non ho completato questa guida.
Un'altra persona ha completato questa guida.
Team

Cal Poly, Team S24-G12, Maness Spring 2018 Membro di Cal Poly, Team S24-G12, Maness Spring 2018
CPSU-MANESS-S18S24G12
4 Membri
10 Guide realizzate
Un commento
Gday!
I recived a Sega HD Flashback 85 for Xmax. When I turned ON the game I have sound on the main menu but not when I played the game.
I went on the at@game to download there firware for the good console since my uptade I don’t have any video game anymore. I rename the file name on my SD Card like the instruction with anysucces. When I installed the SD card with the last firware and turn ON the console it update for ever without rest upload and turn ON the new update.
ERIC GUAY