Salta al contenuto principale

Ryobi Compact 18 Volt Hammer Drill P214 Trigger Replacement

Cosa ti serve

  1. Ryobi Compact 18 Volt Hammer Drill P214 Trigger Replacement, Battery: passo 1, immagine 1 di 3 Ryobi Compact 18 Volt Hammer Drill P214 Trigger Replacement, Battery: passo 1, immagine 2 di 3 Ryobi Compact 18 Volt Hammer Drill P214 Trigger Replacement, Battery: passo 1, immagine 3 di 3
    • Detach the battery unit from the drill body and pull the battery outwards.

    • If the battery doesn't disconnect easily, gently wiggle the battery back and forth until it comes out.

  2. Ryobi Compact 18 Volt Hammer Drill P214 Trigger Replacement, Housing Assembly: passo 2, immagine 1 di 1
    • Remove ten 13.5 mm screws from the drill casing using a Phillips #2 screwdriver to gain access to the interior.

  3. Ryobi Compact 18 Volt Hammer Drill P214 Trigger Replacement: passo 3, immagine 1 di 3 Ryobi Compact 18 Volt Hammer Drill P214 Trigger Replacement: passo 3, immagine 2 di 3 Ryobi Compact 18 Volt Hammer Drill P214 Trigger Replacement: passo 3, immagine 3 di 3
    • Grab the sides of the housing and pull straight up until the housing pulls away revealing the inside assembly.

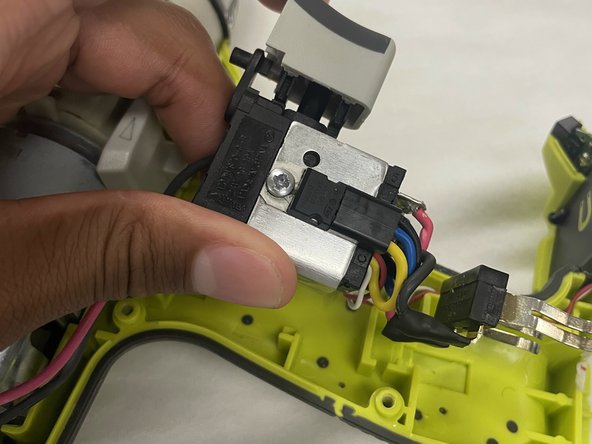
  4. Ryobi Compact 18 Volt Hammer Drill P214 Trigger Replacement, Trigger: passo 4, immagine 1 di 3 Ryobi Compact 18 Volt Hammer Drill P214 Trigger Replacement, Trigger: passo 4, immagine 2 di 3 Ryobi Compact 18 Volt Hammer Drill P214 Trigger Replacement, Trigger: passo 4, immagine 3 di 3
    • Gently lift the battery clip to gain access to the trigger.

    • You can now clean any debris blocking the trigger.

Conclusione

To reassemble your device, follow these instructions in reverse order.

0 Commenti

Aggiungi Commento

Visualizza Statistiche:

Ultime 24 Ore: 0

Ultimi 7 Giorni: 1

Ultimi 30 Giorni: 9

Tutti i Tempi: 208