Questa versione può contenere modifiche errate. Passa all'ultima istantanea verificata.
Cosa ti serve
-
Questo passaggio è privo di traduzione. Aiuta a tradurlo
-
Turn the toaster over and remove the rubber bumper feet.
-
-
Questo passaggio è privo di traduzione. Aiuta a tradurlo
-
Use a Phillips #2 screwdriver to remove four 12 mm screws at the base of the toaster shell.
-
-
Questo passaggio è privo di traduzione. Aiuta a tradurlo
-
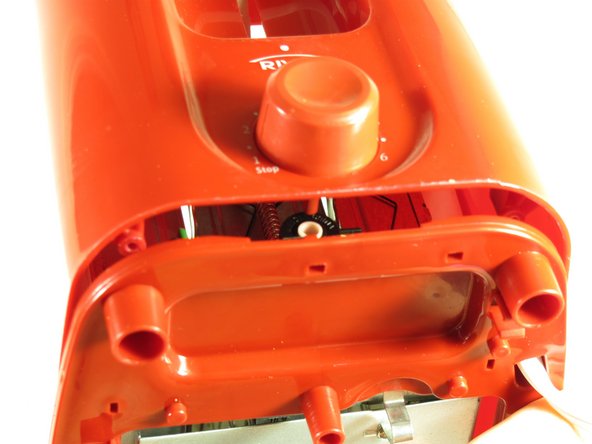
With the dial facing you, push the toaster base up and away until the base is just over the lip of the shell. This will disconnect the browning dial from the rest of the toaster.
-
-
Questo passaggio è privo di traduzione. Aiuta a tradurlo
-
Reach into the shell and grab the back white part of the lever.
-
Hold the grey lever with both your index finger and middle finger. Next, pull it.
-
Remove the shell.
-
-
Questo passaggio è privo di traduzione. Aiuta a tradurlo
-
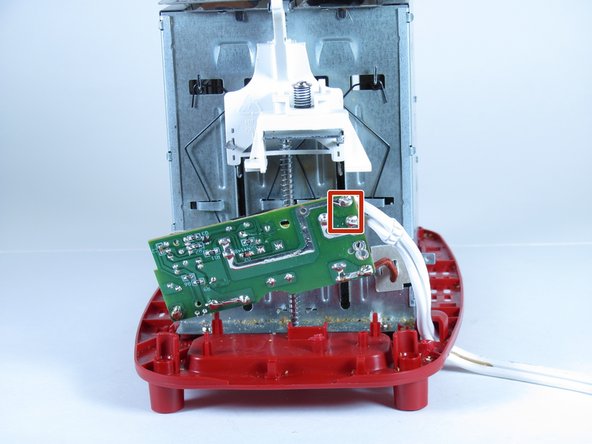
The power wire connects to the toaster in the area highlighted.
-
To free the wire, unscrew the two .5 inch screws, and remove the white brace.
-
-
Questo passaggio è privo di traduzione. Aiuta a tradurlo
-
To solder the the wire, the circuit board has to be released.
-
To do this, unscrew the .5 inch screw located in the middle of the board.
-
Slowly lift the board up off the toaster, making sure that the red pegs that hold the board in place do not break.
-
-
Questo passaggio è privo di traduzione. Aiuta a tradurlo
-
To reattach the wire, follow this solder guide.
-


Team

Cal Poly, Team 2-8, Propen Fall 2012 Membro di Cal Poly, Team 2-8, Propen Fall 2012
CPSU-PROPEN-F12S2G8
5 Membri
6 Guide realizzate