Questa versione può contenere modifiche errate. Passa all'ultima istantanea verificata.
Cosa ti serve
-
Questo passaggio è privo di traduzione. Aiuta a tradurlo
-
Using a toothbrush, clean the entire cleat, especially where the shoe is ripped.
-
-
Questo passaggio è privo di traduzione. Aiuta a tradurlo
-
Squeeze out a good amount of the Shoe Goo onto the piece of printer paper.
-
-
Questo passaggio è privo di traduzione. Aiuta a tradurlo
-
Using the paint brush, paint the glue in the opening of the ripped cleat and between the leather and the sole of the cleat.
-
Let dry for 3 minutes and repeat the step again.
-
-
-
Questo passaggio è privo di traduzione. Aiuta a tradurlo
-
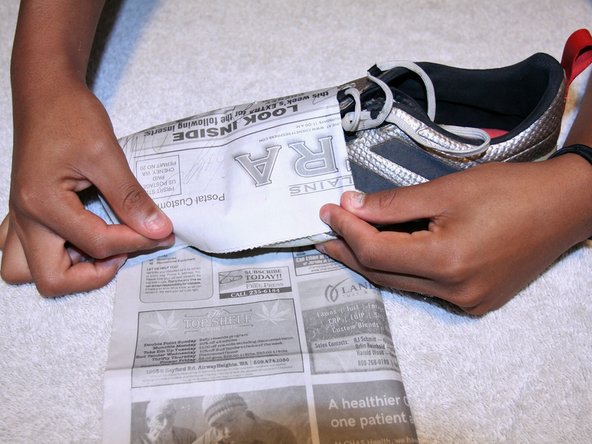
Press the cleat together firmly and wrap a few pieces of newspaper around the sole of the shoe.
-
-
Questo passaggio è privo di traduzione. Aiuta a tradurlo
-
Wrap the adhesive tape around the newspaper tightly to keep pressure on the tear until the glue dries.
-
-
Questo passaggio è privo di traduzione. Aiuta a tradurlo
-
Use a hair dryer to slowly warm the newspaper surrounding the tear. Do this for 10 minutes, then let the shoe rest.
-
-
Questo passaggio è privo di traduzione. Aiuta a tradurlo
-
After 24 hours, remove the tape and newspaper.
-
Then once the tape and newspaper are removed, peel off any excess glue that is stuck around the area of the rip.
-


Annulla: non ho completato questa guida.
Altre 2 persone hanno completato questa guida.

Team

Eastern Washington University, Team S2-G1, Crane Summer 2018 Membro di Eastern Washington University, Team S2-G1, Crane Summer 2018
EWU-CRANE-SU18S2G1
4 Membri
4 Guide realizzate