Introduzione
Tired of continuously changing your planer cutter blades? Replace your cutter head with a Byrd SHELIX spiral cutter head with 72 carbide mini blades that each offer four cutting surfaces before they need to be replaced.
Cosa ti serve
-
-
Ridgid planer from Home Depot purchased around 2007.
-
-
-
Remove four M5 x 16mm hex head screws using a 3mm allen wrench.
-
Loosen (or carefully remove) 4 phillips screws located under top cover holding top cover to side panels. Once loosed, pull edges of side panels out to remove each end of top cover.
-
Carefully grab the cover around outside edge to pop cover off frame.
-
-
-
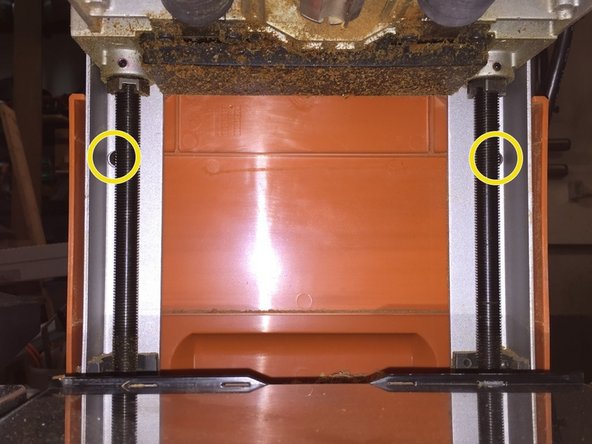
Remove four phillips head screws from each side cover. They are located behind the frame posts. The top two are near the top. Crank the cutter assembly up towards the top to get to the lower ones. After removal, crank it back down towards middle of cage assembly.
-
A magnetized screw driver helps.
-
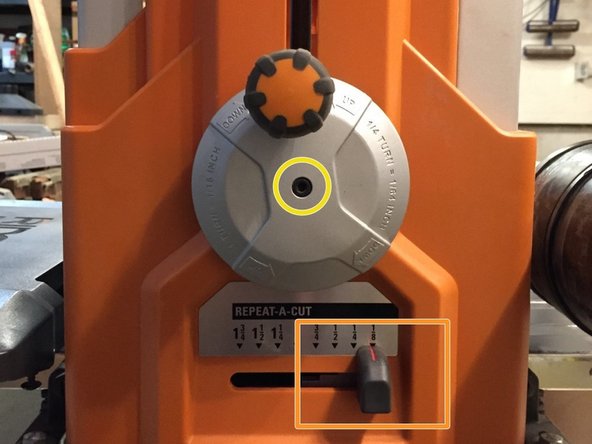
Remove M5 x 16mm screw with lock washer from center of handwheel using 3mm allen wrench. Pull off "Repeat-a-Cut" knob.
-
-
-
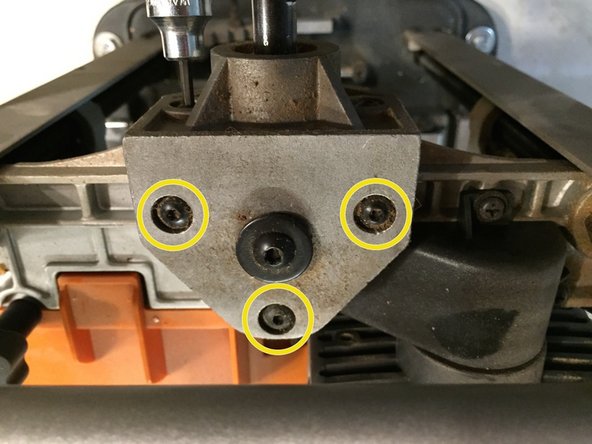
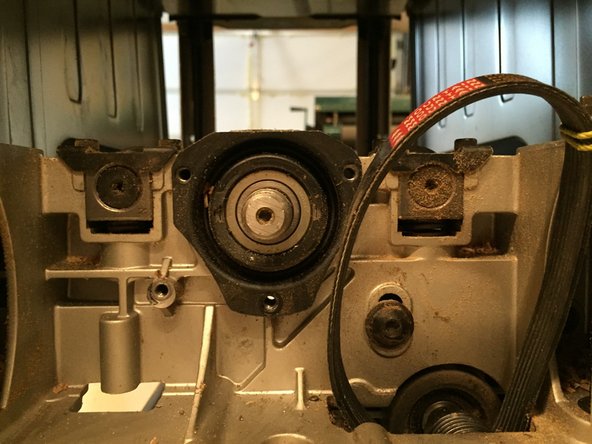
The elevating mechanism on the crank side needs to be removed to get to the drive pulley.
-
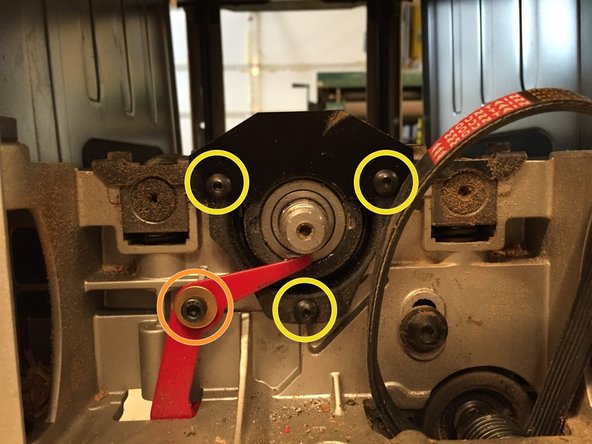
Remove five M5 x 16MM screws, two on the front and three from the top. Leave center screw along. At this point the assembly can't be removed.
-
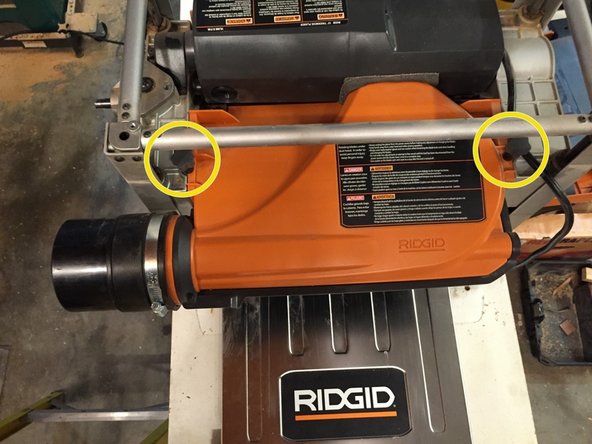
Now is a good time to remove the dust collector hood by removing two knobs and lifting the hood out of the way.
-
WARNING: Removing the dust collector hood exposes the current cutter blades.
-
If planer is mounted to a stand, remove mounting bolts and lay planer on its side.
-
-
-
-
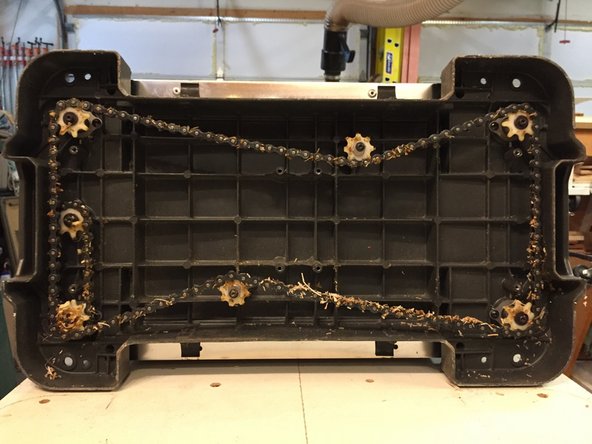
Remove eight M5 x 16mm screws using a 3mm allen wrench. Gear covers remove easily.
-
Now is a good time to clean the gears and chain.
-
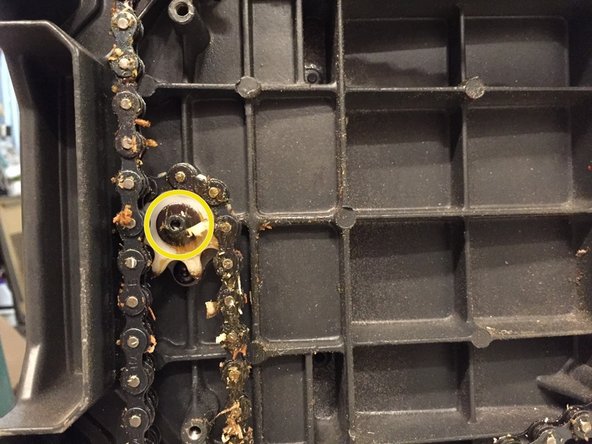
Remove one M5 x 16mm screw from the elevation sprocket using a 3mm allen wrench. Temporarily put the handwheel back on, providing leverage to unscrew screw. Once removed, the elevating shaft can be carefully pulled from the gear.
-
There are two washers, one behind the gear and one that goes on top of the gear before the screw is replaced. Secure the gear in place with string or tie wrap, fishing it through the shaft hole so you don't lose the gear.
-
-
-
Flip planer onto its top.
-
It's a good idea to clamp it to your stand or work surface before attempting to remove nut.
-
Place a piece of wood on the cutter assembly to lock it in place. The existing cylinder lock doesn't provide enough holding power.
-
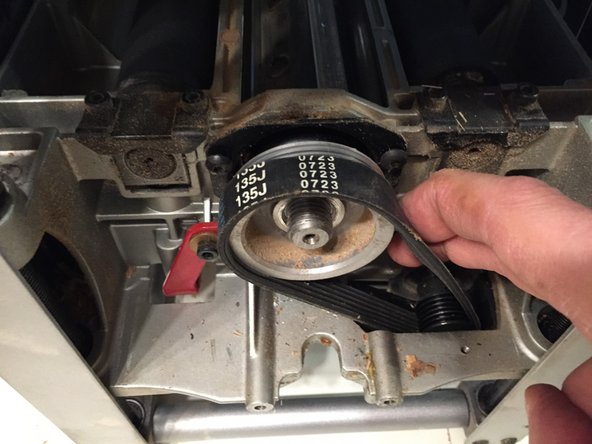
Using both hands, gently work off the drive belt being careful not to pinch your fingers. Initially push down on the back side of the belt with your right hand while carefully twisting the pulley with your left. Once you get half way, move your right hand to the front of the pulley and press down. Take your time.
-
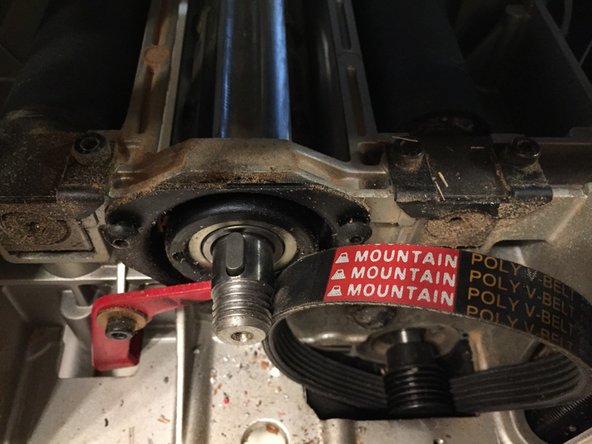
Using a 22mm socket wrench, holding it with both hands so you don't slip, and gently unscrew the drive nut. It only needs a short twist to break the torque then can be unscrewed the rest of the way by hand.
-
WARNING: The drive nut is a left-hand thread so you'll need to use the tightening setup on your wrench (turn clockwise).
-
Pull off the pulley.
-
-
-
Pull pulley off carefully and remove the shaft key.
-
Remove three M5 x 16mm screws using a 3mm allen wrench. The belt dust shield plate is attached with the top two screws.
-
Remove one M5 x 16mm screw from the cutterhead lock lever with a 4mm allen wrench. The lock assembly with not be used with the new cutter head.
-
-
-
At this point, the cutterhead assembly might just pull out. It didn't on mine so there are a few extra steps necessary.
-
Using whatever short flat-bladed screwdriver you have, carefully pry around the bearing retainer until it finally comes off.
-
-
-
Go to other end of planer and remove gear box cover. It simply lifts off.
-
Tie drive chains together so everything stays in same location. Remove three retaining rings with a retaining ring plier (easiest and safest way to do it, buy one at your local hardware store).
-
Pull off two sets of chain and sprockets and carefully lay aside.
-
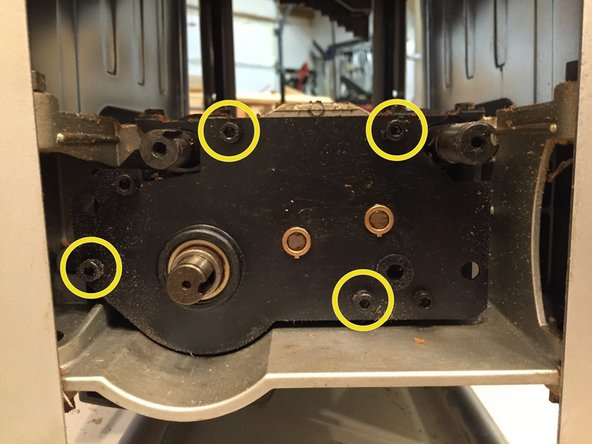
Remove four M5 x 35mm screws with a 4mm allen wrench. Leave the remaining two bolts in place.
-
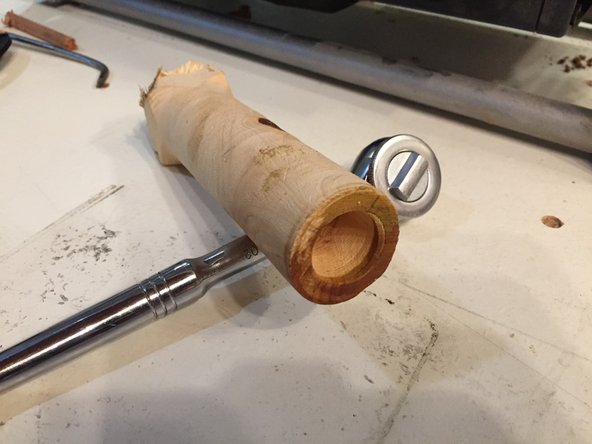
Using a bearing removal tool, drive the bearing out of its socket. This will drive the bearing out of the other end so stop when both bearings are loose.
-
My turned bearing removal tool. It worked fine.
-
With proper gloves to protect your hands, carefully remove the cutterhead assembly.
-
-
-
Using two flat head screwdrivers, carefully press against the bearing to work it off.
-
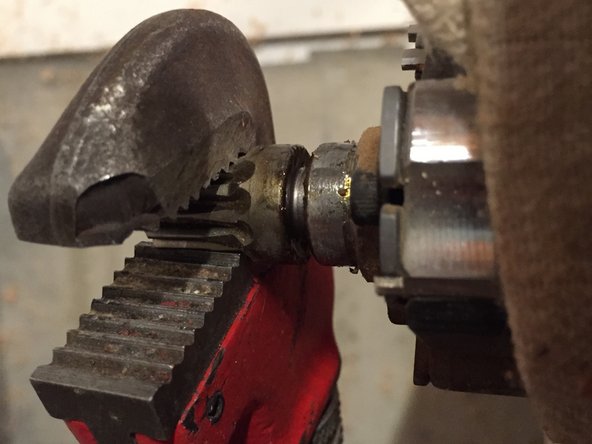
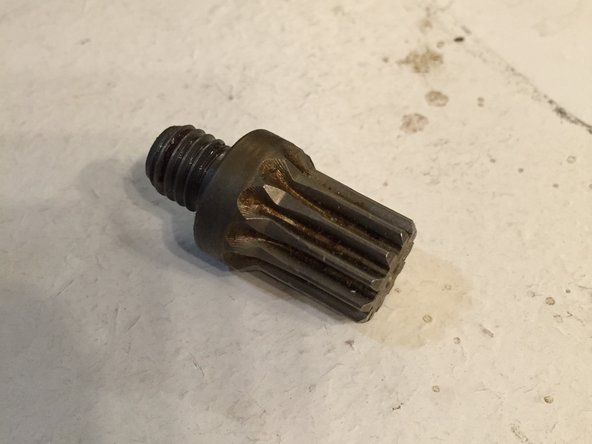
Remove the pinion gear. I put my cutter assembly in a wood vice then carefully used a small pipe wrench to unscrew the gear. It only took a little pressure to get the gear to start unscrewing. If it doesn't come off easily, try WD-40, wait a bit, then try unscrewing again.
-
Clean the pinion gear and screw it onto the new cutter.
-
Using heavy gloves, carefully insert the cutter into the housing from the drive belt side. If it doesn't slide easily into the bearing seats, use a soft head mallet to drive it in. Screw the bearing retainer onto the bearing and housing to seat the bearing properly.
-
-
-
New, spiral cutter successfully installed.
-
Each cutter can be rotated three times, producing a new, sharp edge. Clean the cutter seat and tighten to 45 inch pounds with a Torx TP25 bit (3/8" socket version usually included with cutter).
-


To reassemble your device, follow these instructions in reverse order.
To reassemble your device, follow these instructions in reverse order.