Salta al contenuto principale

Ridgid GEN5X R8611506 Gears Replacement

Cosa ti serve

  1. Ridgid GEN5X R8611506 Gears Replacement, Outer Case: passo 1, immagine 1 di 2 Ridgid GEN5X R8611506 Gears Replacement, Outer Case: passo 1, immagine 2 di 2
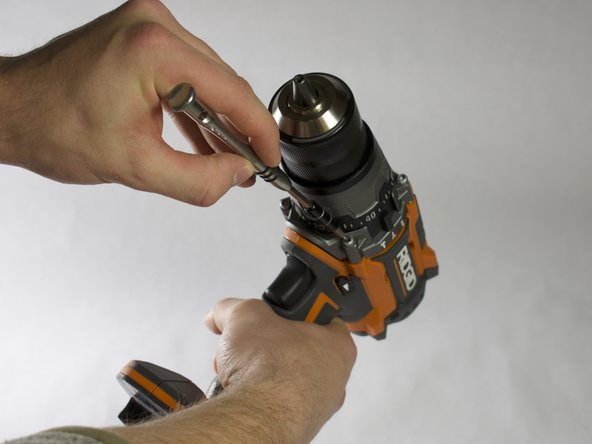
    • Orient the drill to have the side with the screws facing up.

    • Using the Torx T10 screwdriver, remove the eight 4.0mm screws from the face of the drill.

  2. Ridgid GEN5X R8611506 Gears Replacement: passo 2, immagine 1 di 3 Ridgid GEN5X R8611506 Gears Replacement: passo 2, immagine 2 di 3 Ridgid GEN5X R8611506 Gears Replacement: passo 2, immagine 3 di 3
    • Orient the drill to where the back is facing up.

    • Using a Torx T10 screwdriver, remove the four 6.0mm screws that attach the back piece to the drill.

    • Remove the back piece of the drill using the iFixit opening tool.

  3. Ridgid GEN5X R8611506 Gears Replacement: passo 3, immagine 1 di 2 Ridgid GEN5X R8611506 Gears Replacement: passo 3, immagine 2 di 2
    • Orient the drill to where the chuck is facing up.

    • Using the Torx T15 screwdriver, remove the four 8.0mm screws from the front of the drill.

  4. Ridgid GEN5X R8611506 Gears Replacement: passo 4, immagine 1 di 2 Ridgid GEN5X R8611506 Gears Replacement: passo 4, immagine 2 di 2
    • Orient the drill so the side with the screw holes is facing up.

    • Use a plastic opening tool to gently pry the face off of the drill.

    • Remove the face completely from the drill.

  5. Ridgid GEN5X R8611506 Gears Replacement, Speed Selector Switch: passo 5, immagine 1 di 1
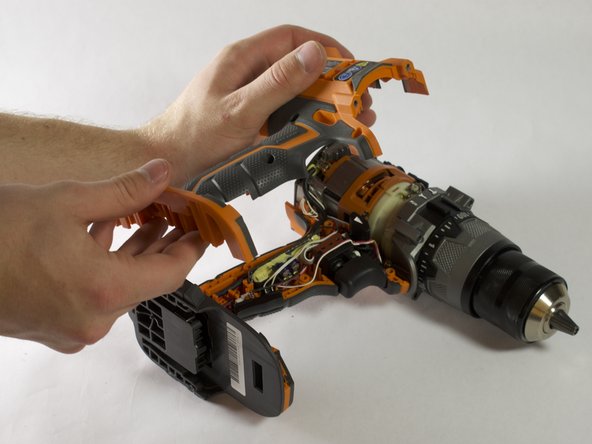
    • Locate the selector switch.

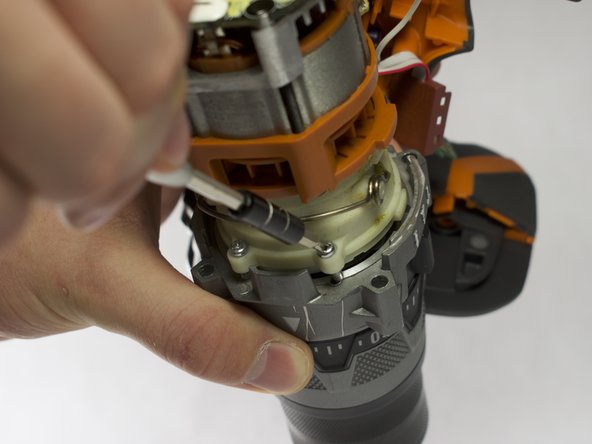
    • Unhook the selector switch from the small silver wire located near the top of the drill.

  6. Ridgid GEN5X R8611506 Gears Replacement: passo 6, immagine 1 di 1
    • Remove the speed selector switch from the case housing.

  7. Ridgid GEN5X R8611506 Gears Replacement, Gears: passo 7, immagine 1 di 1
    • Pull the motor and chuck out of the drill casing.

  8. Ridgid GEN5X R8611506 Gears Replacement: passo 8, immagine 1 di 2 Ridgid GEN5X R8611506 Gears Replacement: passo 8, immagine 2 di 2
    • Orient the motor and chuck to where the back of the motor is facing up.

    • Using a Phillips #0 screwdriver, remove the four 5.0mm screws that connect the motor to the chuck.

  9. Ridgid GEN5X R8611506 Gears Replacement: passo 9, immagine 1 di 2 Ridgid GEN5X R8611506 Gears Replacement: passo 9, immagine 2 di 2
    • Pull apart the motor from the chuck to expose the gears.

    • Remove the four gears located within the motor/chuck housing.

Conclusione

To reassemble your device, follow these instructions in reverse order.

Altre 2 persone hanno completato questa guida.

0 Commenti

Aggiungi Commento

Visualizza Statistiche:

Ultime 24 Ore: 0

Ultimi 7 Giorni: 2

Ultimi 30 Giorni: 7

Tutti i Tempi: 670