Salta al contenuto principale

Retro-Bit Retro Duo Controller Button and Pad Replacement.

Cosa ti serve

  1. Retro-Bit Retro Duo Controller Button and Pad Replacement., Buttons and Pads in Controller(s): passo 1, immagine 1 di 3 Retro-Bit Retro Duo Controller Button and Pad Replacement., Buttons and Pads in Controller(s): passo 1, immagine 2 di 3 Retro-Bit Retro Duo Controller Button and Pad Replacement., Buttons and Pads in Controller(s): passo 1, immagine 3 di 3
    • With the controller on its face, remove the five 6 mm Phillips #1 screws.

    • After screw removal, carefully lift the controller casing.

  2. Retro-Bit Retro Duo Controller Button and Pad Replacement.: passo 2, immagine 1 di 3 Retro-Bit Retro Duo Controller Button and Pad Replacement.: passo 2, immagine 2 di 3 Retro-Bit Retro Duo Controller Button and Pad Replacement.: passo 2, immagine 3 di 3
    • Pinch the top and bottom of the shoulder pads, then lift out.

    • There are small elastic pads below each shoulder pad. Replace these if they are not functioning correctly.

  3. Retro-Bit Retro Duo Controller Button and Pad Replacement.: passo 3, immagine 1 di 3 Retro-Bit Retro Duo Controller Button and Pad Replacement.: passo 3, immagine 2 di 3 Retro-Bit Retro Duo Controller Button and Pad Replacement.: passo 3, immagine 3 di 3
    • Carefully lift the circuit board from the controller case.

  4. Retro-Bit Retro Duo Controller Button and Pad Replacement.: passo 4, immagine 1 di 3 Retro-Bit Retro Duo Controller Button and Pad Replacement.: passo 4, immagine 2 di 3 Retro-Bit Retro Duo Controller Button and Pad Replacement.: passo 4, immagine 3 di 3
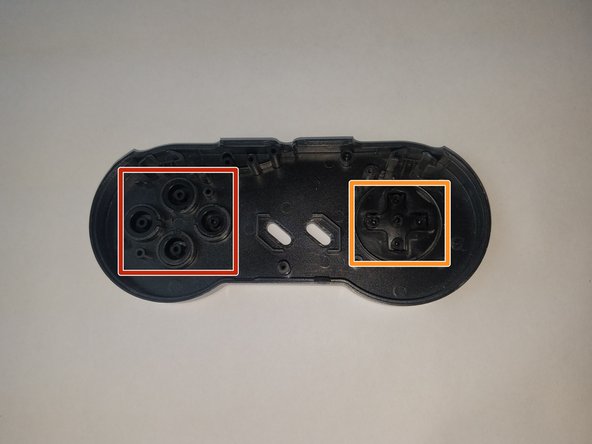
    • To replace the action button pad, lift this part out.

    • Lift the Select and Start button pad.

    • If replacing the D-Pad, lift this pad.

    • Pinch and lift the shoulder button pads.

  5. Retro-Bit Retro Duo Controller Button and Pad Replacement.: passo 5, immagine 1 di 3 Retro-Bit Retro Duo Controller Button and Pad Replacement.: passo 5, immagine 2 di 3 Retro-Bit Retro Duo Controller Button and Pad Replacement.: passo 5, immagine 3 di 3
    • Support the controller face and push buttons toward the inner case.

    • Use care. The buttons have a tiny tab to keep them in place.

    • Support the controller face and push the D-Pad toward the inner case.

Conclusione

To reassemble your device, follow these instructions in reverse order.

Evelyn

Membro da: 09/25/17

223 Reputazione

2 Guide realizzate

Team

USF Tampa, Team S4-G4, Eyestone Fall 2017 Membro di USF Tampa, Team S4-G4, Eyestone Fall 2017

USFT-EYESTONE-F17S4G4

3 Membri

10 Guide realizzate

0 Commenti

Aggiungi Commento

Visualizza Statistiche:

Ultime 24 Ore: 0

Ultimi 7 Giorni: 2

Ultimi 30 Giorni: 6

Tutti i Tempi: 1,169