Salta al contenuto principale

Respironics REMstar Plus M Series Blower Fan Replacement

Cosa ti serve

  1. Respironics REMstar Plus M Series Blower Fan Replacement, Blower Fan: passo 1, immagine 1 di 3 Respironics REMstar Plus M Series Blower Fan Replacement, Blower Fan: passo 1, immagine 2 di 3 Respironics REMstar Plus M Series Blower Fan Replacement, Blower Fan: passo 1, immagine 3 di 3
    • Push upwards at the bottom of the control module to separate it from the two locking pegs on the base plate.

    • Pull the control module down to disconnect and remove it from the base plate.

  2. Respironics REMstar Plus M Series Blower Fan Replacement: passo 2, immagine 1 di 3 Respironics REMstar Plus M Series Blower Fan Replacement: passo 2, immagine 2 di 3 Respironics REMstar Plus M Series Blower Fan Replacement: passo 2, immagine 3 di 3
    • Place the control module so the labels are facing upright.

    • Use a TR9 Torx screwdriver to remove the top screw.

    • Remove the filter housing from the control module.

  3. Respironics REMstar Plus M Series Blower Fan Replacement: passo 3, immagine 1 di 2 Respironics REMstar Plus M Series Blower Fan Replacement: passo 3, immagine 2 di 2
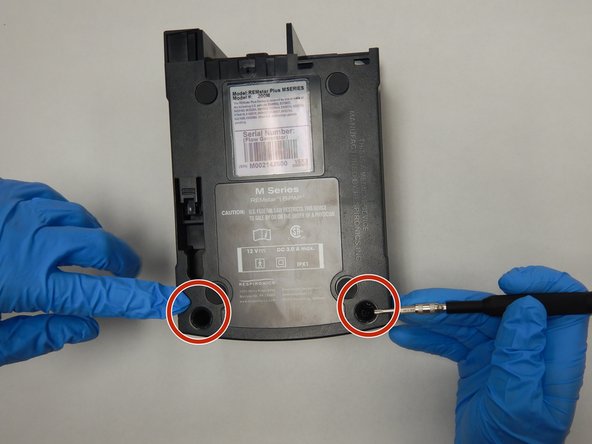
    • Use a TR15 Torx screwdriver to remove the three screws from the bottom of the control module.

    • An extension may be required to reach the two screws at the bottom. The iFixit toolkit flexible extension does not fit in the hole. The 4.0 mm socket bit can be used in place of the extension to provide the extra length necessary to remove the screws.

  4. Respironics REMstar Plus M Series Blower Fan Replacement: passo 4, immagine 1 di 3 Respironics REMstar Plus M Series Blower Fan Replacement: passo 4, immagine 2 di 3 Respironics REMstar Plus M Series Blower Fan Replacement: passo 4, immagine 3 di 3
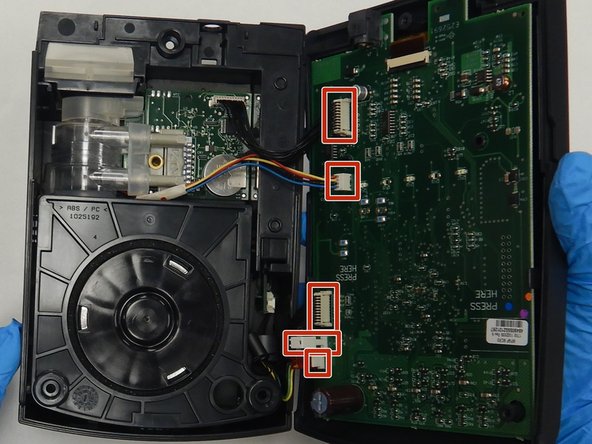
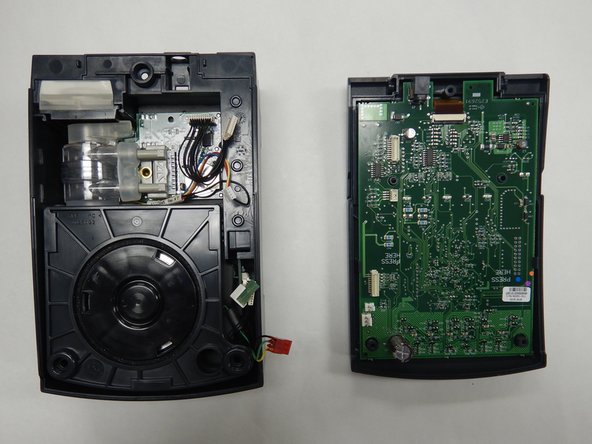
    • Place the control module face up.

    • Open the face plate to the right.

    • Disconnect the 5 connectors along the left side of the control circuit board.

  5. Respironics REMstar Plus M Series Blower Fan Replacement: passo 5, immagine 1 di 3 Respironics REMstar Plus M Series Blower Fan Replacement: passo 5, immagine 2 di 3 Respironics REMstar Plus M Series Blower Fan Replacement: passo 5, immagine 3 di 3
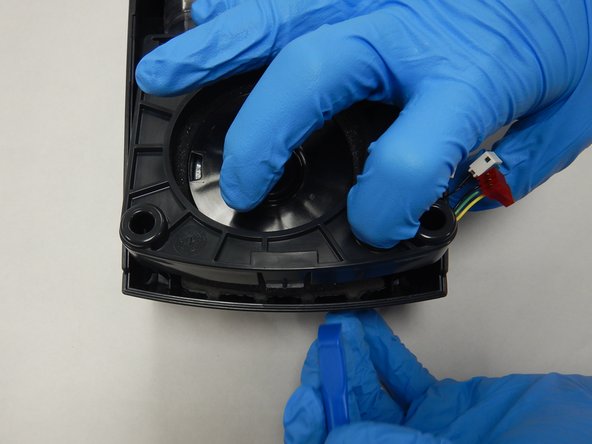
    • Use the plastic opening tool as a lever to release the plastic motor frame from the retaining tab at the bottom of the module.

    • With the tab released, pivot the plastic frame up and away from the control module.

    • There are three total retaining tabs. The two on either side of the motor frame will release when pivoting the frame upward.

    • The small hole in the frame provides an excellent point of contact to aid in removal.

  6. Respironics REMstar Plus M Series Blower Fan Replacement: passo 6, immagine 1 di 3 Respironics REMstar Plus M Series Blower Fan Replacement: passo 6, immagine 2 di 3 Respironics REMstar Plus M Series Blower Fan Replacement: passo 6, immagine 3 di 3
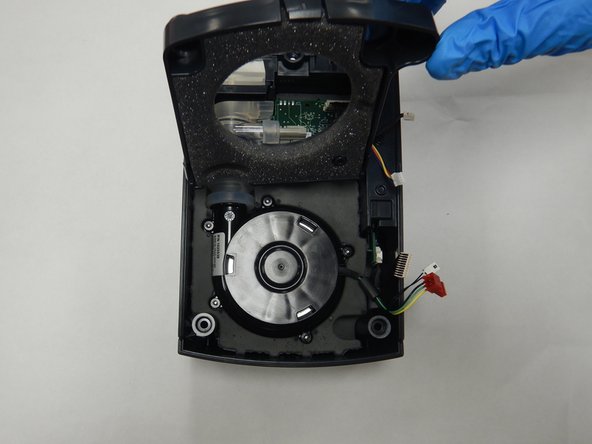
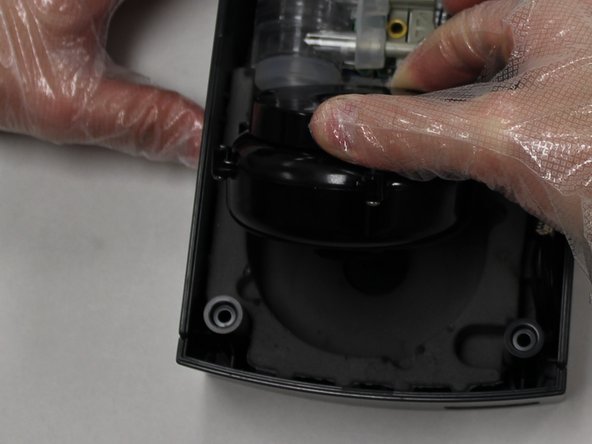
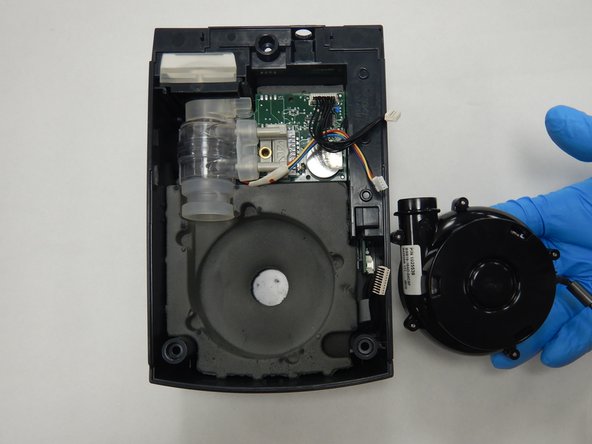
    • Pivot the blower motor upwards to disconnect it from the pipe connector.

Conclusione

To reassemble your device, follow these instructions in reverse order.

Altre 4 persone hanno completato questa guida.

0 Commenti

Aggiungi Commento

Visualizza Statistiche:

Ultime 24 Ore: 0

Ultimi 7 Giorni: 8

Ultimi 30 Giorni: 30

Tutti i Tempi: 2,054