Questa versione può contenere modifiche errate. Passa all'ultima istantanea verificata.
Cosa ti serve
-
Questo passaggio è privo di traduzione. Aiuta a tradurlo
-
Flip the console over on its back.
-
Take note of your model number, in case replacement parts are needed.
-
-
Questo passaggio è privo di traduzione. Aiuta a tradurlo
-
Remove the expansion bay by applying pressure to the small clip on the expansion bay while prying it away from the console.
-
-
-
Individua e rimuovi le quattro viti nere Phillips #02 da 12 mm dai lati inferiori della console.
-
-
-
Questo passaggio è privo di traduzione. Aiuta a tradurlo
-
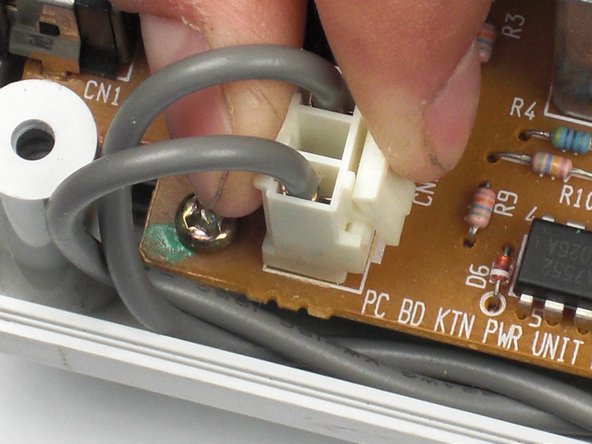
Remove the white female pin header by clamping the clip and pulling it up gently from the power board.
-
-
Questo passaggio è privo di traduzione. Aiuta a tradurlo
-
Remove the two 10mm Philips #02 screws that are fastened to the power block.
-
-
Questo passaggio è privo di traduzione. Aiuta a tradurlo
-
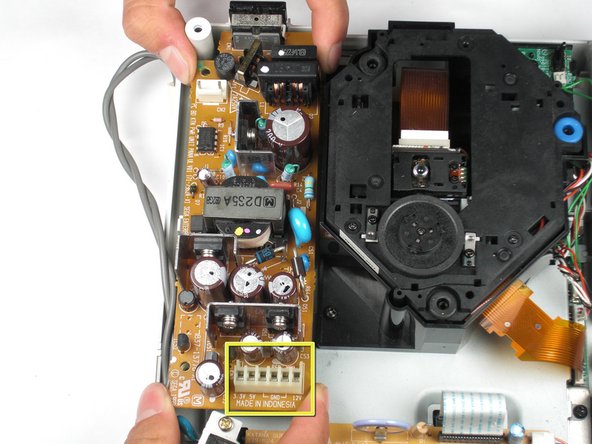
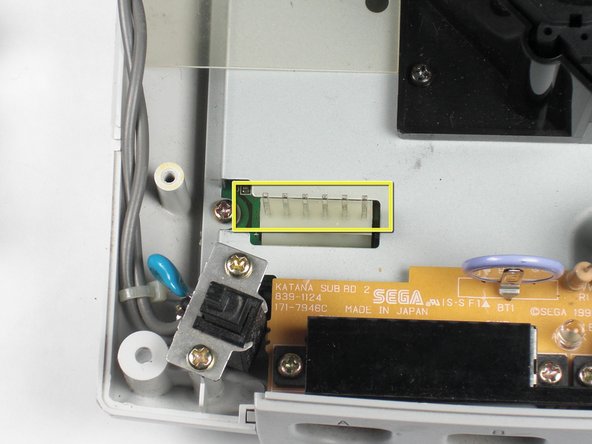
Do not bend the male pin header between the mounted head when you remove the power supply from the chassis.
-
Remove the power board by using both hands to gently lift the power board away from the console.
-
-
Questo passaggio è privo di traduzione. Aiuta a tradurlo
-
Remove the clear plastic film that is tucked between the power supply and the chassis.
-
Annulla: non ho completato questa guida.
Altre 8 persone hanno completato questa guida.
3 Commenti
All symptoms of dead PSU can be occuring, if by accident flat ribbon cable between motherboard and controller board is disconnected. Check that cable if both ends is firmly plugged.
Hello There!
i turn on my dreamcast, No video, GD don´t spin, but the orange led barely shine, this happened many years ago (2003) , i just bought another DC in those days because i was in a hurry to end Grandia 2, and now i still have the damaged console in my room and im wondering if it is possible to fix it ...thanks!


