Introduzione
Use this guide to replace the LCD.
Cosa ti serve
-
-
Okay, so here is Nikon Coolpix L20 purchased for $8.00. Only issue identified is an obviously cracked LCD screen
-
-
-
-
Open the battery cover.
-
Separate the rear cover from the front by simply gently pulling the two halves apart. You may have to use your fingernails to separate them. Start at the bottom side, by the AC Power cover. Work your way around the bottom.
-
Once the bottom part of the halves is released, gently pull the back cover in an upward motion. The top is secured by some tabs to the front part.
-
-
-
When you remove this screw, make sure that the shield plate on top of the bracket plate, is just slightly pushed out of the way. This will free the bracket plate.
-
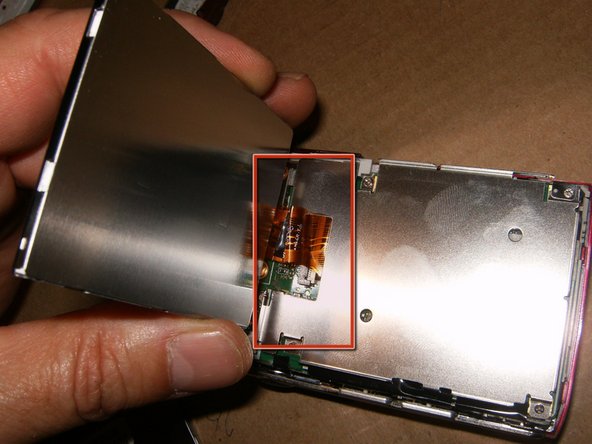
After the removal of the bracket plate, you have access to the connector. Move the white clip gently to the lift (upright) position, to free the cable.
-
The LCD should now easily separate from the logic board.
-


To reassemble your device, follow these instructions in reverse order.
To reassemble your device, follow these instructions in reverse order.
Annulla: non ho completato questa guida.
Altre 5 persone hanno completato questa guida.

Team

4 Commenti
Very good, I really appreciate it. Thank you.
where did you buy the replacement lcd? my l20 broke recently and i’m trying to fix it.
@katherinelam had to be either ebay or aliexpress. It's been to long ago to remember for sure.
Can confirm that these instructions also work for the Nikon Coolpix L24 model with one or two changes simply related to the amount of screws and the location of them on the casing of the camera. Other than that, just make sure that if your battery compartment does not slide open after you remove the casing or replace the casing then you need to slightly adjust the hinge pin to get it to work. You’ll have to do this with the back basing removed.