Salta al contenuto principale

Replacement of the W670SZQ1 BIOS Battery

Guida Archiviata
Questa guida è mantenuta solo per scopi storici. Usa la versione aggiornata della guida per eseguire la riparazione.

Cosa ti serve

  1. Replacement of the W670SZQ1 BIOS Battery, accumulator: passo 1, immagine 1 di 3 Replacement of the W670SZQ1 BIOS Battery, accumulator: passo 1, immagine 2 di 3 Replacement of the W670SZQ1 BIOS Battery, accumulator: passo 1, immagine 3 di 3
    • Open the latch of the accumulator on the left side.

    • Open the battery latch on the right side.

    • Remove the accumulator by simultaneously holding the right-hand latch open.

  2. Replacement of the W670SZQ1 BIOS Battery, Access to the most important components: passo 2, immagine 1 di 3 Replacement of the W670SZQ1 BIOS Battery, Access to the most important components: passo 2, immagine 2 di 3 Replacement of the W670SZQ1 BIOS Battery, Access to the most important components: passo 2, immagine 3 di 3
    • Use the Philips screwdriver to remove the two screws at the bottom of the cover.

    • Lift the cover at the bottom right with the iFixit Opening Tool

    • Lift the cover at the bottom left with the iFixit Opening Tool

    • Finally, remove the cover to gain access to the most important components.

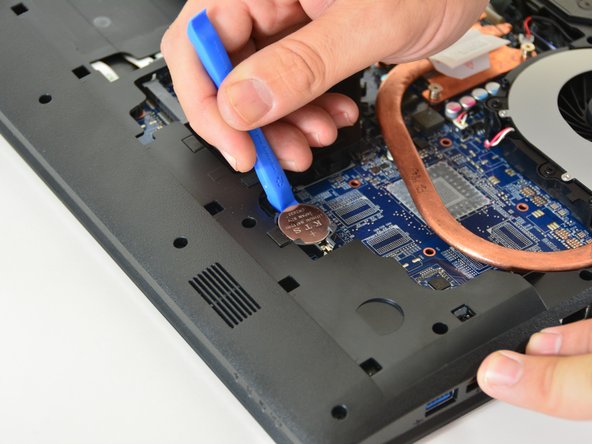
  3. Replacement of the W670SZQ1 BIOS Battery, BIOS battery: passo 3, immagine 1 di 1
    • Be careful removing the BIOS battery from its holder.

    • Please do not throw the battery in the garbage. In Switzerland, the electrical shops are obliged to accept all batteries and accumulators for disposal.

Conclusione

Replacing the W670SZQ1 BIOS Battery

Un ringraziamento speciale a questi traduttori:

de en

100%

Corey Meyer ci sta aiutando ad aggiustare il mondo! Vuoi partecipare?
Inizia a tradurre ›

Felice Suglia

Membro da: 06/15/13

30.884 Reputazione

264 Guide realizzate

0 Commenti

Aggiungi Commento

Visualizza Statistiche:

Ultime 24 Ore: 0

Ultimi 7 Giorni: 0

Ultimi 30 Giorni: 0

Tutti i Tempi: 68