Introduzione
In this guide, I’ll show you how to mend a seam that has come apart at one spot in a way that it’s invisible afterward. The technique is called a "ladder stitch" or "invisible stitch."
This technique is used when you can’t access the other side where the two pieces of fabric were originally sewn together. For example, you can use it to repair a lined jacket, a pillow, or a waistband.
Here, I’m closing the opening in the upper waistband of a pair of children’s pants, into which I’ve inserted an elastic band. (I accidentally sewed the waistband so that the insertion opening was on the outside.) To make it more visible, I’m using a contrasting thread; normally, I would use a color that matches the fabric. But even this thread won’t be visible later.
Cosa ti serve
-
-
Cut a piece of sewing thread and thread the needle. It's better to take a bit too much thread than too little.
-
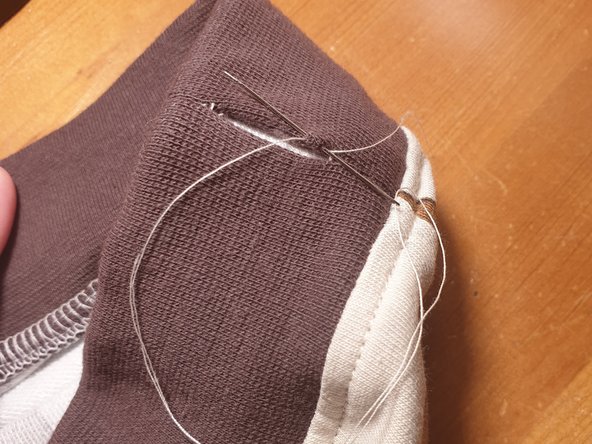
Insert the needle at the edge on one side of the opening, stitching in and out along the edge. The stitch should be 1-2 mm long.
-
Leave at least 5 cm of thread hanging.
-
Stitch again at the same entry point and come out at the same exit point.
-
Repeat this a second time, so you’ve sewn the same stitch a total of three times. This secures the thread so it won’t slip out.
-
I should have actually started a bit further to the right here, where the intact seam still is. In my case, it’s not a big deal, but you’ll get a cleaner seam if you secure the thread where the intact seam is.
-
-
-
Push the thread end into the opening so it’s no longer visible.
-
Start with the actual seam. First stitch:
-
Stitch into the opposite edge, making sure the entry point is directly across from the exit point of the thread-securing stitch. The thread should bridge the opening in a straight line.
-
The stitch goes along the edge again and comes out 1-2 mm further.
-
Second stitch:
-
Stitch back into the first edge, directly across from the exit point of the first stitch. Again, a straight bridge forms across the opening.
-
The stitch goes along the edge again and comes out 1-2 mm further.
-
-
-
-
Continue sewing stitch by stitch in this manner until you reach the end of the opening.
-
Now you see why this technique is called "ladder stitch": the thread stretches between the two fabric edges like the rungs of a ladder.
-
Now gently pull the thread so that the two edges are drawn together and the opening closes.
-
-
-
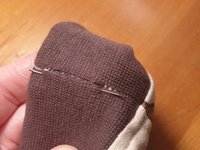
The gap closes, and the thread is no longer visible. You can only see the threads of the intact seam on both sides here. As I said, I should have started sewing further to the right.
-
Now secure the thread end by sewing the same stitch three times, just like when securing the thread start.
-
-
-
Stitch as closely as possible to the exit point and slide the needle a few centimeters through the fabric. Make sure the needle runs between the two fabric layers and doesn’t come out on the other side of the lower layer.
-
Pull the needle out, tighten the thread, and cut the thread end. Tug slightly on the fabric so the last bit of thread disappears between the fabric layers.
-
Voilà - the invisible seam!
-


Done! Enjoy your restored garment, pillow, sofa cover, bag, or whatever you just mended for a long time :)
Un ringraziamento speciale a questi traduttori:
100%

Questi traduttori ci stanno aiutando ad aggiustare il mondo! Vuoi partecipare?
Inizia a tradurre ›

Team
