Salta al contenuto principale

Removing the Ink Cartridge Rail

Solo Prerequisita
Questa guida è destinata a essere usata solo come prerequisito per altre guide. Da sola è incompleta.

Cosa ti serve

  1. Removing the Ink Cartridge Rail, Ink Cartridge Rail: passo 1, immagine 1 di 2 Removing the Ink Cartridge Rail, Ink Cartridge Rail: passo 1, immagine 2 di 2
    • Remove the five 13.0 mm Torx #10 screws found on top of the frame.

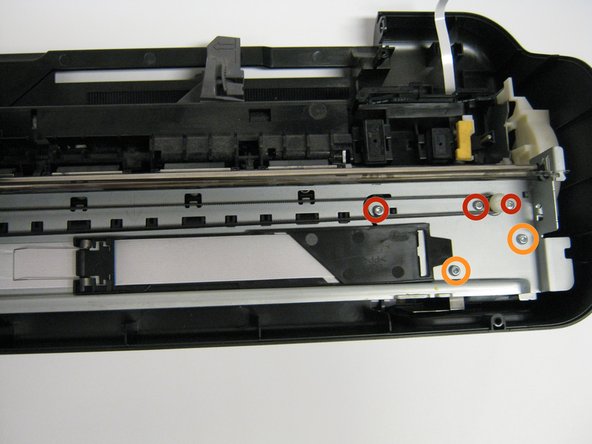
    • Remove the four 9.0 mm Torx #10 smaller screws.

  2. Removing the Ink Cartridge Rail: passo 2, immagine 1 di 2 Removing the Ink Cartridge Rail: passo 2, immagine 2 di 2
    • Lift the rail carefully as a strip and motor will be connected to the bottom part of the printer.

    • Now detach the white strip and wires by gently lifting them up.

Conclusione

To reassemble your device, follow these instructions in reverse order.

Team

Cal Poly, Team 1-41, Maness Winter 2014 Membro di Cal Poly, Team 1-41, Maness Winter 2014

CPSU-MANESS-W14S1G41

4 Membri

14 Guide realizzate

0 Commenti

Aggiungi Commento

Visualizza Statistiche:

Ultime 24 Ore: 0

Ultimi 7 Giorni: 0

Ultimi 30 Giorni: 0

Tutti i Tempi: 33