Salta al contenuto principale

RYOBI P422 Body Replacement

Cosa ti serve

  1. RYOBI P422 Body Replacement, Battery and Handle: passo 1, immagine 1 di 2 RYOBI P422 Body Replacement, Battery and Handle: passo 1, immagine 2 di 2
    • To remove the battery press down on the two buttons located on each side of the battery and pull away from the body of the grinder.

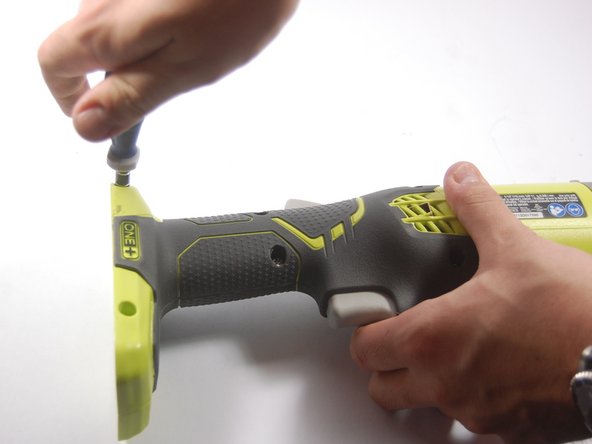
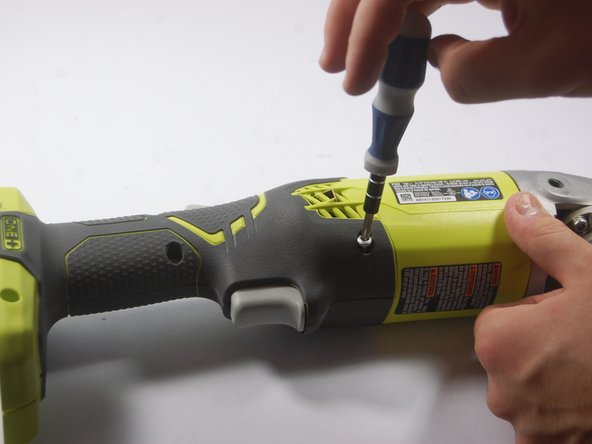
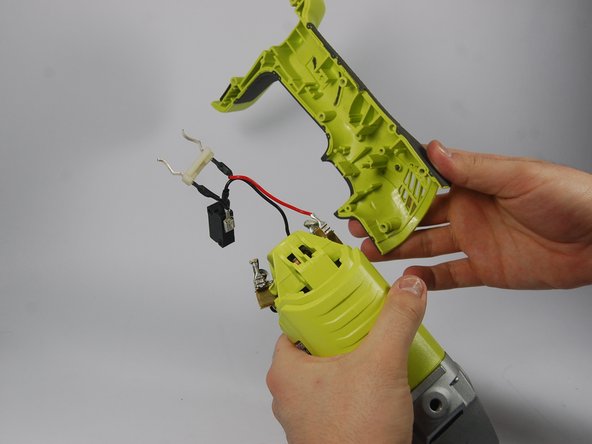
    • To remove the handle hold grinder with one hand and use the other hand to unscrew the handle with a counter-clockwise motion

  2. RYOBI P422 Body Replacement, Body: passo 2, immagine 1 di 1
    • Lay the grinder flat on its side so the screws are facing up.

  3. RYOBI P422 Body Replacement: passo 3, immagine 1 di 3 RYOBI P422 Body Replacement: passo 3, immagine 2 di 3 RYOBI P422 Body Replacement: passo 3, immagine 3 di 3
    • Remove the four 1.8 cm screws from the lower and mid section of the body with the Torx T20 screwdriver.

    • Remove the 3.7 cm screws from the upper section of the body, with the same screwdriver.

  4. RYOBI P422 Body Replacement: passo 4, immagine 1 di 2 RYOBI P422 Body Replacement: passo 4, immagine 2 di 2
    • Now that the two halves are unscrewed, lift up the top half.

  5. RYOBI P422 Body Replacement: passo 5, immagine 1 di 3 RYOBI P422 Body Replacement: passo 5, immagine 2 di 3 RYOBI P422 Body Replacement: passo 5, immagine 3 di 3
    • Remove the safety trigger and the spring.

    • Be careful in removing the safety trigger, the pin may fall out as you are moving it.

  6. RYOBI P422 Body Replacement: passo 6, immagine 1 di 2 RYOBI P422 Body Replacement: passo 6, immagine 2 di 2
    • Lift up main trigger and spring together.

    • By lifting this trigger and spring out of the handle, you will pull double duty by lifting the black switch box off of its two support posts.

    • Slide the trigger off of the black switch box.

    • Be careful when removing trigger, the spring will be compressed and may move unexpectedly.

  7. RYOBI P422 Body Replacement: passo 7, immagine 1 di 3 RYOBI P422 Body Replacement: passo 7, immagine 2 di 3 RYOBI P422 Body Replacement: passo 7, immagine 3 di 3
    • Lift the battery lead bracket from its slot.

    • Use the PH 1 screwdriver to unscrew the two 0.7 cm screws that hold the 2.6 cm long brass bracket in place.

    • Use tweezers to remove the brass bracket.

    • During reassembly, remember to keep the spring inside the main trigger and against the bracket that is visible in the second of the accompanying photos.

  8. RYOBI P422 Body Replacement: passo 8, immagine 1 di 2 RYOBI P422 Body Replacement: passo 8, immagine 2 di 2
    • Flip the grinder over and lift off the second half of the body.

    • Now you can replace your damaged handles with a new pair.

Conclusione

To reassemble your device, follow these instructions in reverse order.

Altre 2 persone hanno completato questa guida.

Team

0 Commenti

Aggiungi Commento

Visualizza Statistiche:

Ultime 24 Ore: 0

Ultimi 7 Giorni: 1

Ultimi 30 Giorni: 4

Tutti i Tempi: 1,378