Salta al contenuto principale

RCA RP3715A Speaker Replacement

Cosa ti serve

  1. RCA RP3715A Speaker Replacement, Reaching the battery terminal.: passo 1, immagine 1 di 2 RCA RP3715A Speaker Replacement, Reaching the battery terminal.: passo 1, immagine 2 di 2
    • Push down on the clip to release pressure. The pull off the plastic cover.

  2. RCA RP3715A Speaker Replacement, Replacing the battery: passo 2, immagine 1 di 1
    • Remove the 9-volt battery from the battery terminal.

  3. RCA RP3715A Speaker Replacement, Getting inside the device.: passo 3, immagine 1 di 1
    • Take out the six screws located on the back of the device.

    • The red screws are 10 mm Phillip's #1. The orange screws are 13 mm Phillips #1.

    • Three screws are located on the back panel. One is located inside the battery carriage.

    • Two screws are located on the on the back panel on the bottom left and right side.

  4. RCA RP3715A Speaker Replacement, Relieve extension cord tension.: passo 4, immagine 1 di 3 RCA RP3715A Speaker Replacement, Relieve extension cord tension.: passo 4, immagine 2 di 3 RCA RP3715A Speaker Replacement, Relieve extension cord tension.: passo 4, immagine 3 di 3
    • Remove the 10 mm Phillip's #1 screw.

    • Then remove the metal reinforcement.

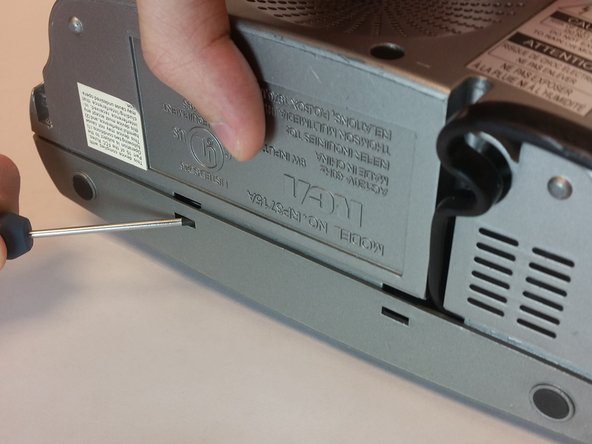
  5. RCA RP3715A Speaker Replacement: passo 5, immagine 1 di 2 RCA RP3715A Speaker Replacement: passo 5, immagine 2 di 2
    • Using flathead screwdriver undo the release tabs.

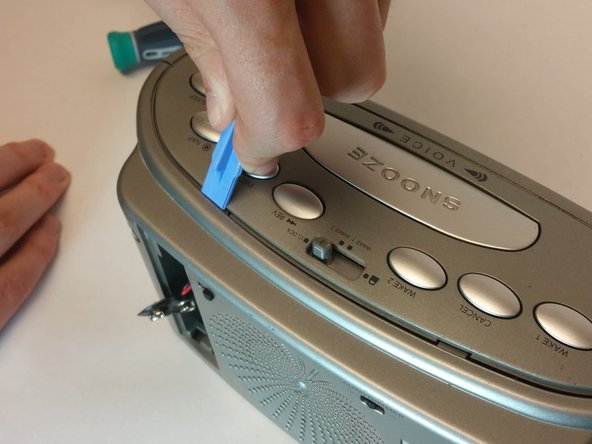
  6. RCA RP3715A Speaker Replacement: passo 6, immagine 1 di 3 RCA RP3715A Speaker Replacement: passo 6, immagine 2 di 3 RCA RP3715A Speaker Replacement: passo 6, immagine 3 di 3
    • Pry the release tabs with a spudger.

    • Start with back of the device on the topside.

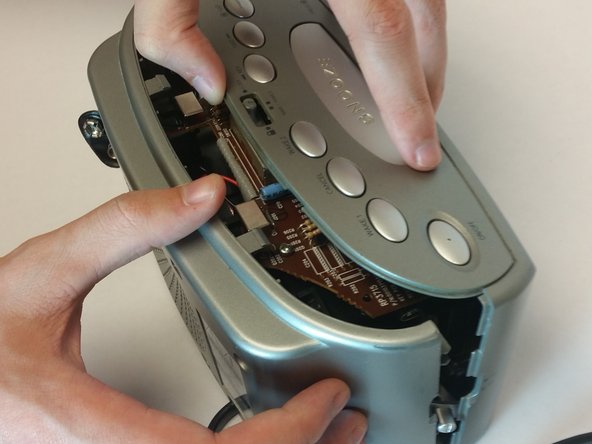
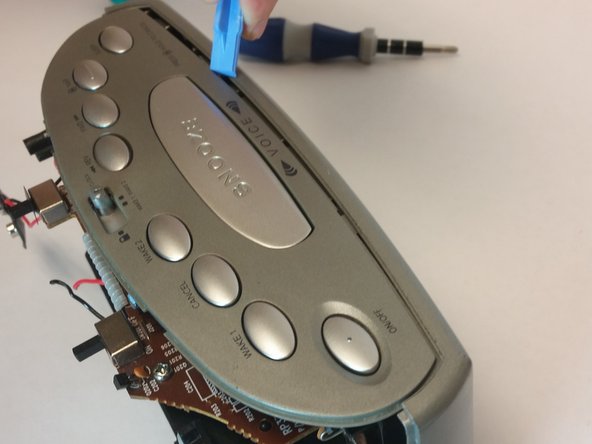
  7. RCA RP3715A Speaker Replacement: passo 7, immagine 1 di 2 RCA RP3715A Speaker Replacement: passo 7, immagine 2 di 2
    • Pry open both tabs to remove the topside of the clock.

  8. RCA RP3715A Speaker Replacement, Speaker Replacement: passo 8, immagine 1 di 1
    • Remove the two 10mm Phillip's #1 screws. Also remove the two reinforcements holding the speaker in place.

Conclusione

To reassemble your device, follow these instructions in reverse order.

Un'altra persona ha completato questa guida.

Team

USF Tampa, Team 10-5, Brown Fall 2014 Membro di USF Tampa, Team 10-5, Brown Fall 2014

USFT-BROWN-F14S10G5

3 Membri

5 Guide realizzate

0 Commenti

Aggiungi Commento

Visualizza Statistiche:

Ultime 24 Ore: 0

Ultimi 7 Giorni: 0

Ultimi 30 Giorni: 0

Tutti i Tempi: 209