Salta al contenuto principale

RCA RCT6378W2 Screen Replacement

Guida Archiviata
Questa guida è mantenuta solo per scopi storici. Usa la versione aggiornata della guida per eseguire la riparazione.

Cosa ti serve

  1. RCA RCT6378W2 Screen Replacement, Screen Replacement: passo 1, immagine 1 di 1
    • Remove two 2.4mm x 4mm screws from bottom of the tablet with Phillips #00 Screwdriver.

  2. RCA RCT6378W2 Screen Replacement: passo 2, immagine 1 di 2 RCA RCT6378W2 Screen Replacement: passo 2, immagine 2 di 2
    • Remove back cover with lever tool, exposing the battery and motherboard.

  3. RCA RCT6378W2 Screen Replacement: passo 3, immagine 1 di 2 RCA RCT6378W2 Screen Replacement: passo 3, immagine 2 di 2
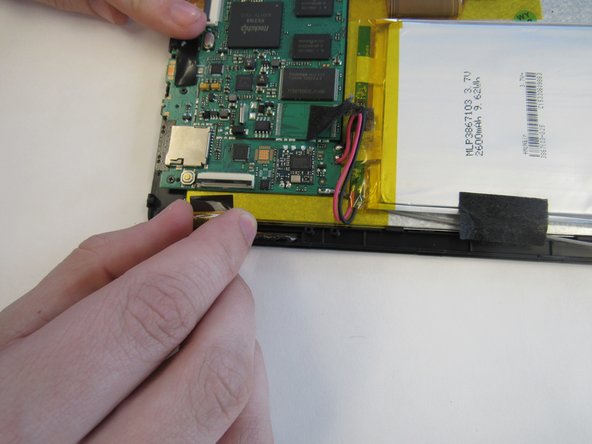
    • Using the tweezers, remove the black tape connecting the screen to the motherboard.

  4. RCA RCT6378W2 Screen Replacement: passo 4, immagine 1 di 2 RCA RCT6378W2 Screen Replacement: passo 4, immagine 2 di 2
    • Pull up the switch to remove the input connector.

  5. RCA RCT6378W2 Screen Replacement: passo 5, immagine 1 di 1
    • Heat the iOpener in the microwave, following the instructions provided with the tool. Lay the heated iOpener on the front screen for two minutes to soften the connection of the screen to the tablet.

  6. RCA RCT6378W2 Screen Replacement: passo 6, immagine 1 di 2 RCA RCT6378W2 Screen Replacement: passo 6, immagine 2 di 2
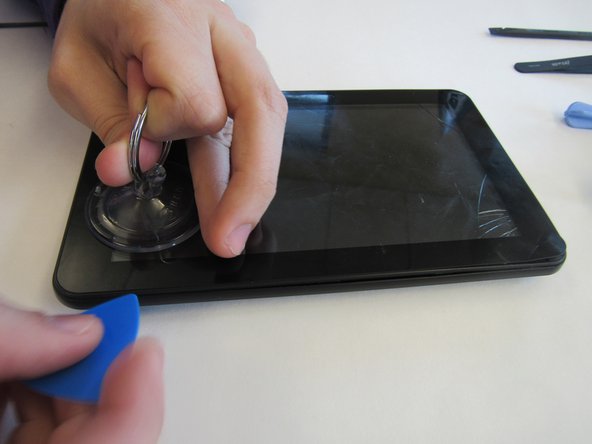
    • Use the suction cup and lever tool tool to pry the front screen from the tablet.

Conclusione

To reassemble your device, follow these instructions in reverse order.

Altre 2 persone hanno completato questa guida.

mikayla

Membro da: 01/29/15

408 Reputazione

2 Guide realizzate

Team

Clemson, Team 14-4, Shirley Spring 2015 Membro di Clemson, Team 14-4, Shirley Spring 2015

CLEM-SHIRLEY-S15S14G4

6 Membri

15 Guide realizzate

0 Commenti

Aggiungi Commento

Visualizza Statistiche:

Ultime 24 Ore: 0

Ultimi 7 Giorni: 0

Ultimi 30 Giorni: 0

Tutti i Tempi: 1,189