Salta al contenuto principale

Putting On A Transparent Shell On Flipper Zero

Cosa ti serve

  1. Putting On A Transparent Shell On Flipper Zero, Take Out The SD Card: passo 1, immagine 1 di 1
    • An Easy Way To Get The SD Card Out Is To Grip It With Your Fingernails.

  2. Putting On A Transparent Shell On Flipper Zero, Remove The 4 PH0 Screws On The Back: passo 2, immagine 1 di 3 Putting On A Transparent Shell On Flipper Zero, Remove The 4 PH0 Screws On The Back: passo 2, immagine 2 di 3 Putting On A Transparent Shell On Flipper Zero, Remove The 4 PH0 Screws On The Back: passo 2, immagine 3 di 3
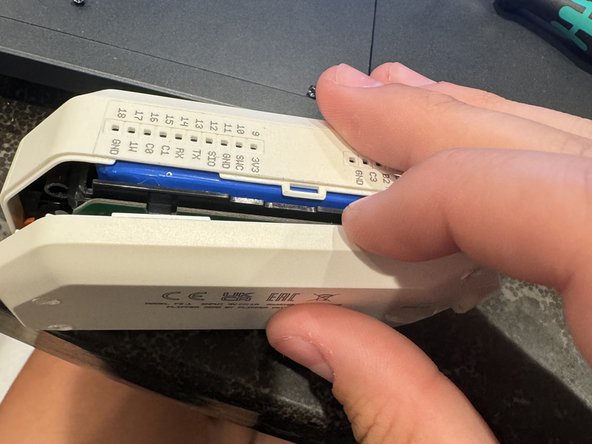
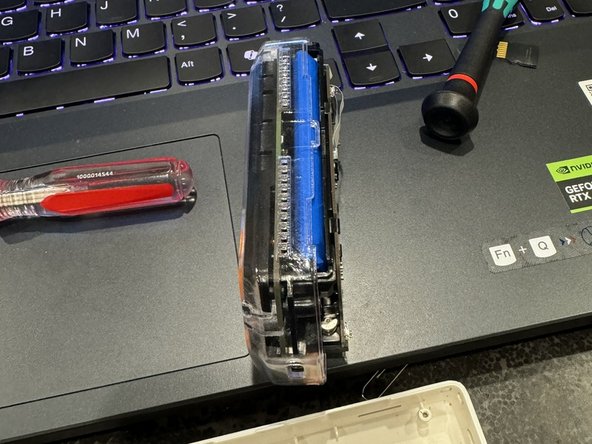
    • Use A PH0 Screwdriver To Open/Remove The Back Part Of The Shell.

    • Be Careful, The Screws Strip Easily. One Way To Combat This Is To Press Down On The Screw While Unscrewing It.

  3. Putting On A Transparent Shell On Flipper Zero, Taking Off The Back Shell: passo 3, immagine 1 di 3 Putting On A Transparent Shell On Flipper Zero, Taking Off The Back Shell: passo 3, immagine 2 di 3 Putting On A Transparent Shell On Flipper Zero, Taking Off The Back Shell: passo 3, immagine 3 di 3
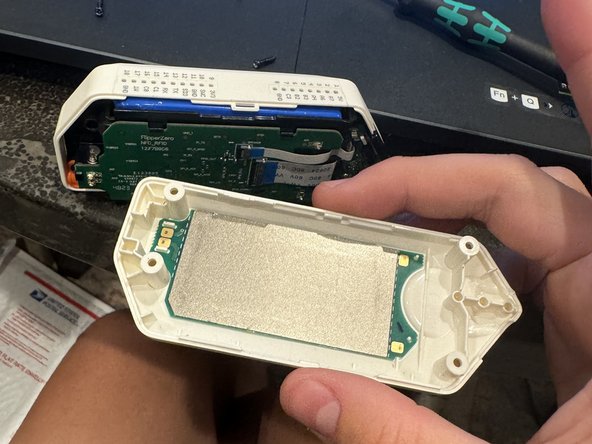
    • Using Your Fingernail, Spudger, Guitar Pick, Or Any Other Prying Tool, Take Off The Back Shell.

  4. Putting On A Transparent Shell On Flipper Zero, Take Out The Internals: passo 4, immagine 1 di 3 Putting On A Transparent Shell On Flipper Zero, Take Out The Internals: passo 4, immagine 2 di 3 Putting On A Transparent Shell On Flipper Zero, Take Out The Internals: passo 4, immagine 3 di 3
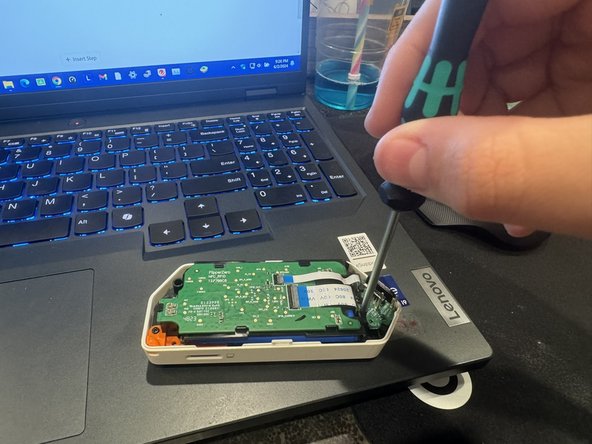
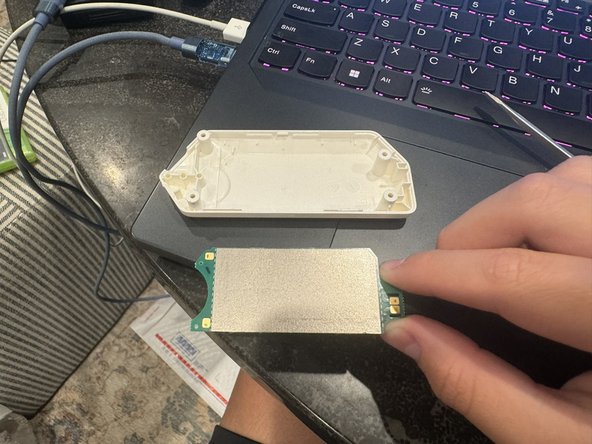
    • Using Your PH0 Screwdriver Unscrew The Two Short Screws Holding The Internals Down To The Shell.

    • Be Careful With The iButton Pins, They Break Off Very Easily.

  5. Putting On A Transparent Shell On Flipper Zero, Transfer The Flipper's Internals To The New Shell: passo 5, immagine 1 di 2 Putting On A Transparent Shell On Flipper Zero, Transfer The Flipper's Internals To The New Shell: passo 5, immagine 2 di 2
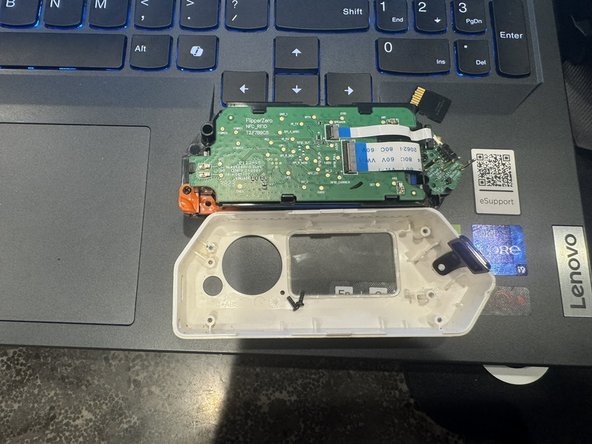
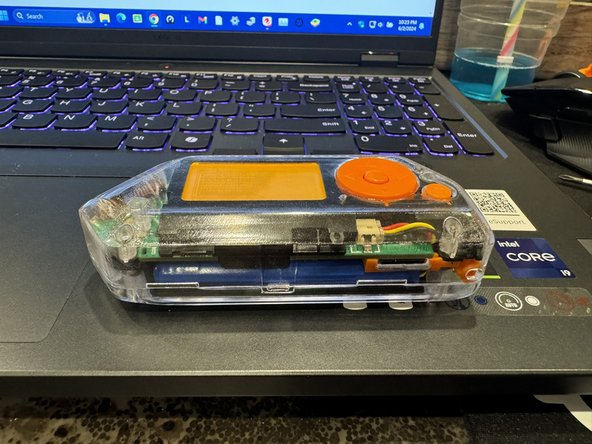
    • Put Your Flipper's Internals Into The New Shell.

    • Screw The Three Short Screws Back Into Place.

    • Do Not Make The Screws Too Tight As The Threads On The New Transparent Board Will Strip Because It Is 3D Printed.

  6. Putting On A Transparent Shell On Flipper Zero, Take The NFC Board Off The Back Shell: passo 6, immagine 1 di 2 Putting On A Transparent Shell On Flipper Zero, Take The NFC Board Off The Back Shell: passo 6, immagine 2 di 2
    • Using Your, Spudger, Guitar Pick, Flathead Screwdriver, Or Any Other Prying Tool, Take Off The NFC Board

    • Do Not Use Your Fingernails To Take Off The NFC Board!

  7. Putting On A Transparent Shell On Flipper Zero, Put The NFC Board Onto The New Transparent Back Shell: passo 7, immagine 1 di 1
    • The NFC Board Should Look Like How It Is In The Picture, If It Doesn't Look Like The Picture Reapply The NFC Board.

  8. Putting On A Transparent Shell On Flipper Zero, Combine The Two Shells: passo 8, immagine 1 di 2 Putting On A Transparent Shell On Flipper Zero, Combine The Two Shells: passo 8, immagine 2 di 2
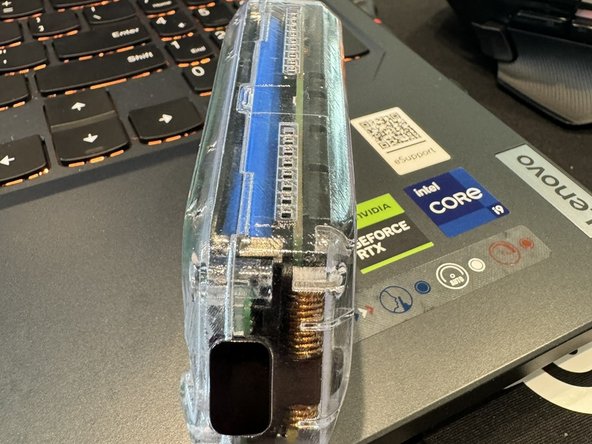
    • Put The Two Shells Together And Then Insert The Four Long Screws Into The Screw Holes And Tighten Them.

  9. Putting On A Transparent Shell On Flipper Zero, YA DONE!: passo 9, immagine 1 di 2 Putting On A Transparent Shell On Flipper Zero, YA DONE!: passo 9, immagine 2 di 2
    • You Have Just Assembled Yourself A Transparent Flipper Zero, Nice Work!

Linea Traguardo

Kaeden Smith

Membro da: 06/02/24

169 Reputazione

1 Guida realizzata

0 Commenti

Aggiungi Commento

Visualizza Statistiche:

Ultime 24 Ore: 1

Ultimi 7 Giorni: 13

Ultimi 30 Giorni: 73

Tutti i Tempi: 73