Introduzione
Whether you're experiencing a sudden drop in performance or your mouse has ceased to function altogether, troubleshooting and replacing the battery can often be the key to restoring your device to optimal functionality.
In this step-by-step guide, we'll walk you through accessing the battery compartment and safely replacing the battery in your Pulsar Xlite V2 Wireless mouse. After following this guide, your Pulsar Xlite V2 Wireless mouse should continue to deliver smooth and reliable performance.
Cosa ti serve
-
-
Disassembly is the first step, which requires something thin like a mini pry bar or even your fingernails, to remove the lower mouse skate on the flat underside of the mouse.
-
-
-
After removing the mouse skate, use a Phillips screwdriver to unscrew two screws and detach the bottom layer of the mouse.
-
-
-
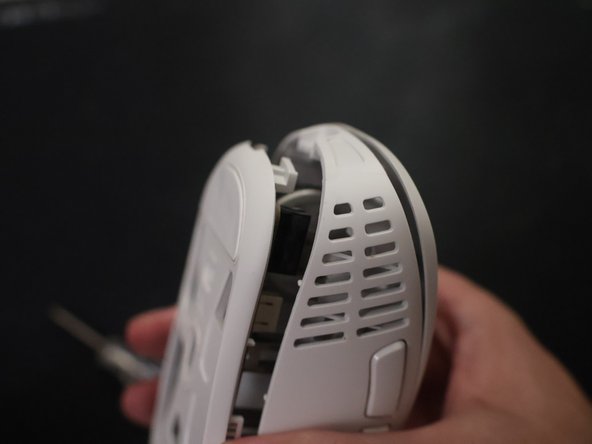
To separate the bottom and top layer, begin lifting the bottom half of the mouse.
-
Next, apply some pressure by pushing the top layer towards the hinges seen in the second picture. Then, the entire top layer can be lifted off.
-
-
-
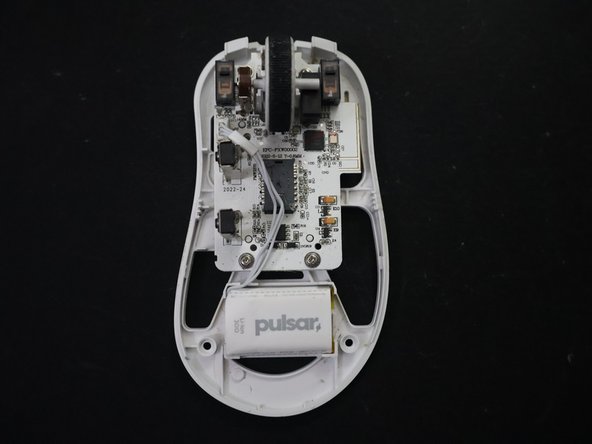
Remove the connector from its slot and the battery.
-
The new battery can now be attached in the opposite manner by connecting the 3-pin connector in its slot.
-




Now that you've successfully replaced the battery, enjoy the renewed efficiency and responsiveness of your Pulsar Xlite V2 Wireless mouse. Happy computing!
Annulla: non ho completato questa guida.
Un'altra persona ha completato questa guida.


Team

CSU Los Angeles, Team 12-3, Ribeiro Fall 2023 Membro di CSU Los Angeles, Team 12-3, Ribeiro Fall 2023
CSULA-RIBEIRO-F23S12G3
2 Membri
3 Guide realizzate
