Cosa ti serve
-
Questo passaggio è privo di traduzione. Aiuta a tradurlo
-
A Psion Series 5!
-
On screen, it has a permanent taskbar. 8MB internal store. A big keyboard. And you can record while the Psion is closed with external buttons.
-
-
Questo passaggio è privo di traduzione. Aiuta a tradurlo
-
Let's turn it!
-
There's a Compactflash card. You can use it for backups or documents.
-
Remove the three screws, holding the backcase.
-
There was a "guarantee void if removed" sticker. Anyway, this device is over 12 years old, there's no guarantee!
-
-
Questo passaggio è privo di traduzione. Aiuta a tradurlo
-
Open it from the back to the front.
-
Don't forget to remove the plastic on the back.
-
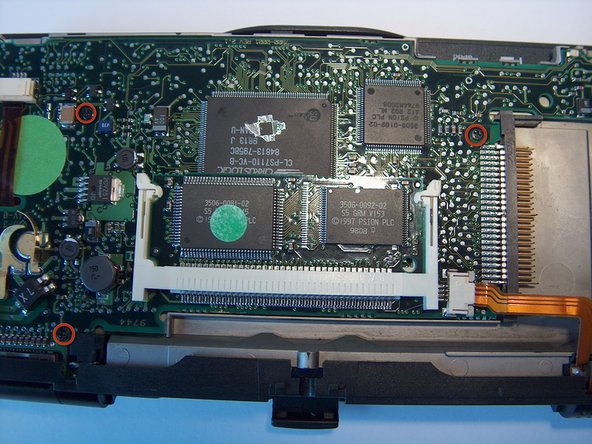
Now let's see what we found:
-
EPOC with the OS stored in ROM. It's removable for the different languages & countries.(Chip with the green stick on it.) The other one is the 4MB RAM.
-
ARM 710 RISC-processor with 18.43MHz.
-
The touchscreen controller.
-
-
Questo passaggio è privo di traduzione. Aiuta a tradurlo
-
Remove the three screws, holding the mainboard in place.
-
Remove the two ribbon cables, one on the left, the other one on the right side.
-
Used for power and speaker.
-
Used for powering the backlight.
-
-
-
Questo passaggio è privo di traduzione. Aiuta a tradurlo
-
Now, slide up the Psion.
-
Carefully remove the mainboard and diconnect the two ribbon cables. (That's the faulty design I mentioned in the description.)
-
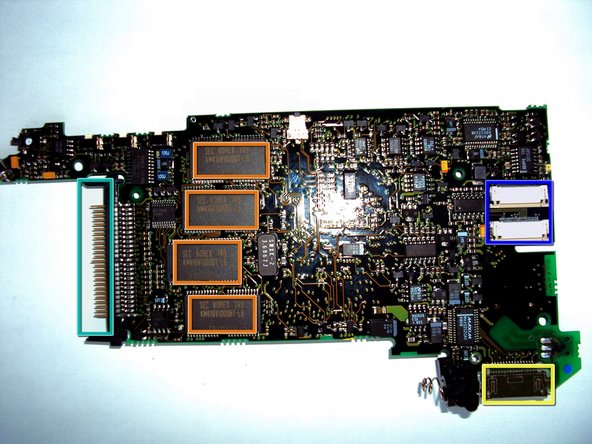
Let's see the other side of the mainboard:
-
4x 2MB of RAM.
-
Connectors for the two ribbon cables. The blu one's the keyboard and the brown one's screen and touchscreen cable.
-
Compactflash card connector.
-
Connector for PC synchronistation,Printer and internet.
-
Again, the front of the mainboard.
-
-
Questo passaggio è privo di traduzione. Aiuta a tradurlo
-
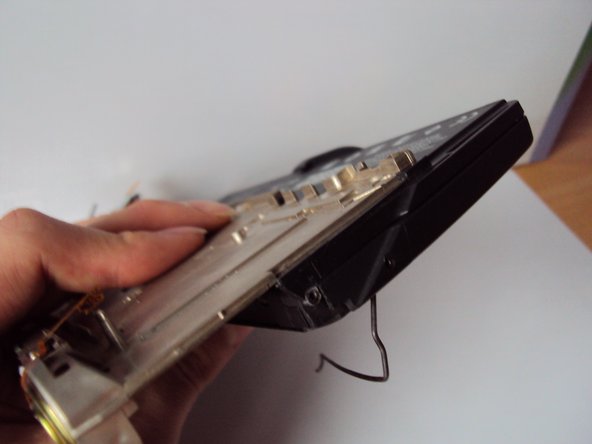
First, remove the spring hinge.
-
Unhook them on both sides. Careful not to snap any of the ABS casing!
-
-
Questo passaggio è privo di traduzione. Aiuta a tradurlo
-
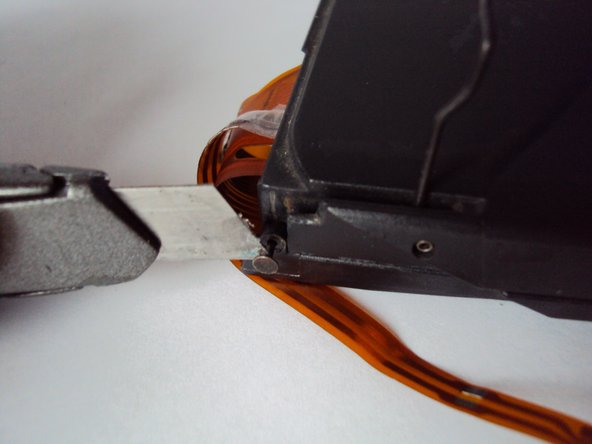
Slide the screen from the chassis.
-
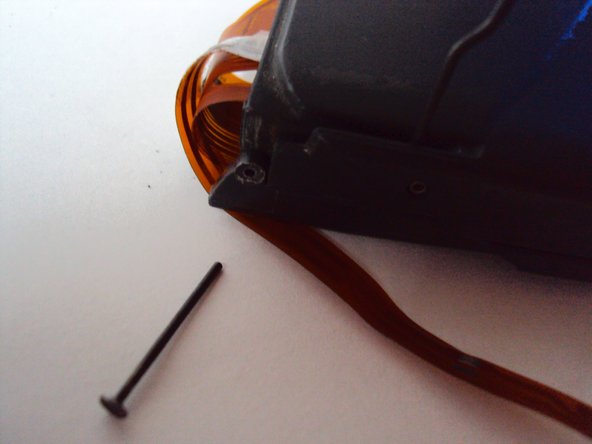
Use a knife to slide out the metal peg holding the keyboard to the screen on each side.
-
-
Questo passaggio è privo di traduzione. Aiuta a tradurlo
-
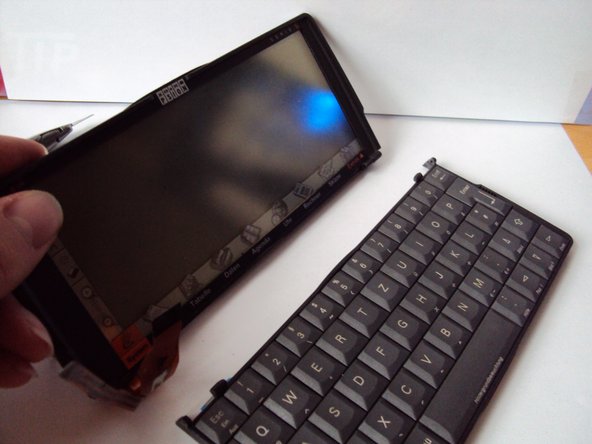
Remove the keyboard.
-
A total of 12MB internal. Made in UK 1997.
-
-
Questo passaggio è privo di traduzione. Aiuta a tradurlo
-
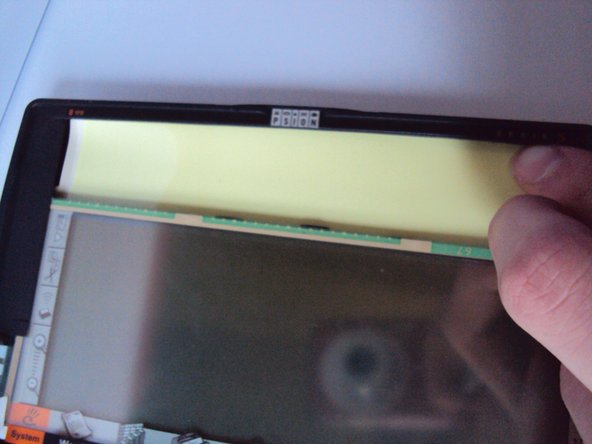
You can pull out the screen from the plastic case.
-
That's the backlight. It shines very green, so instead of black/wihte you had grey/green. Today, you would install some LEDs and that's it.
-
-
Questo passaggio è privo di traduzione. Aiuta a tradurlo
-
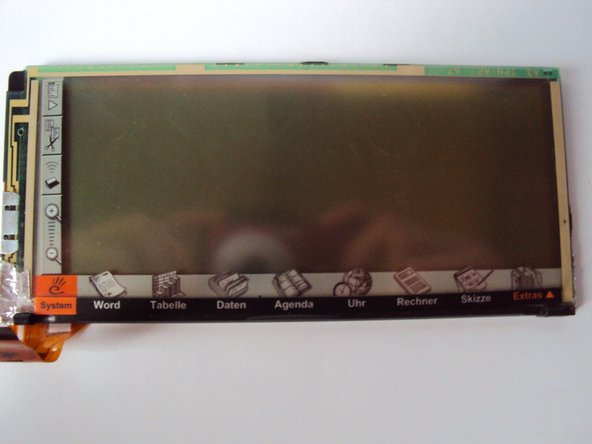
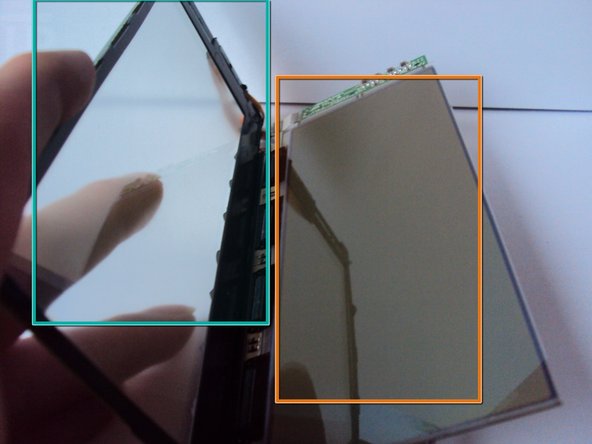
Thats the screen.
-
You can see, the screen is made of two parts:
-
That's the touchscreen.
-
That's the greyscale LCD screen from Sharp.
-
-
Questo passaggio è privo di traduzione. Aiuta a tradurlo
-
Everything laid out:
-
Plastig case.
-
LCD screen and touchscreen.
-
Backlight.
-
Chassis with speaker.
-
Mainboard.
-
Keyboard (German layout)
-
Thank you for reading & watching my Teardown :)
-


3 Commenti
For more Psionrepairs: Mail: psion@hccnet.nl (december 2010)
Does there exist a description of the keyboard connector? I have a fully operational Psion 5 but its screen is cracked from top to bottom. Only the left side of the screen is now sensitive to touch. The whole screen shows data so that functions properly. Now I'd like to use the screen with my Rasberry Pi 2. Won't tear it down just yet. Thanks.