Introduzione
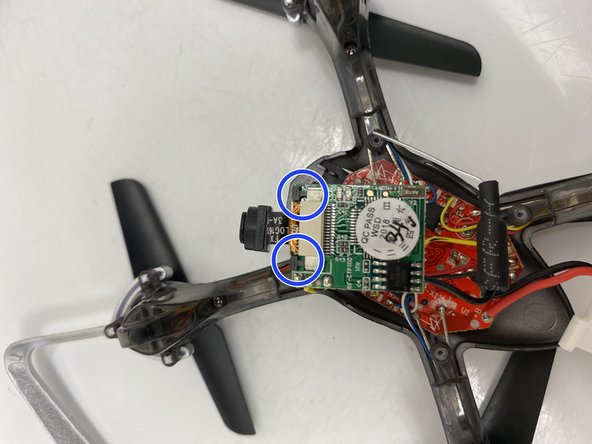
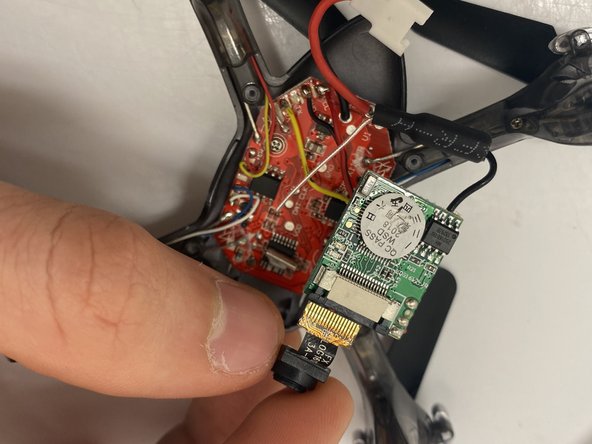
If your Protocol Slipstream WiFi (model number 6182-3MXB) has a broken camera on it, use this guide to replace the camera. The camera is what allows the user to take photo and videos from the device. If the camera is broken you will not be able to take photos and videos from the device. Be careful not to replace the camera with the device turned on. The propeller spins very fast and can be potentially harmful. When removing the camera be careful with the ribbon wire. Ribbon wire is very fragile and very easy to break. Before trying to remove the camera’s ribbon wire from the connection point, make sure that the two tabs that hold the ribbon wire are fully pushed out.
Cosa ti serve
-
-
Remove the four 5.5 mm Phillips #00 screws that hold the lower canopy to the upper canopy.
-
Gently pull the lower canopy up and towards the back of the drone. The lower canopy will still be attached to the upper canopy by 3 wires. Just set the lower canopy aside and continue with the repair.
-
-


To reassemble your device, follow these instructions in reverse order.
To reassemble your device, follow these instructions in reverse order.

Team

Embry-Riddle Aeronautical University, Team S13-G5, Lamothe Fall 2019 Membro di Embry-Riddle Aeronautical University, Team S13-G5, Lamothe Fall 2019
ERAU-LAMOTHE-F19S13G5
2 Membri
5 Guide realizzate