Salta al contenuto principale

Protocol Galileo Top Shell Replacement

Cosa ti serve

  1. Protocol Galileo Top Shell Replacement, Battery: passo 1, immagine 1 di 1
    • Find door on the underside of drone. Open the door.

  2. Protocol Galileo Top Shell Replacement: passo 2, immagine 1 di 2 Protocol Galileo Top Shell Replacement: passo 2, immagine 2 di 2
    • Carefully pull out battery, pulling out wires first.

  3. Protocol Galileo Top Shell Replacement: passo 3, immagine 1 di 1
    • Disconnect the connecter.

    • When reconnecting, remember to match up the black wire with the black wire and the red with red.

  4. Protocol Galileo Top Shell Replacement, Propeller: passo 4, immagine 1 di 2 Protocol Galileo Top Shell Replacement, Propeller: passo 4, immagine 2 di 2
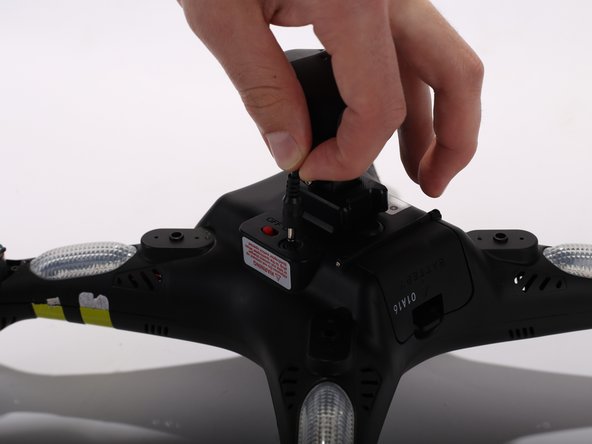
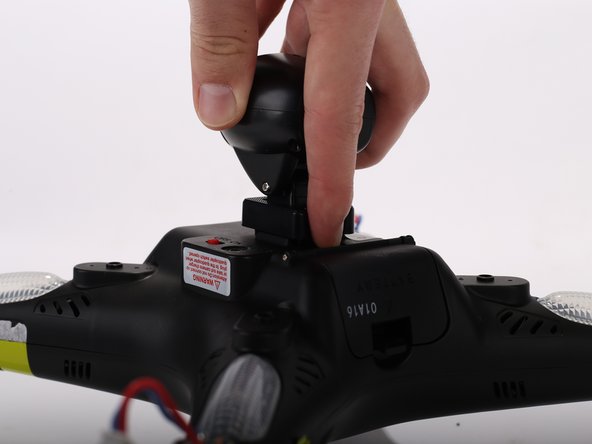
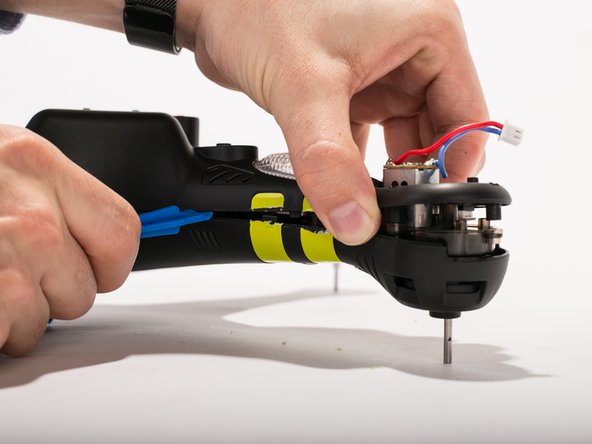
    • Use the heavy duty spudger tool to pry off metal caps by pushing the spudger up into the cap.

  5. Protocol Galileo Top Shell Replacement: passo 5, immagine 1 di 1
    • Twist the white spindle sleeve counter clockwise to align locking pin inside with the opening.

  6. Protocol Galileo Top Shell Replacement: passo 6, immagine 1 di 1
    • Use tweezers to remove locking pin.

  7. Protocol Galileo Top Shell Replacement: passo 7, immagine 1 di 1
    • Pull off white spindle sleeve.

    • Take note of which side of the spindle sleeve is the top.

  8. Protocol Galileo Top Shell Replacement: passo 8, immagine 1 di 2 Protocol Galileo Top Shell Replacement: passo 8, immagine 2 di 2
    • Pull off propeller.

  9. Protocol Galileo Top Shell Replacement, Top Shell: passo 9, immagine 1 di 3 Protocol Galileo Top Shell Replacement, Top Shell: passo 9, immagine 2 di 3 Protocol Galileo Top Shell Replacement, Top Shell: passo 9, immagine 3 di 3
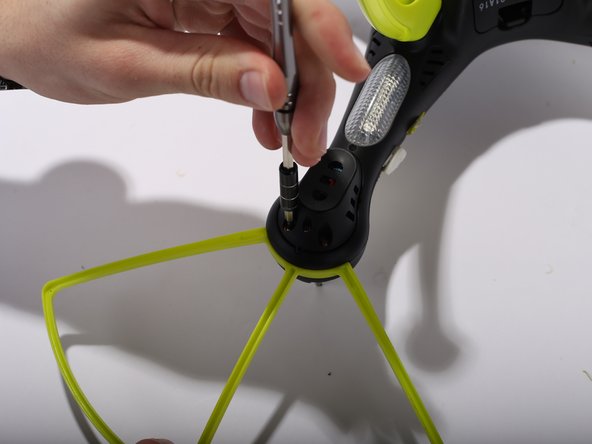
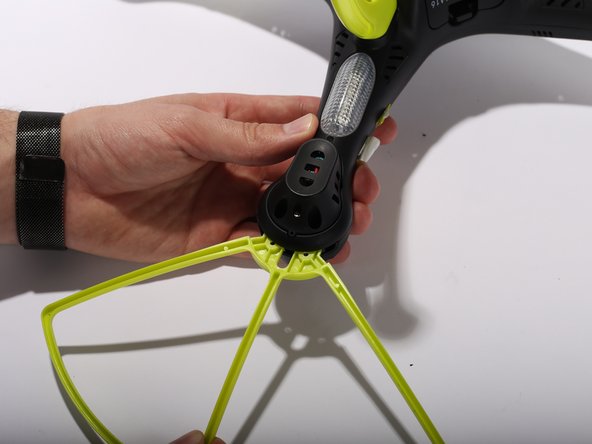
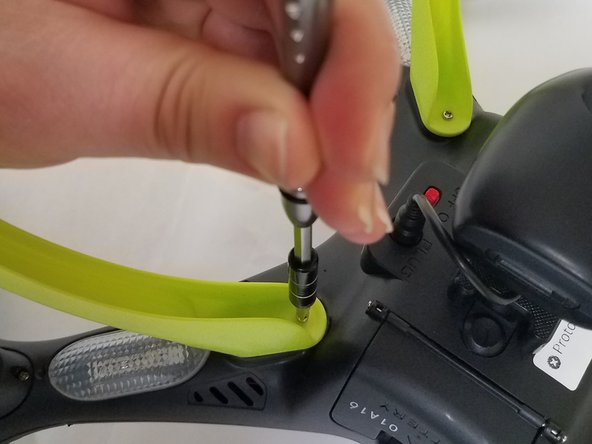
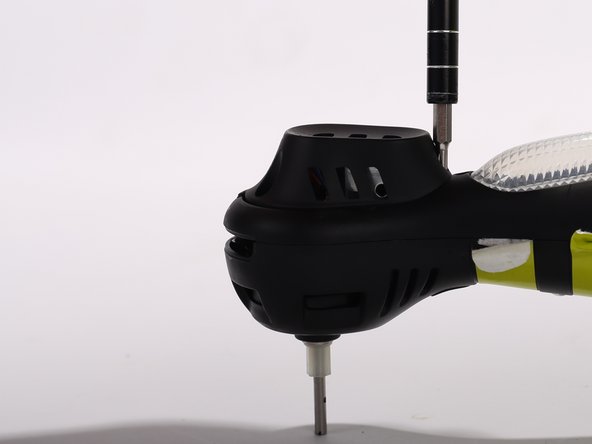
    • Remove Blade Guards by unscrewing two 13 millimeter screws using Philips #0. Pull out the guards. Repeat the steps for the other three corners.

  10. Protocol Galileo Top Shell Replacement: passo 10, immagine 1 di 2 Protocol Galileo Top Shell Replacement: passo 10, immagine 2 di 2
    • Unscrew two 9 mm screws located inside the legs. Repeat the same procedure for the other three legs

  11. Protocol Galileo Top Shell Replacement: passo 11, immagine 1 di 3 Protocol Galileo Top Shell Replacement: passo 11, immagine 2 di 3 Protocol Galileo Top Shell Replacement: passo 11, immagine 3 di 3
    • Unplug the camera wire.

    • Press the hold release button and slide out the camera module away from the button.

  12. Protocol Galileo Top Shell Replacement: passo 12, immagine 1 di 2 Protocol Galileo Top Shell Replacement: passo 12, immagine 2 di 2
    • Remove the motor protection cover by unscrewing two 9 mm screws using Philips #0. When the screws are off, use your fingers to pull the motor protection cover off. Repeat the procedure for the other three arms.

  13. Protocol Galileo Top Shell Replacement: passo 13, immagine 1 di 3 Protocol Galileo Top Shell Replacement: passo 13, immagine 2 di 3 Protocol Galileo Top Shell Replacement: passo 13, immagine 3 di 3
    • Unclip the motor cable from the shells housing using two pry tools. Repeat the same procedure for the other three arms.

  14. Protocol Galileo Top Shell Replacement: passo 14, immagine 1 di 1
    • Remove 3 9mm screws around the motor housing. Repeat the steps for the three other arms.

  15. Protocol Galileo Top Shell Replacement: passo 15, immagine 1 di 2 Protocol Galileo Top Shell Replacement: passo 15, immagine 2 di 2
    • Remove four 9 mm screws located where the legs originally are placed. (Use a thin head screwdriver)

  16. Protocol Galileo Top Shell Replacement: passo 16, immagine 1 di 3 Protocol Galileo Top Shell Replacement: passo 16, immagine 2 di 3 Protocol Galileo Top Shell Replacement: passo 16, immagine 3 di 3
    • Cut the yellow strips using a scalpel. Pry open the casing using pry tools working gently around the corners.

Conclusione

To reassemble your device, follow these instructions in reverse order.

Thomas Ramey

Membro da: 02/03/17

301 Reputazione

3 Guide realizzate

Team

UW Tacoma, Team 2-3, Rose Winter 2017 Membro di UW Tacoma, Team 2-3, Rose Winter 2017

UWT-ROSE-W17S2G3

4 Membri

5 Guide realizzate

0 Commenti

Aggiungi Commento

Visualizza Statistiche:

Ultime 24 Ore: 0

Ultimi 7 Giorni: 0

Ultimi 30 Giorni: 2

Tutti i Tempi: 167