Salta al contenuto principale
Unisciti alla Community delle riparazioni - Crea un account
ProntoTec Axius Screen Replacement

ProntoTec Axius Screen Replacement

Antonio Irons

Antonio Irons e 5 altri collaboratori

Ultimo aggiornamento il 4 set 2019

Nessuna stima
Moderato
Attrezzi Non Corretti

Introduzione

Vai al passo 1

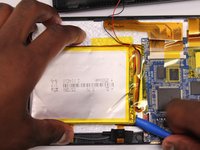
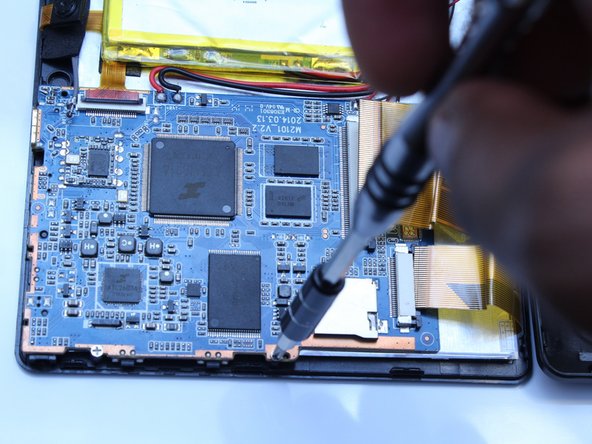
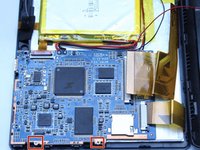
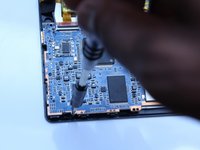
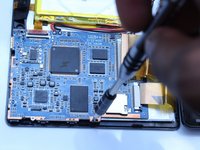
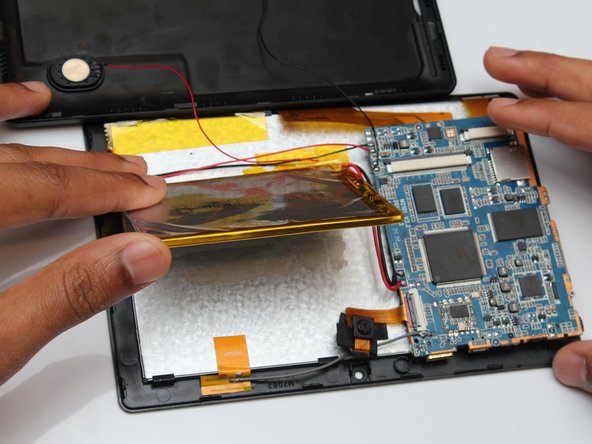
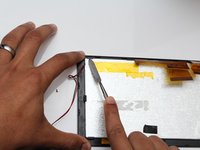
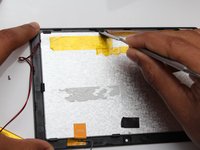
Handheld devices such as this tablet are very commonly dropped. Even dropping your device small heights can result in shattering or breaking the screen. This guide demonstrates how to remove other components inside the device to access the screen for removal and replacement.

Cosa ti serve

Strumenti

Mostra di più…

  1. ProntoTec Axius Screen Replacement, Screen: passo 1, immagine 1 di 1
    • Make sure the device is completely turned off before you begin taking it apart to avoid risk of electrocution.

    • Place the tablet face-up on a flat table

  2. ProntoTec Axius Screen Replacement: passo 2, immagine 1 di 1
    • Starting near the headphone port, fit the flat end of the spudger in between the screen and back case.

    • Pry the back case from the screen around each point on the device to release the clips securing the case halves to each other.

  3. ProntoTec Axius Screen Replacement: passo 3, immagine 1 di 1
    • Gently remove the back case of the device and lay it in a flat surface as shown in the photo.

    • Make sure not to sever the wires (red and black) connected to the speaker that is located in the back case.

  4. ProntoTec Axius Screen Replacement: passo 4, immagine 1 di 1
    • Remove all of the yellow tape that is on the device with the spudger.

    • Be careful not to cut any wires that are under the tapes.

  5. ProntoTec Axius Screen Replacement: passo 5, immagine 1 di 2 ProntoTec Axius Screen Replacement: passo 5, immagine 2 di 2
    • Use the flat end of the spudger to gently pry the battery from the back of the screen.

  6. ProntoTec Axius Screen Replacement: passo 6, immagine 1 di 2 ProntoTec Axius Screen Replacement: passo 6, immagine 2 di 2
    • Use a spudger to lift all the ribbon cable clamps

    • Detach all three ribbon cables from the clamps

  7. ProntoTec Axius Screen Replacement: passo 7, immagine 1 di 3 ProntoTec Axius Screen Replacement: passo 7, immagine 2 di 3 ProntoTec Axius Screen Replacement: passo 7, immagine 3 di 3
    • Using a Phillips screwdriver (PH00), unscrew the motherboard from the device

  8. ProntoTec Axius Screen Replacement: passo 8, immagine 1 di 3 ProntoTec Axius Screen Replacement: passo 8, immagine 2 di 3 ProntoTec Axius Screen Replacement: passo 8, immagine 3 di 3
    Attrezzo utilizzato in questo passaggio:
    Heavy-Duty Spudger
    $4.99
    • Use the flat end of the metal spudger to remove the battery from the back of the screen of the device.

    • Avoid using metal when prying off the battery. For serious prying power, try using the heavy-duty plastic spudger.

  9. ProntoTec Axius Screen Replacement: passo 9, immagine 1 di 1
    • Remove the orange tab from the back of the screen as shown in the picture

  10. ProntoTec Axius Screen Replacement: passo 10, immagine 1 di 2 ProntoTec Axius Screen Replacement: passo 10, immagine 2 di 2
    • Use the flat end of the metal spudger to unclip and remove the screen from the casing.

Conclusione

To reassemble your device, follow these instructions in reverse order.

Team

UMass Dartmouth, Team 5-3, Martin Fall 2016 Membro di UMass Dartmouth, Team 5-3, Martin Fall 2016

UMASSD-MARTIN-F16S5G3

3 Membri

10 Guide realizzate

0Commenti sulla guida

Aggiungi Commento

Visualizza Statistiche:

Ultime 24 Ore: 2

Ultimi 7 Giorni: 2

Ultimi 30 Giorni: 4

Tutti i Tempi: 309