Questa versione può contenere modifiche errate. Passa all'ultima istantanea verificata.
Cosa ti serve
-
-
Gira la vite che blocca lo schermo così che questa sia parallela alla barra spaziatrice.
-
Tira verso di te le alette di rilascio della tastiera e solleva la tastiera finché non si libera.
-
Solleva la tastiera e rimuovila tirandola su e via da te. Posa la tastiera, a faccia in giù, sopra al track pad.
-
-
-
Rimuovi le due viti a croce Phillips #1 d’argento che fissano lo scudo termico alla struttura metallica interna.
-
Solleva lo scudo termico e tiralo verso di te.
-
-
Questo passaggio è privo di traduzione. Aiuta a tradurlo
-
Firmly grasp the plastic tab attached to the Airport card and pull up and then to the right.
-
-
-
Questo passaggio è privo di traduzione. Aiuta a tradurlo
-
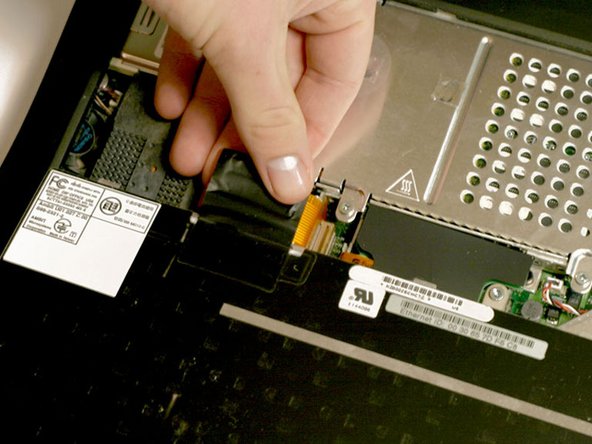
Disconnect the antenna cable from the Airport card.
-
-
Questo passaggio è privo di traduzione. Aiuta a tradurlo
-
Pull the battery cable directly up from the logic board.
-
Remove the battery from its holder by pulling up and to the left.
-
-
Questo passaggio è privo di traduzione. Aiuta a tradurlo
-
Your laptop should look approximately like this.
-
-
Questo passaggio è privo di traduzione. Aiuta a tradurlo
-
Remove the long silver Phillips #1 screw from the heat sink.
-
Remove the two T8 Torx screws that attach the heat sink to the processor.
-
-
Questo passaggio è privo di traduzione. Aiuta a tradurlo
-
Lift the heat sink up from the left side and pull it out.
-
-
Questo passaggio è privo di traduzione. Aiuta a tradurlo
-
Grasp the plastic tab on the processor's right side and pull it directly up.
-
-
Questo passaggio è privo di traduzione. Aiuta a tradurlo
-
Your laptop should look approximately like this.
-
-
Questo passaggio è privo di traduzione. Aiuta a tradurlo
-
Remove the black Torx screw from the right side of the modem.
-
Remove the small black plastic rectangle with four holes.
-
-
Questo passaggio è privo di traduzione. Aiuta a tradurlo
-
Use the tips of your fingers, a spudger, or a flat non-metal tool to get under the modem's edge and pry it up from its socket.
-
-
Questo passaggio è privo di traduzione. Aiuta a tradurlo
-
Disconnect the cable from the right side of the modem.
-