Introduzione
There is nothing more annoying than having the buttons on your wireless controller become stuck or broken. Wireless controllers for consoles can be quite expensive and can range from $50 USD all the way to $300 USD. If you are trying to save some money by extending the life of the action buttons on your PowerA Enhanced Wireless Controller, or if you want to learn how to clean your action buttons for appearance and performance purposes, then this is the repair for you. This repair is fairly easy, and no specific skills are required for completion. By following these steps you will be back on your console in no time with your newly fixed controller that you can tell all your friends about!
Cosa ti serve
-
-
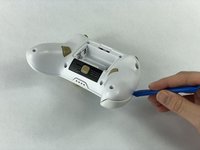
Remove the battery cover by pressing down on the lever located on the top of the cover.
-
Apply pressure until it clicks out of place, and pull it off.
 Chiedi a FixBot
-
-
-
-
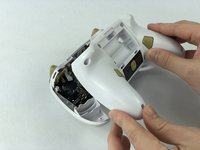
Insert the iFixit opening tool into the seam and gently pry the cover plate up.
-
Remove the cover plate once it is loosened.
-
-
-
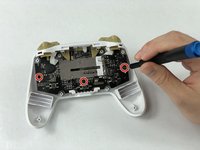
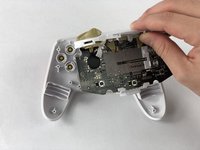
Remove all three screws securing the motherboard using the J00 screwdriver.
-
Remove the motherboard.
-
-
-
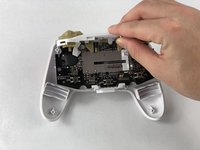
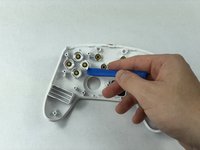
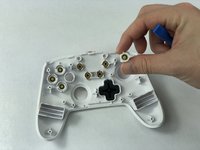
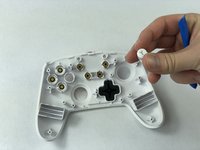
Use the iFixit opening tool to lift the action button out from its place.
-
Pull the button out with your fingers.
-


To reassemble your device, follow these instructions in reverse order.
Annulla: non ho completato questa guida.
Un'altra persona ha completato questa guida.
Team

USF Tampa, Team S1-G5, Leahy Fall 2019 Membro di USF Tampa, Team S1-G5, Leahy Fall 2019
USFT-LEAHY-F19S1G5
3 Membri
11 guide realizzate
3Commenti sulla guida
Where do you buy the buttons ?? I haven’t been able to find them
Where can I buy the buttons?