Salta al contenuto principale
Unisciti alla Community delle riparazioni - Crea un account
Polaroid Automatic 100 Bottom Frame Spring Replacement

Polaroid Automatic 100 Bottom Frame Spring Replacement

Katie Miller

Katie Miller e 4 altri collaboratori

Ultimo aggiornamento il 29 giu 2015

15 minuti
Moderato
Guida Studente in Evidenza

Introduzione

Vai al passo 1

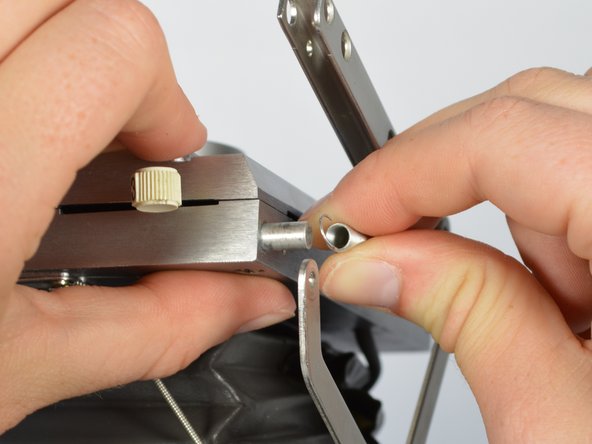
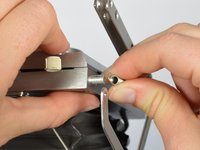
The spring is located within a slender metal mount that is screwed into the front underside of the Polaroid. It is below the camera lens and can be seen through the mount it is within.

Cosa ti serve

Strumenti

Mostra di più…

  1. Polaroid Automatic 100 Bottom Frame Spring Replacement, Bottom Frame Spring Replacement: passo 1, immagine 1 di 3 Polaroid Automatic 100 Bottom Frame Spring Replacement, Bottom Frame Spring Replacement: passo 1, immagine 2 di 3 Polaroid Automatic 100 Bottom Frame Spring Replacement, Bottom Frame Spring Replacement: passo 1, immagine 3 di 3
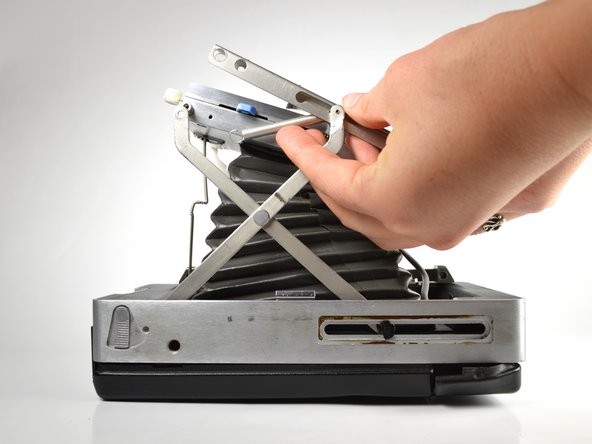
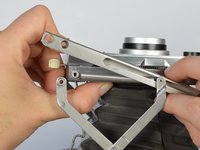
    • Fully extend the bellows to prevent collapse using the #1 tab.

    • Remove the camera cover in order to make the camera easier to work with.

    • When collapsing bellows, press down on the metal frame above the bellows.

  2. Polaroid Automatic 100 Bottom Frame Spring Replacement: passo 2, immagine 1 di 1
    • Remove the Phillips #0 6mm screw on the shutter mount and the washers using a size 5 nut driver.

  3. Polaroid Automatic 100 Bottom Frame Spring Replacement: passo 3, immagine 1 di 1
    • Unscrew the 4.5 mm Phillips screw on the right with a Phillips #0 Screwdriver.

  4. Polaroid Automatic 100 Bottom Frame Spring Replacement: passo 4, immagine 1 di 3 Polaroid Automatic 100 Bottom Frame Spring Replacement: passo 4, immagine 2 di 3 Polaroid Automatic 100 Bottom Frame Spring Replacement: passo 4, immagine 3 di 3
    • Remove the spring from the shutter mount.

    • The hooks on the ends of the spring within the shutter mount may recoil when being removed, and may be sharp enough to puncture skin.

    • When reassembling, getting the smaller screw on the right hand side can be challenging. It may be helpful to tip the camera upside down so that gravity helps the screw fall into place.

Conclusione

To reassemble your device, follow these instructions in reverse order.

Altre 2 persone hanno completato questa guida.

Katie Miller

Membro da: 04/14/15

680 Reputazione

5 Guide realizzate

Team

Cal Poly, Team 4-3, Maness Spring 2015 Membro di Cal Poly, Team 4-3, Maness Spring 2015

CPSU-MANESS-S15S4G3

4 Membri

6 Guide realizzate

2Commenti sulla guida

Thank you so very much!!!

You saved my camera and my sanity!!!!

CAROL HOLDER - Replica

Has anyone ever had to replace their bellows with a new one? If so, where do I get one from?

sbenite - Replica

Aggiungi Commento

Visualizza Statistiche:

Ultime 24 Ore: 0

Ultimi 7 Giorni: 3

Ultimi 30 Giorni: 9

Tutti i Tempi: 1,177