Questa versione può contenere modifiche errate. Passa all'ultima istantanea verificata.
Cosa ti serve
-
-
Usa un cacciavite a croce Phillips #00 per svitare le quattro viti da 6,4 mm nella scocca posteriore.
-
-
-
Questo passaggio è privo di traduzione. Aiuta a tradurlo
-
Using the pointy end of the spudger, disconnect the three antenna cable connectors on top of the wireless card.
-
Deroute the antenna cables so that they are out of the wireless card casing. Rest the wires out of the way.
-
-
Questo passaggio è privo di traduzione. Aiuta a tradurlo
-
Hook the spudger beneath the tab on the wireless card casing and release the tab.
-
Peel up and remove the wireless card casing.
-
-
Questo passaggio è privo di traduzione. Aiuta a tradurlo
-
Remove the two 4.4mm Phillips #00 screws on the wireless card.
-
Pull out the wireless card.
-
-
Questo passaggio è privo di traduzione. Aiuta a tradurlo
-
Pry up the right shoulder button casing with a spudger and set it aside.
-
-
Questo passaggio è privo di traduzione. Aiuta a tradurlo
-
Remove the translucent, plastic right shoulder button cover.
-
-
Questo passaggio è privo di traduzione. Aiuta a tradurlo
-
Release the right shoulder button flex cable socket by using a spudger to gently pry open the tab.
-
Using tweezers, slide the flex cable out of the socket.
-
-
Questo passaggio è privo di traduzione. Aiuta a tradurlo
-
Using a spudger, gently peel up the right shoulder button from the light adhesive connecting it to casing.
-
-
Questo passaggio è privo di traduzione. Aiuta a tradurlo
-
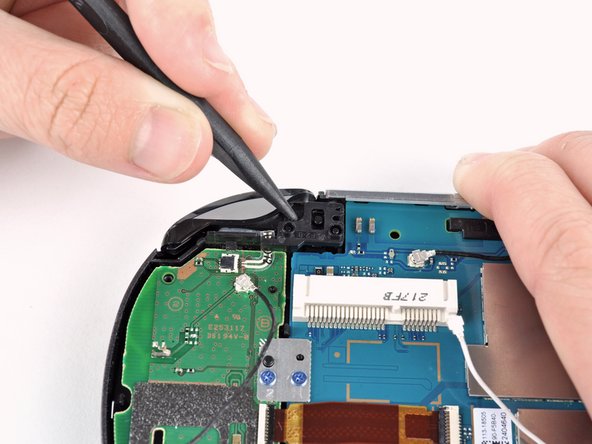
Using the pointy end of a spudger, detach the antenna cable on the right button board.
-
Remove the antenna cable.
-
-
Questo passaggio è privo di traduzione. Aiuta a tradurlo
-
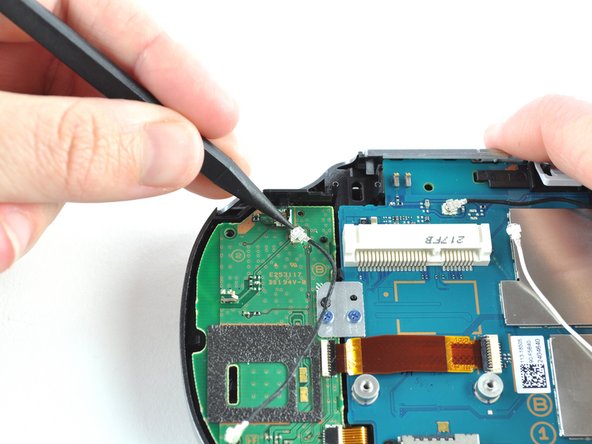
Using a spudger, pry up and release the ZIF socket on the right button board.
-
Gently pull the flex cable out of the socket. Rest the flex cable out of the way.
-
-
Questo passaggio è privo di traduzione. Aiuta a tradurlo
-
Release the tab on the small flex cable socket by prying up the tab with a spudger.
-
Using tweezers, gently pull the flex cable out of the socket. Rest the flex cable out of the way.
-
-
Questo passaggio è privo di traduzione. Aiuta a tradurlo
-
Remove the two 5.0mm Phillips #00 screws from the metal bracket securing the right button board to the motherboard.
-
Remove the metal bracket, using a spudger as necessary to lift it out.
-
-
Questo passaggio è privo di traduzione. Aiuta a tradurlo
-
Use a spudger to free the right button board by prying up from the bottom right corner of board.
-
Gently lift the right button board out.
-
-
Questo passaggio è privo di traduzione. Aiuta a tradurlo
-
Using a Phillips #00 screwdriver, remove the two 5.0mm, blue screws from the right joystick.
-
-
Questo passaggio è privo di traduzione. Aiuta a tradurlo
-
Using a spudger, gently pry the joystick out of the back casing assembly.
-


Annulla: non ho completato questa guida.
Altre 25 persone hanno completato questa guida.

