Questa versione può contenere modifiche errate. Passa all'ultima istantanea verificata.
Cosa ti serve
-
-
Usa la punta di uno spudger per rimuovere dal lato della PS3 il coprivite in plastica nera.
-
-
-
Rimuovi le seguenti sette viti:
-
Sei viti Phillips da 52 mm
-
Una vite Phillips da 30 mm
-
-
-
Solleva la cover superiore dal suo bordo posteriore e ruotano verso la parte anteriore della PS3.
-
Rimuovi la cover superiore.
-
C'è un gancio in plastica posizionato in un foro sul retro dell'angolo superiore destro. Spingi con delicatezza con uno spudger il gancio in plastica verso la parte posteriore della console in modo da liberare la parte posteriore destra della console.
-
-
-
-
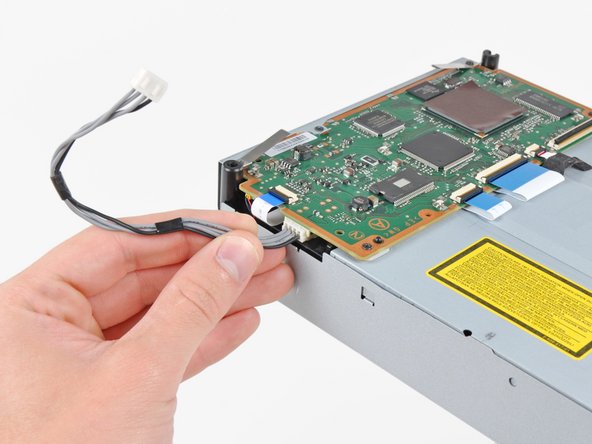
Disconnetti il cavo di alimentazione del lettore Blu-ray dalla scheda madre.
-
-
Questo passaggio è privo di traduzione. Aiuta a tradurlo
-
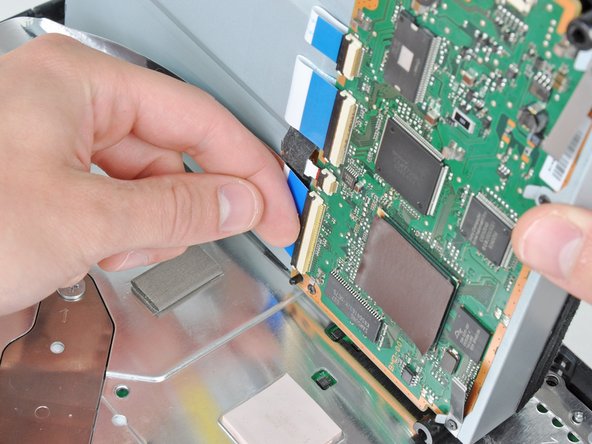
Using your fingernail, lift the flap on the ZIF connector holding the Blu-ray lens motor cable to the Blu-ray control daughterboard.
-
Pull the ribbon cable straight away from its socket on the daughterboard.
-
-
Questo passaggio è privo di traduzione. Aiuta a tradurlo
-
Using your fingernail, lift the flap on the ZIF connector holding the Blu-ray lens Data cable to the Blu-ray control daughterboard.
-
Pull the ribbon cable straight away from its socket on the daughterboard.
-
-
Questo passaggio è privo di traduzione. Aiuta a tradurlo
-
Using your fingernail, lift the flap on the ZIF connector holding the Blu-ray drive motor cable to the Blu-ray control daughterboard.
-
Pull the ribbon cable straight away from its socket on the daughterboard.
-
-
Questo passaggio è privo di traduzione. Aiuta a tradurlo
-
Using your fingernail, lift the flap on the ZIF connector holding the Blu-ray IR sensor cable to the Blu-ray control daughterboard.
-
Pull the ribbon cable straight away from its socket on the daughterboard.
-
-
Questo passaggio è privo di traduzione. Aiuta a tradurlo
-
Remove the five 8.4mm phillips screws securing the Blu-ray control board to the Blu-ray drive.
-
-
Questo passaggio è privo di traduzione. Aiuta a tradurlo
-
Carefully lift the daughterboard from the rear edge.
-
Slide the daughterboard out from under the top case.
-
-
Questo passaggio è privo di traduzione. Aiuta a tradurlo
-
Carefully turn the daughterboard over, making sure to not tear the attached cable.
-
Pull the IR Sensor cable straight away from its socket on the board.
-
Blu-Ray drive remains.
-
Annulla: non ho completato questa guida.
Altre 83 persone hanno completato questa guida.
5 Commenti
Is there a thermal pad replacement for the bond between the Optical Drive and the metal housing of around the motherboard? I can play Borderlands for hours, but if I use a disc based game or one with more intensive graphics the overheat light comes on. I’m thinking of reapplying the thermal paste with the squish method as well. Already by replacing the thermal pads (some were missing or just like clay) has reduced the fan noise. Any suggestions? The thermal pad currently is also claylike.
I have a CECHC04 that does not accept discs. If i replace the BD drive with another one from a CECHC03 will it work, or do i have to keep my original daughterboard as well? What if my problem is the daughterboard?
I got everything re hooked up but when I insert my disc , it won't suck it in. is that normal or do I have my wires crossed?


