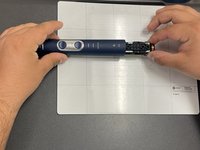
Salta al contenuto principale

Philips Sonicare ProtectiveClean 6500 Internal Assembly Replacement

Cosa ti serve

  1. Philips Sonicare ProtectiveClean 6500 Internal Assembly Replacement, Internal Assembly: passo 1, immagine 1 di 3 Philips Sonicare ProtectiveClean 6500 Internal Assembly Replacement, Internal Assembly: passo 1, immagine 2 di 3 Philips Sonicare ProtectiveClean 6500 Internal Assembly Replacement, Internal Assembly: passo 1, immagine 3 di 3
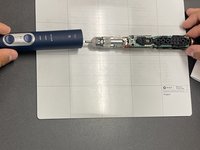
    • Pry the bottom cap away from the toothbrush body.

    • Pry the bottom cap away from the toothbrush body until it releases.

    • Remove the bottom cap by hand.

  2. Philips Sonicare ProtectiveClean 6500 Internal Assembly Replacement: passo 2, immagine 1 di 2 Philips Sonicare ProtectiveClean 6500 Internal Assembly Replacement: passo 2, immagine 2 di 2
    • Use a metal spudger to release the two retaining clips inside the device.

    • The clips release when pried inward.

  3. Philips Sonicare ProtectiveClean 6500 Internal Assembly Replacement: passo 3, immagine 1 di 2 Philips Sonicare ProtectiveClean 6500 Internal Assembly Replacement: passo 3, immagine 2 di 2
    • Slide the internal assembly out of the chassis.

Conclusione

To reassemble your device, follow these instructions in reverse order.

Connor Bassolino

Membro da: 03/29/22

8.140 Reputazione

42 Guide realizzate

Team

iFixit Membro di iFixit

Staff

141 Membri

17.873 Guide realizzate

0 Commenti

Aggiungi Commento

Visualizza Statistiche:

Ultime 24 Ore: 1

Ultimi 7 Giorni: 6

Ultimi 30 Giorni: 24

Tutti i Tempi: 24