Questa versione può contenere modifiche errate. Passa all'ultima istantanea verificata.
Cosa ti serve
-
Questo passaggio è privo di traduzione. Aiuta a tradurlo
-
First, remove the two 16mm pan head screws (1) directly under the front panel of the ventilator. (Page 3).
-
-
Questo passaggio è privo di traduzione. Aiuta a tradurlo
-
Next, remove the two 16mm flat head screws (3) from the back panel of the ventilator. (Page 3).
-
-
Questo passaggio è privo di traduzione. Aiuta a tradurlo
-
Lift off the top cover (2) of the device. (Page 3).
-
-
Questo passaggio è privo di traduzione. Aiuta a tradurlo
-
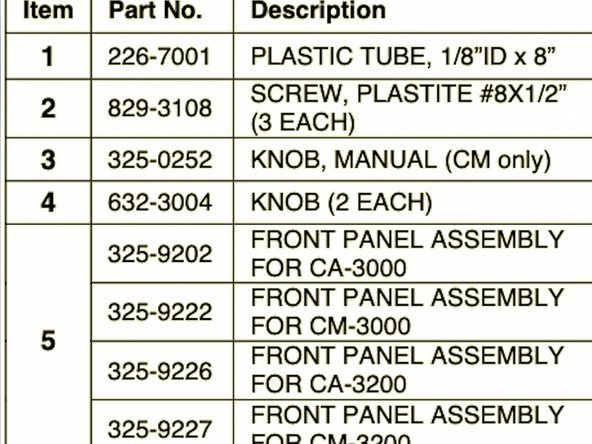
Now remove the "Inhale flow" control knob (4) and "Inhale pressure" knob (4), by loosening the setscrew on each before pulling off. If you have a CM model, carefully remove the Manual Control Lever (3) by prying it off with the screwdriver. (Page 3).
-
-
Questo passaggio è privo di traduzione. Aiuta a tradurlo
-
Unscrew the three 12.7mm plastite screws ( 2) holding the panel assembly to the lower housing. A long Phillips screwdriver is very helpful for access to the three screws. (Page 3)
-
-
Questo passaggio è privo di traduzione. Aiuta a tradurlo
-
The front control panel (5) should now be loose. Carefully slide it forwards to remove. (Page 4).
-


