Salta al contenuto principale
Unisciti alla Community delle riparazioni - Crea un account

Pentax ZX-5n Shutter Speed Dial Replacement

Cosa ti serve

    1. Pentax ZX-5n Shutter Speed Dial Replacement, Remove back cover: passo 1, immagine 1 di 1
      • Push down on the screw to depress the spring loaded hinge and release the door.

      Chiedi a FixBot

      Aggiungi Commento

    2. Pentax ZX-5n Shutter Speed Dial Replacement, Remove bottom cover: passo 2, immagine 1 di 1
      • Remove six 5.3 mm #00 screws.

      • Remove one 3.4 mm #00 screw.

      • The short screw has a machine thread and screws into the plate underneath. The rest screw into the plastic body.

      Chiedi a FixBot

      Aggiungi Commento

    3. Pentax ZX-5n Shutter Speed Dial Replacement, Remove left front cover: passo 3, immagine 1 di 1
      • Remove three 5.3 mm #00 screws (the bottom-most screw is not always present).

      • Remove one 7.3 mm #00 screw.

      • Remove the remote trigger cover.

      Chiedi a FixBot

      Aggiungi Commento

    4. Pentax ZX-5n Shutter Speed Dial Replacement, Remove front cover: passo 4, immagine 1 di 2 Pentax ZX-5n Shutter Speed Dial Replacement, Remove front cover: passo 4, immagine 2 di 2
      • Remove one 3.4 mm #00 screw.

      • Remove two 5.3 mm #00 screw.

      • Gently lift up on the flash housing to help remove the cover if necessary.

      Chiedi a FixBot

      Aggiungi Commento

    5. Pentax ZX-5n Shutter Speed Dial Replacement, Remove right front cover: passo 5, immagine 1 di 1
      • Remove two 3.9 mm #00 screws.

      Chiedi a FixBot

      Aggiungi Commento

    1. Pentax ZX-5n Shutter Speed Dial Replacement, Remove eye cup: passo 6, immagine 1 di 1
      • Slide the eye cup up and off to access the screws underneath.

      Chiedi a FixBot

      Aggiungi Commento

    2. Pentax ZX-5n Shutter Speed Dial Replacement, Unscrew top cover: passo 7, immagine 1 di 3 Pentax ZX-5n Shutter Speed Dial Replacement, Unscrew top cover: passo 7, immagine 2 di 3 Pentax ZX-5n Shutter Speed Dial Replacement, Unscrew top cover: passo 7, immagine 3 di 3
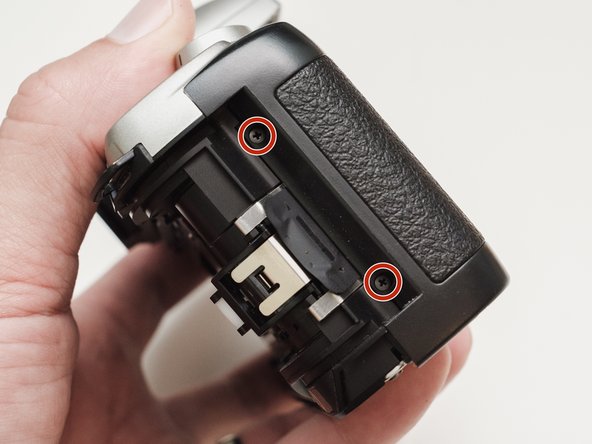
      • Remove two 5.3 mm #00 screws by the eyepiece.

      • Remove one 6.8 mm #00 screw in the battery compartment.

      • Remove one 7.0 mm #00 screw near the take up spool.

      Chiedi a FixBot

      Aggiungi Commento

    3. Pentax ZX-5n Shutter Speed Dial Replacement, Lift top cover: passo 8, immagine 1 di 1
      • Lift the cover so it is just free of the body. It is still attached by several wires.

      Chiedi a FixBot

      Aggiungi Commento

    4. Pentax ZX-5n Shutter Speed Dial Replacement, Discharge flash capacitors: passo 9, immagine 1 di 1
      • Use a 1kΩ-10kΩ resistor to discharge the capacitor. Place the resistor between the blue wire, exposed in the previous step, and ground.

      • The flash capacitors store energy at a very high voltage. Failing to discharge the capacitors properly could result in personal injury and/or damage to the camera.

      Chiedi a FixBot

      Aggiungi Commento

    5. Pentax ZX-5n Shutter Speed Dial Replacement, Unsolder flash connections: passo 10, immagine 1 di 1
      • Unsolder one green wire.

      • Unsolder one blue wire.

      • Unsolder one brown wire.

      • Unsolder one black wire.

      Chiedi a FixBot

      Aggiungi Commento

    6. Pentax ZX-5n Shutter Speed Dial Replacement, Unsolder remaining connections: passo 11, immagine 1 di 3 Pentax ZX-5n Shutter Speed Dial Replacement, Unsolder remaining connections: passo 11, immagine 2 di 3 Pentax ZX-5n Shutter Speed Dial Replacement, Unsolder remaining connections: passo 11, immagine 3 di 3
      • Unsolder one black wire.

      • Pull black wire out from its routed location.

      • Unsolder flex connector

      • Be careful not to overheat the flex circuit. Work in short durations. Allow for cool downs in between if necessary.

      • Some repairs can be performed with the top cover still connected but the flex connection is fragile and easily damaged.

      Chiedi a FixBot

      Aggiungi Commento

    1. Pentax ZX-5n Shutter Speed Dial Replacement, Set shutter speed dial: passo 12, immagine 1 di 1
      • Set the shutter speed dial to 'A'

      Chiedi a FixBot

      Aggiungi Commento

    2. Pentax ZX-5n Shutter Speed Dial Replacement, Remove screw: passo 13, immagine 1 di 1
      • Remove one 4.3 mm #00 screw.

      • Be careful not to damage the feeler contacts for the metering switch throughout the repair. There are delicate and easily bent.

      Chiedi a FixBot

      Aggiungi Commento

    3. Pentax ZX-5n Shutter Speed Dial Replacement, Remove contact PCB: passo 14, immagine 1 di 2 Pentax ZX-5n Shutter Speed Dial Replacement, Remove contact PCB: passo 14, immagine 2 di 2
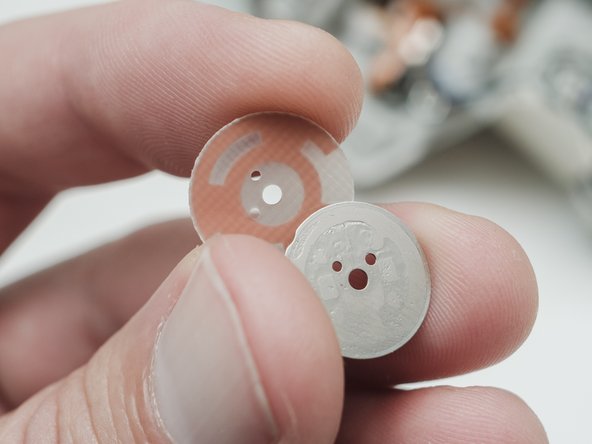
      • Remove the contact PCB.

      • There is a metal plate underneath that may stick to the PCB.

      Chiedi a FixBot

      Aggiungi Commento

    4. Pentax ZX-5n Shutter Speed Dial Replacement, Remove dial: passo 15, immagine 1 di 1
      • Slide the exposure compensation dial out of the top cover.

      • If the dial was not set to 'A' in Step 10, the knob will not slide out. Turning the knob at this stage could damage the detent spring.

      Chiedi a FixBot

      Aggiungi Commento

    5. Pentax ZX-5n Shutter Speed Dial Replacement, Remove detent components: passo 16, immagine 1 di 2 Pentax ZX-5n Shutter Speed Dial Replacement, Remove detent components: passo 16, immagine 2 di 2
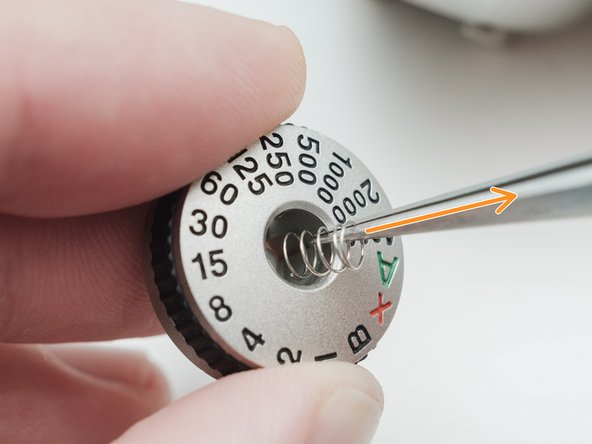
      • Remove the ball bearing from the inside of the dial.

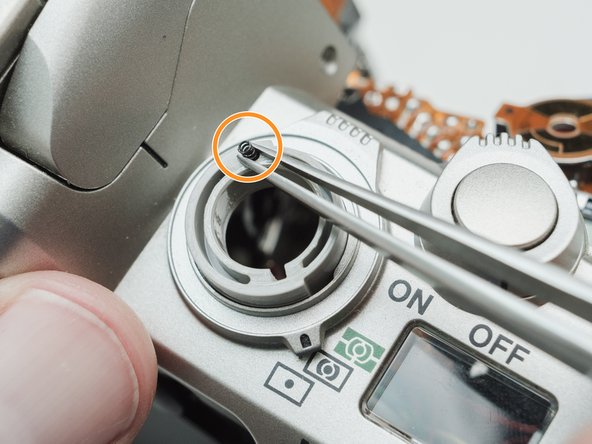
      • Remove the detent spring from the top cover.

      Chiedi a FixBot

      Aggiungi Commento

    6. Pentax ZX-5n Shutter Speed Dial Replacement, Remove lock button: passo 17, immagine 1 di 2 Pentax ZX-5n Shutter Speed Dial Replacement, Remove lock button: passo 17, immagine 2 di 2
      Strumento utilizzato in questo passaggio:
      Tweezers
      $4.99
      • Use tweezers to release the snaps on the lock button.

      • Remove the lock button from the top of the dial.

      Chiedi a FixBot

      Aggiungi Commento

    7. Pentax ZX-5n Shutter Speed Dial Replacement, Remove inner components: passo 18, immagine 1 di 2 Pentax ZX-5n Shutter Speed Dial Replacement, Remove inner components: passo 18, immagine 2 di 2
      • Remove lock actuator.

      • Remove lock spring.

      Chiedi a FixBot

      Aggiungi Commento

    8. Pentax ZX-5n Shutter Speed Dial Replacement, Reassembly notes: passo 19, immagine 1 di 1
      • Use tape to hold components in place when installing the dial.

      Chiedi a FixBot

      Aggiungi Commento

Conclusione

To reassemble your device, follow these instructions in reverse order.

Annulla: non ho completato questa guida.

Altre 2 persone hanno completato questa guida.

Sam Gustafson

Membro da: 09/01/22

14.634 Reputazione

78 guide realizzate

0Commenti sulla guida

Aggiungi Commento

Visualizza statistiche:

Ultime 24 ore: 3

Ultimi 7 giorni: 10

Ultimi 30 giorni: 30

Tutti i Tempi: 531